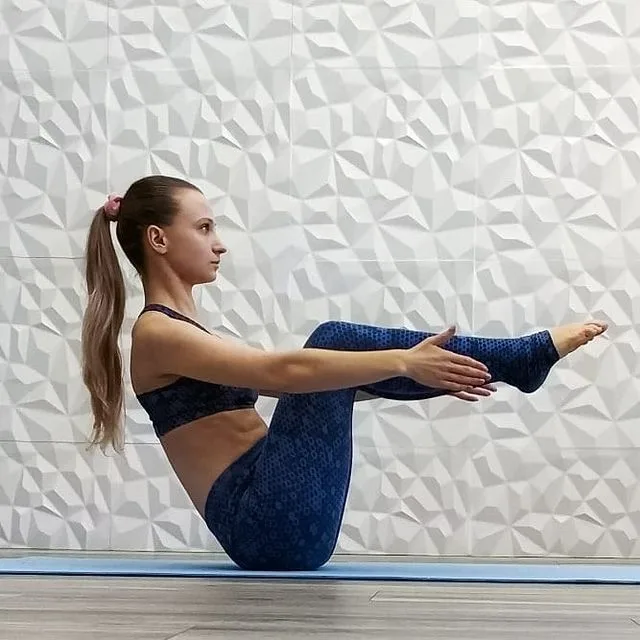
33 yoga for back, these targets asanas which strengthen and stretch your lower, middle, upper back muscles and neck as well. Plus, this yoga will help you ease your pain, If you are looking yoga asanas for easing your neck and lower back pain.
Top 33 yoga poses target your back
“A yogi can be very beneficial for the lower back because it will help to stretch and strengthen the muscles that support the back and spine,” explains Ficchi. She adds, yoga not only helps reduce back pain, but also helps prevent future injuries. This is done through a variety of specific yoga poses that work to release tension in your back, such as your stomach, by strengthening the muscles that support your spine 1. Here are the top 33 yoga poses for your back:
- Setu Bandha Sarvangasana
- Uttana Shishosana
- Upavistha Konasana
- Salamba Bhujangasana
- Bhujangasana
- Salabhasana
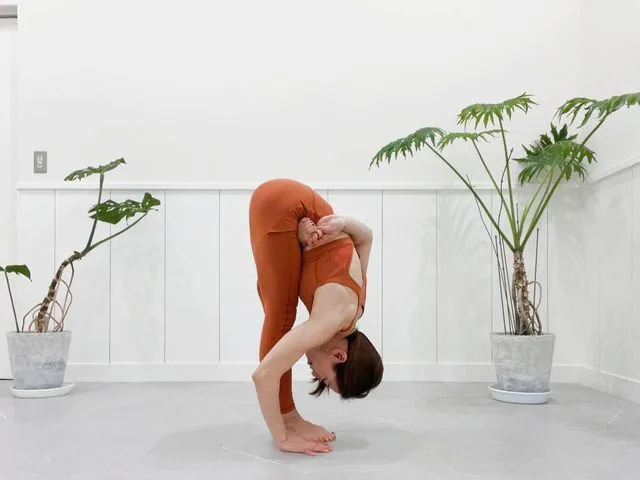
- Ardha Uttanasana
- Marichyasana (Marichi’s pose)
- Virasana
- Parivrtta Janu Sirsasana
- Supta Virasana
- Chakravakasana
- Adho mukha svanasana
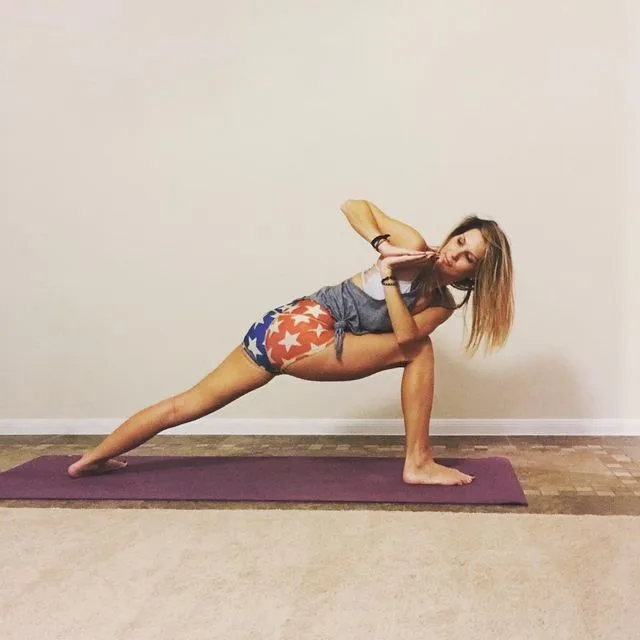
- Utthita Parsvakonasana
- Utthita Trikonasana (Trikonasana)
- Parivrtta Trikonasana
- Matsyasana
- Supta Matsyendrasana
- Ardha Matsyendrasana
- Jathara parivartanasana
- Balasana
- Bharadvajasana
- Dhanurasana
- Ustrasana
- Ardha Pincha Mayurasana
- Garudasana
- Agnistambhasana
- Ardha Chandrasana
- Viparita Karani
- Halasana
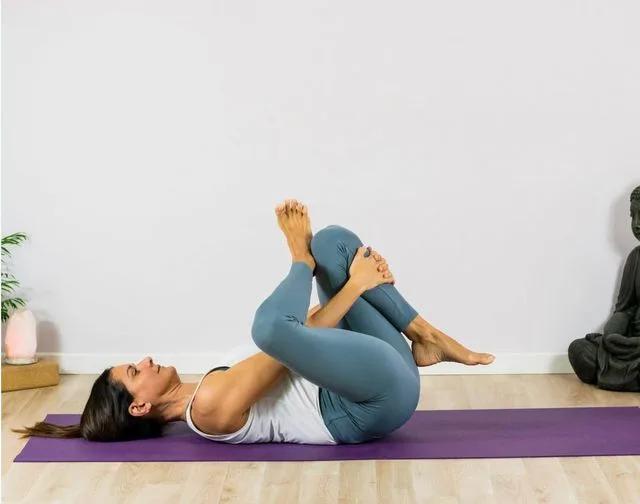
- Supta Padangusthasana
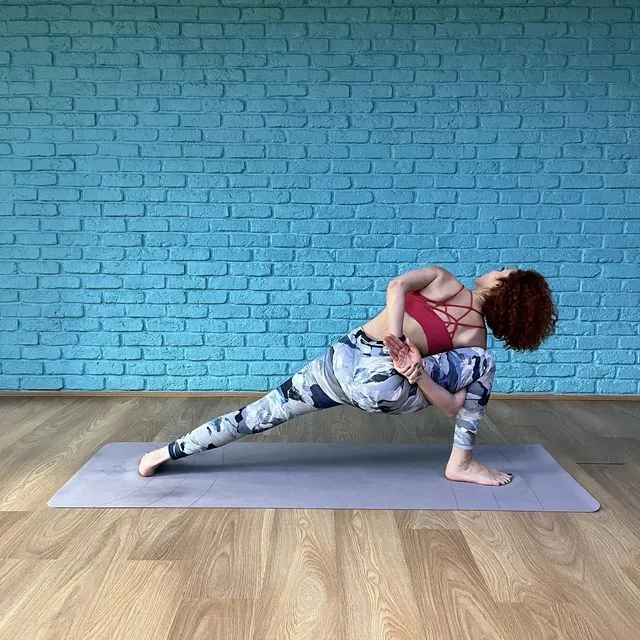
- Parivrtta Parsvakonasana
- Kapotasana
1. Setu Bandha Sarvangasana (Bridge Pose)
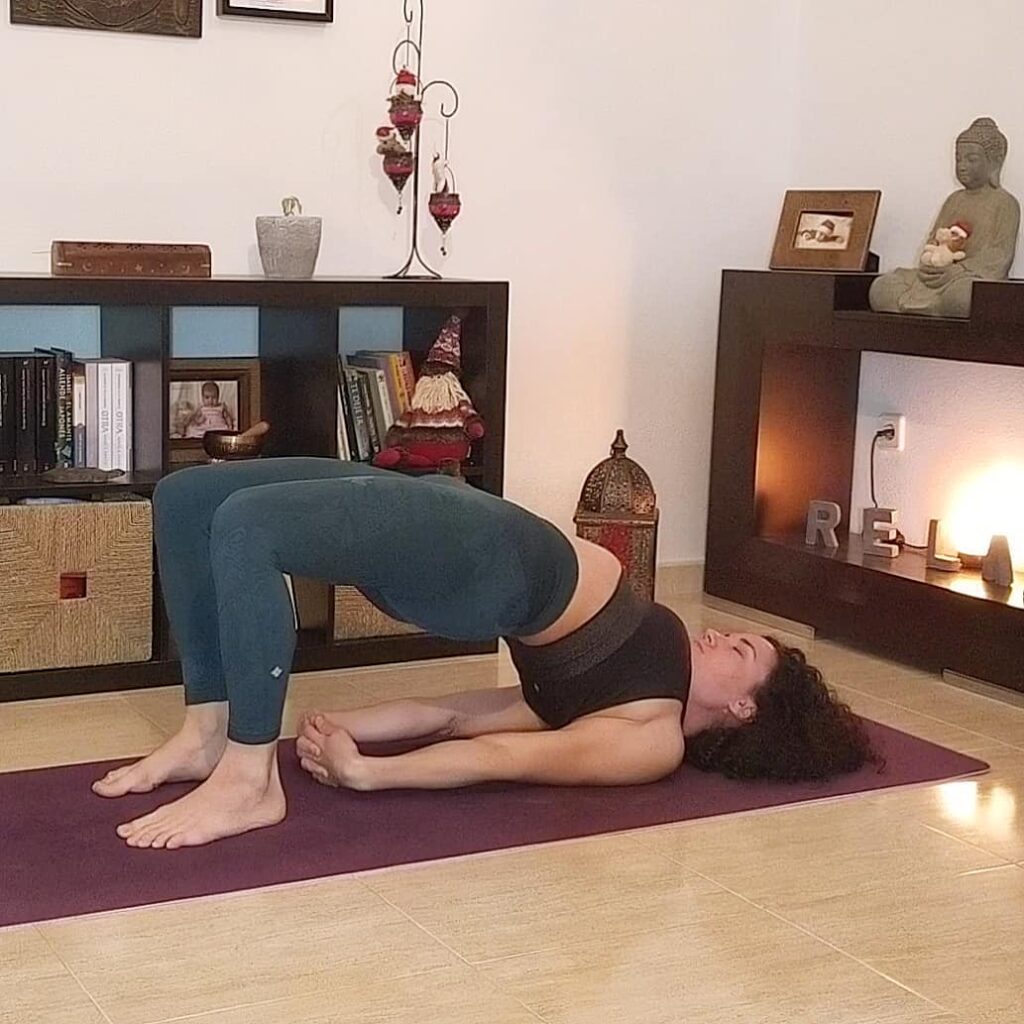
Many people who suffer from asthma, sinus problems, osteoporosis, and high blood pressure find Setu Bandha Sarvangasana, or Bridge Pose, very soothing. Women often find it helpful in relieving their menstrual pain and menopause symptoms.
This yoga pose is great for many parts of your body, but it primarily stretches out your chest, back, spine and neck. Setu Bandha Sarvangasana can also energize your thyroid, abdomen, and lungs. This pose can most out of re-energize the legs, improve digestion and can help in your back pain and prevent headaches, fatigue, insomnia.
Instructions:
- To begin, lie on your back, fold your knees with your feet hip distance (10 to 12 inches from pelvis) apart on the floor.
- Keep your knees and ankles in a straight line and your arms beside your body, palms facing down.
- Inhale and gently lift your lower back, middle back, and upper back off the floor; gently roll in the shoulders; without bringing your chin down touch the chest to the chin while supporting your weight with the shoulders, arms and feet. Keep your thighs parallel to each other and to the floor, and feel your bottom firm up in this posture.
- You may interlace your fingers and push your hands on the floor to lift your torso a little more up, If you wish to, or you could support your back with your palms.
- Remain in this posture for up to 60 seconds, or more.
- To release yourself from this posture, exhale and press down into your feet and lift your hips again and gently lower your back to the floor.
Note: Setu Bandha Sarvangasana can lead to neck injury if performed incorrectly. People with neck injury avoid this yoga asana.
2. Uttana Shishosana (Extended Puppy Pose)
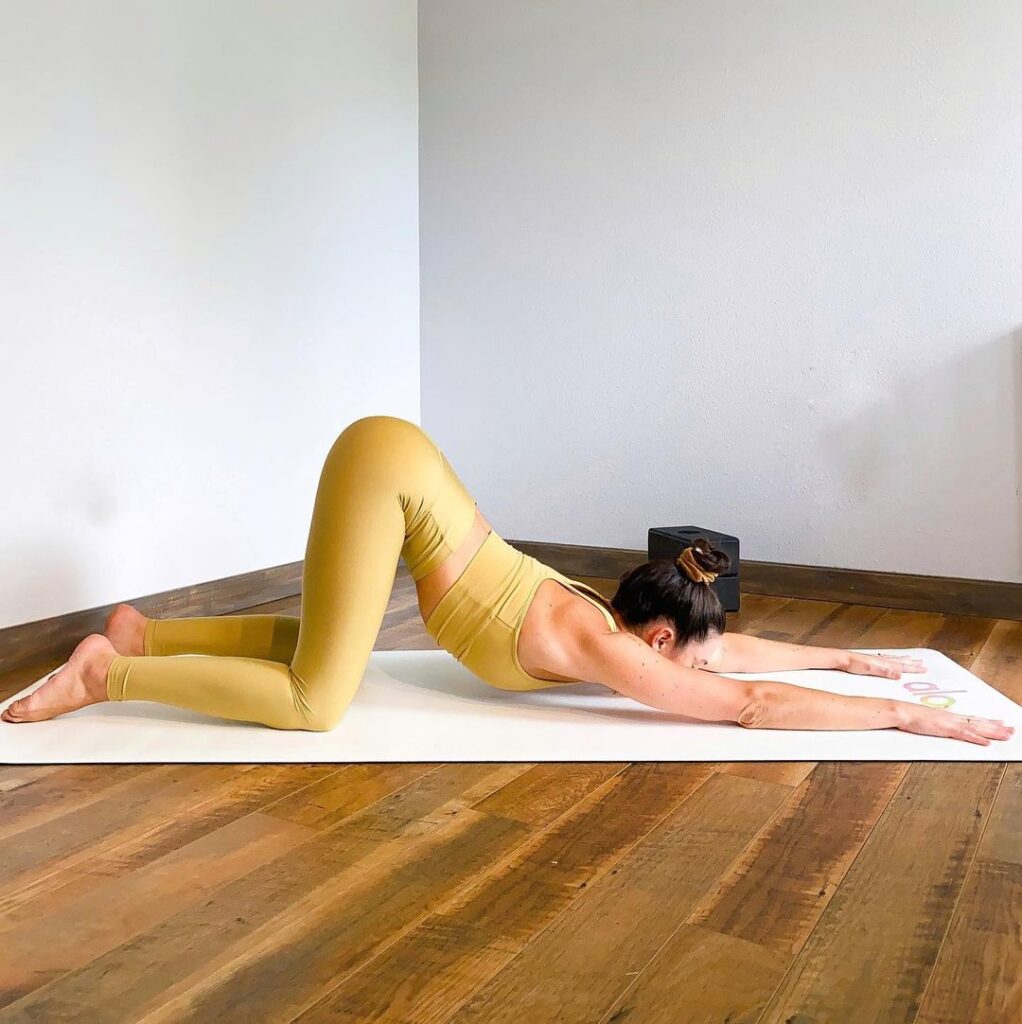
When you are feeling tired, or when you are stuck behind a desk or in a chair all day, Uttana shishosana is a great way to energize the physical and subtle bodies for when you’re feeling fatigued.
Instructions:
- Start on your mat in tabletop position with stack your shoulders directly above the wrists and hips just above your knees, and tuck your toes instead of pointing them.
- Keep your hips above the knees and slowly begin to walk your hands out in front of you, lowering the chest down toward the ground.
- Either your forehead rest on the mat, or on a block, or bring your gaze forward, so that the chin rests gently on the mat, It depends on your body and neck.
- To deepen the stretch along your spine and through your chest and shoulders, press more firmly through your hands as you pull your hips back to create traction.
- Stay for up to 10 breaths. When you are ready to get out of this posture, slowly lift the forehead and walk your palms back toward your body to press up to Tabletop.
Note: Uttana Shishosana (Extended Puppy Pose) is for all, only restriction for people with neck injury.
3. Upavistha Konasana (Wide angle seated forward bend)

The Wide angle seated forward bend yoga pose focuses on building strength in your spine while stretching your back, groins, hamstrings, and insides of your legs.
It can stimulate your abdominal organs and free your waist. Beginners who try this yoga pose can be helpful to bend their knees until they have more practice. Experts believe that Upavistha Konasana (Wide angle seated forward bend) can improve symptoms of arthritis and detox your kidneys.
Instructions:
- Start sitting in the staff pose (dandasana). Slide your heel outward as much as you can without stress.
- Raise your hips up, send your tailbone back, then lower your hips back down.
- Turn your inner thighs up towards the ceiling, so that your kneecaps are straight up. Extend through the heels.
- Press the thighbones into the ground and walk the hands forward. As you move forward, keep the torso long and spine neutral. Keep your hands as forward as possible while maintaining the length between your pubic bone and your navel.
- Hold the pose for 60 seconds. Gently lift your torso, then using your hands, bring your knees together to release.
Note: You need to maintain a neutral spine, not too much curve, especially in the lower back. To avoid any pain and discomfort, focus on lengthening your spine as you lean forward. Individuals with lower back injuries should sit on a folded blanket and focus on keeping their torso upright.
4. Salamba Bhujangasana (Sphinx Pose)
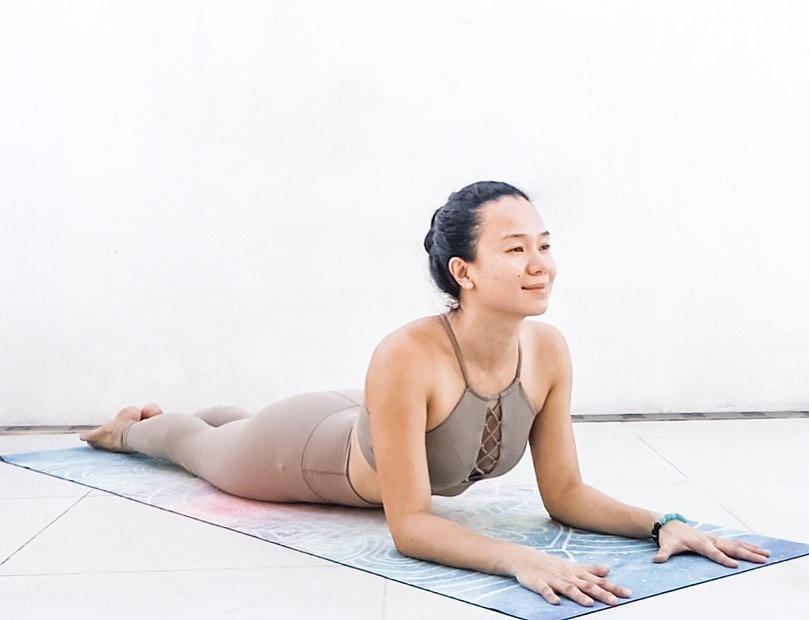
Salamba Bhujangasana (Sphinx Pose) simultaneously strengthens your spine, and improves blood circulation to rejuvenate your back while stretching your shoulders, stomach, lungs, and chest. This yoga pose improve the digestive system, and improve blood circulation to rejuvenate your back.
Instructions:
- To start, lie face down on your tummy with your toes flat on the floor and your forehead resting on the ground.
- Stretch your hands in front of you with the palms facing downward and arms touching the ground.
- Inhale, and gently lift the head, chest and abdomen while keeping your navel on the floor. Lift your kneecaps, connect the inner thighs, and press the tops of the feet firmly into the ground.
- With support of your arms, pull your torso back and off the floor and press firmly into your palms (facing down).
- Keep breathing with consciousness, as you curve the spine vertebra by vertebra.
- Extend out of the crown of the head and create space between your ears and shoulders.
- Remain in this pose at least 60 seconds, or more if it remains comfortable.
- To come out from this pose, exhale and gently bring down your abdomen, chest and head back to the floor.
Note: Individuals with headaches or major back injuries should avoid Salamba Bhujangasana.
5. Bhujangasana (Cobra Pose)
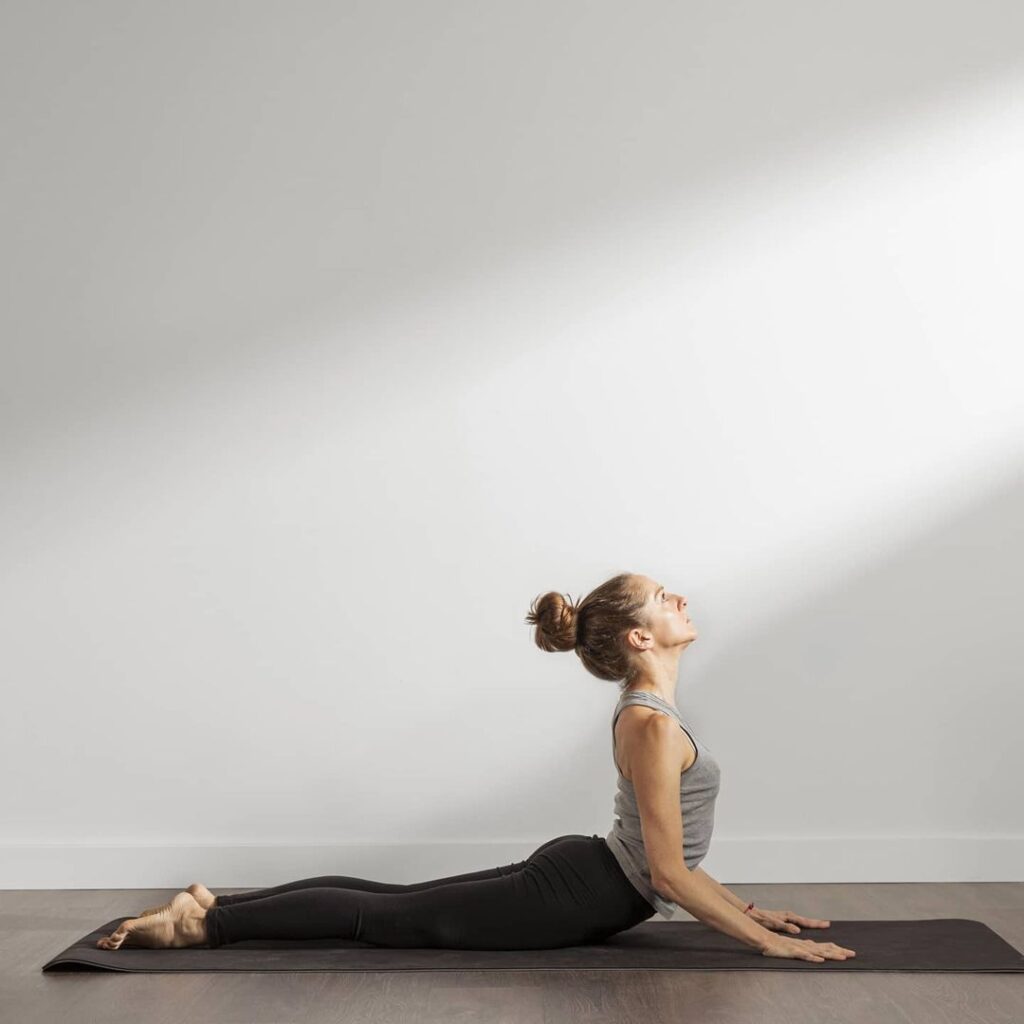
This yoga pose strengthens the back and legs, stretches the front part of the body, opens the chest and shoulders, and energize and activates the spine.
Instructions:
- Lie on your stomach pointing straight, hands below the shoulders, elbows close to the body. Legs are engaged, pull the stomach in and up.
- As you breathe, raise your chest from the back of your heart. Roll the collarbone upward and place the shoulder blades in the upper back along the spine.
- Raise your head last. Open your heart, yet there is no weight in your hands. Take out through toes
- Exhale again and come down. Repeat that twice.
- The third time you arrive, use your hands to find your full expression of the pose. Raise your chest from the back of your heart, head is like this. Reach a point where you like it, yet maintain a connection from the pelvis to the feet.
- Bring the side ribs forward, pull back the bones of the upper arm, lengthen the neck.
- Feel the spinal cord through the entire spine. You can see above, but only if you maintain a length at the back of the neck, otherwise keep your gaze facing forward so that your neck is comfortable.
- Hold for 5 to 10 breaths
- To come out, while exhaling, take the body down and relax lying in your belly or hair posture.
Note: Individuals with fractured ribs or wrists, recently undergone abdominal surgeries, such as for hernia, suffer from Carpal Tunnel Syndrome, and during an astmatic attack should avoid practicing Bhujangasana (Cobra Pose).
6. Salabhasana (Locust pose)
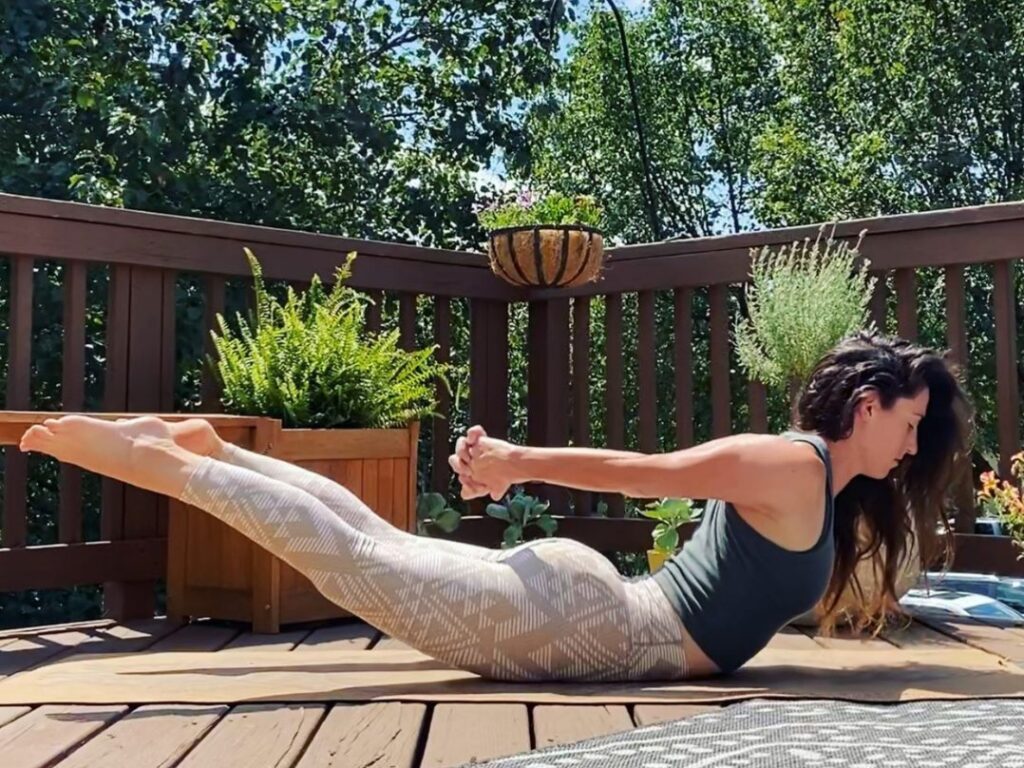
The backbend yoga pose, Salabhasana (Locust pose), is one of the effective ways to bend your back against a natural bend.
Instructions:
- Lie on your stomach, with your hands under your body, your palms, and your forehead. With your big toes facing each other, bend your thighs inward. Tension your hips so that your tailbone pushes into your pubis.
- Take a breath. Raise your head, upper body, legs and hands above the ground. Strain your hips again and actively reach the soles of the feet and toes through your feet. Your big toes should be facing each other. Raise your arms parallel to the ground and push back into the sky through the tips of your fingers. Push your shoulder blades vigorously.
- Keep your head steady and look forward. The back of the neck should be long with your head elevated.
- Establish a smooth flowing breath and wait for the internal cue to start and remain in this position for 30 to 60 seconds. To release yourself from this posture, while exhaling, rest your body on the ground, relax and take a few breaths.
Note: Individuals with slip disc problems, sciatica, or acute back pain or pregnant women, or a person with high blood pressure should not practice Salabhasana (Locust pose).
7. Ardha Uttanasana (Standing Half Forward Bend)

This forward bending yoga pose, Ardha Uttanasana (Standing Half Forward Bend), stretches the front torso, strengthens your back and improves posture and stimulates your abdomen.
Instructions:
- Take some deep breaths while in Uttanasana. When you’re ready, come at your fingertips.
- When you inhale, raise your torso up, keeping your spine flat.
- Get out easily while pulling your shoulder blades together. Pay attention to the knees here and try to microbend to avoid locking them.
- When you raise your head and look forward, keep your spine aligned through your back and neck (this can help visualize pulling a little farther from your chest).
- Take this opportunity to get in touch with your breath. Focus on breathing deeply and leaving each breath in sync with the flow of motion.
- When you are ready to be free from poses, exhale and return to uttanasana.
Note: Individuals with any neck injury, do not lift your head to look forward; otherwise, same as those of Uttanasana.
8. Marichyasana (Marichi’s pose)
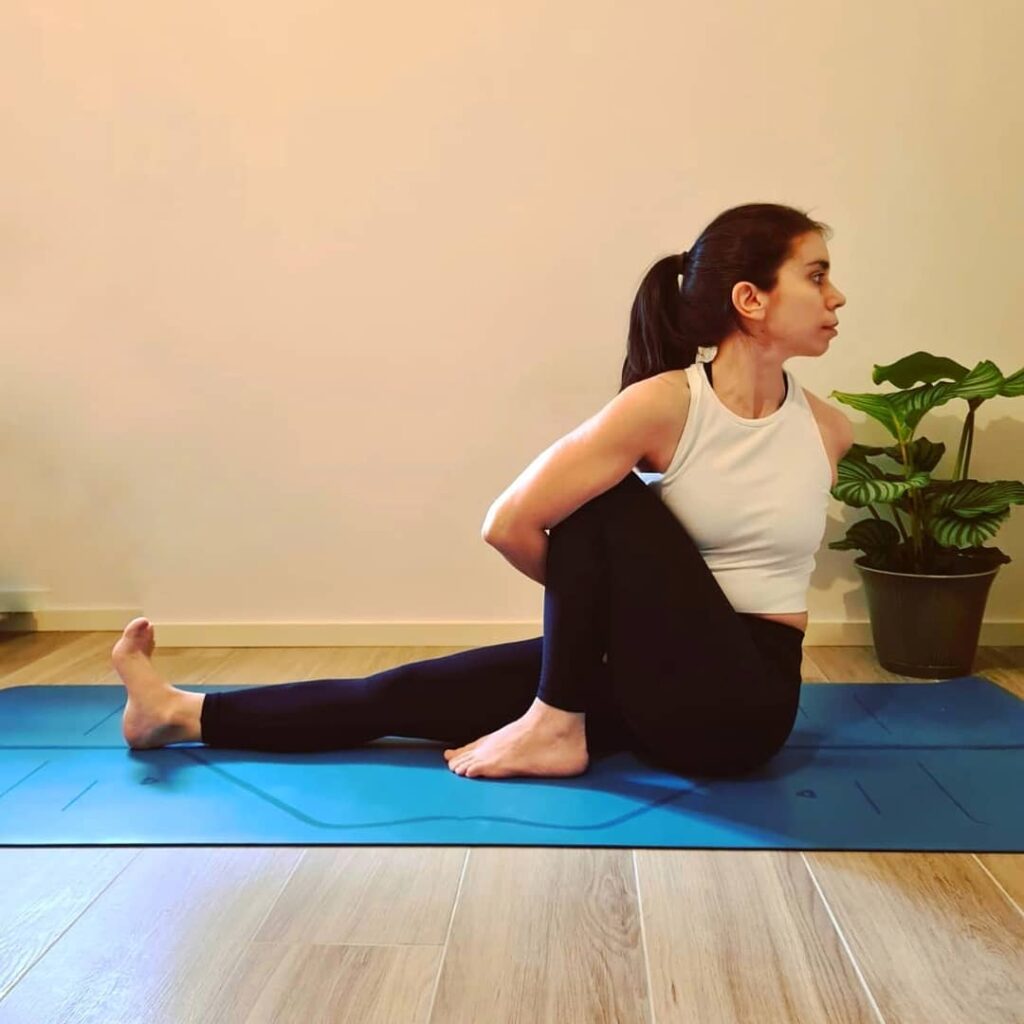
Marichyasana (Marichi’s pose) Yoga posture stimulates the abdominal organs, enlarges the liver and spleen, extends the spine and shoulders and relieves back and hip pain.
Instructions:
- Start sitting in dandasana (staff posture). Bend your left knee and place the soles of your left foot on the floor, near the waist and against the right foot.
- Exhale and turn your torso to the left. Reach your right hand outside your left thigh. Turn your palm behind you. Turn forward so that your right shoulder is outside your left knee.
- Bend your right arm and bring your hand behind your back. Then exhale and reach your left hand behind you. Hold your fingers, hands or wrists.
- Exhale and bend forward. Stare at your toes or your left shoulder.
- Stay in the posture for several breaths. Breathing and untouchable. Change the side.
Note: Individuals with high or low blood pressure, migraine, diarrhea, headache, or insomnia avoid practice Marichyasana (Marichi’s pose).
9. Virasana (Hero Pose)
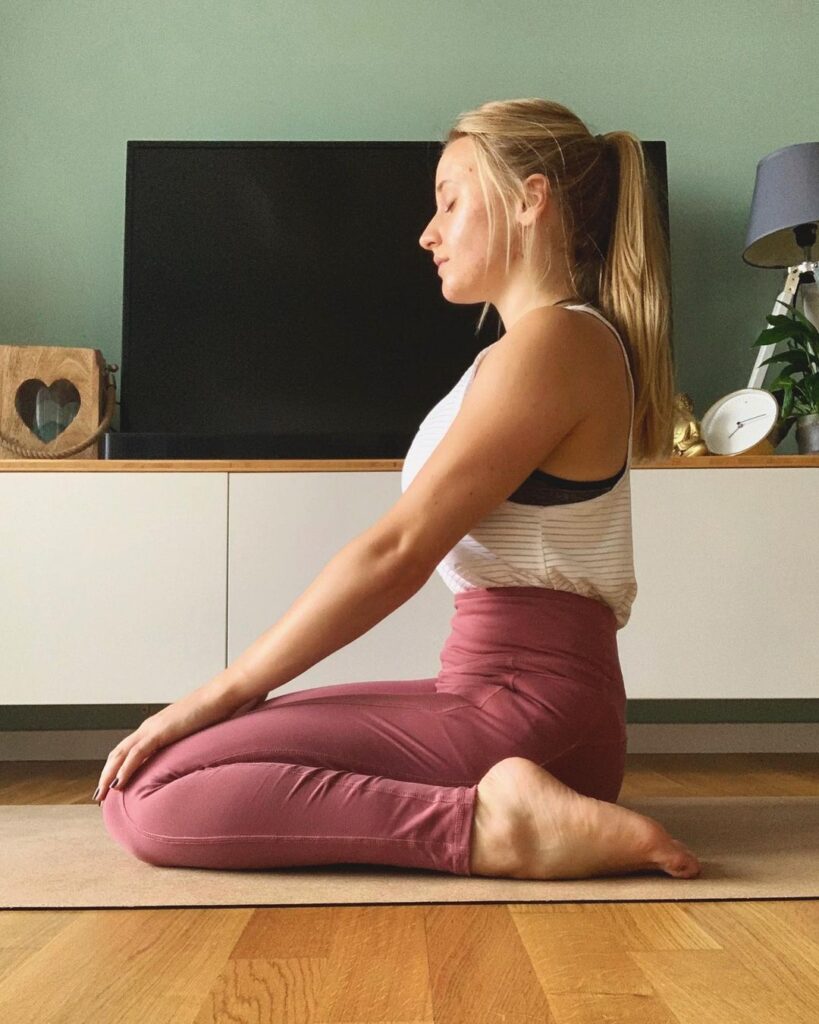
Veerasana (Hero pose) Yoga posture consists of feet, knees, and ankles at the top of the feet. It activates the legs when tired. It’s a great helps improving posture, and alternative to Lotus pose for meditation.
Instructions:
- To get into Hero Pose or Veerasan, start with squares on your hands and knees.
- Get your knees close together and your feet a little apart from the hip distance
- Push the top of your feet down and slowly bring your hips back down until the middle of the heel sits on the mat (or props)
- Use your hands to roll the flesh of your calves, pull your navel in and up, ground through your bones and extend through the crown of your head
- Hold for 5 to 10 breaths
- Coming out of the way you came in front, keeping the hands in front and raising the hips back all the way.
Note: Individuals with ankle or knee injury refrain from practicing this yoga pose. If you feel any strain in the knees, place a blanket or towel under the feet.
10. Parivrtta Janu Sirsasana (Revolved Head-to-Knee Pose)
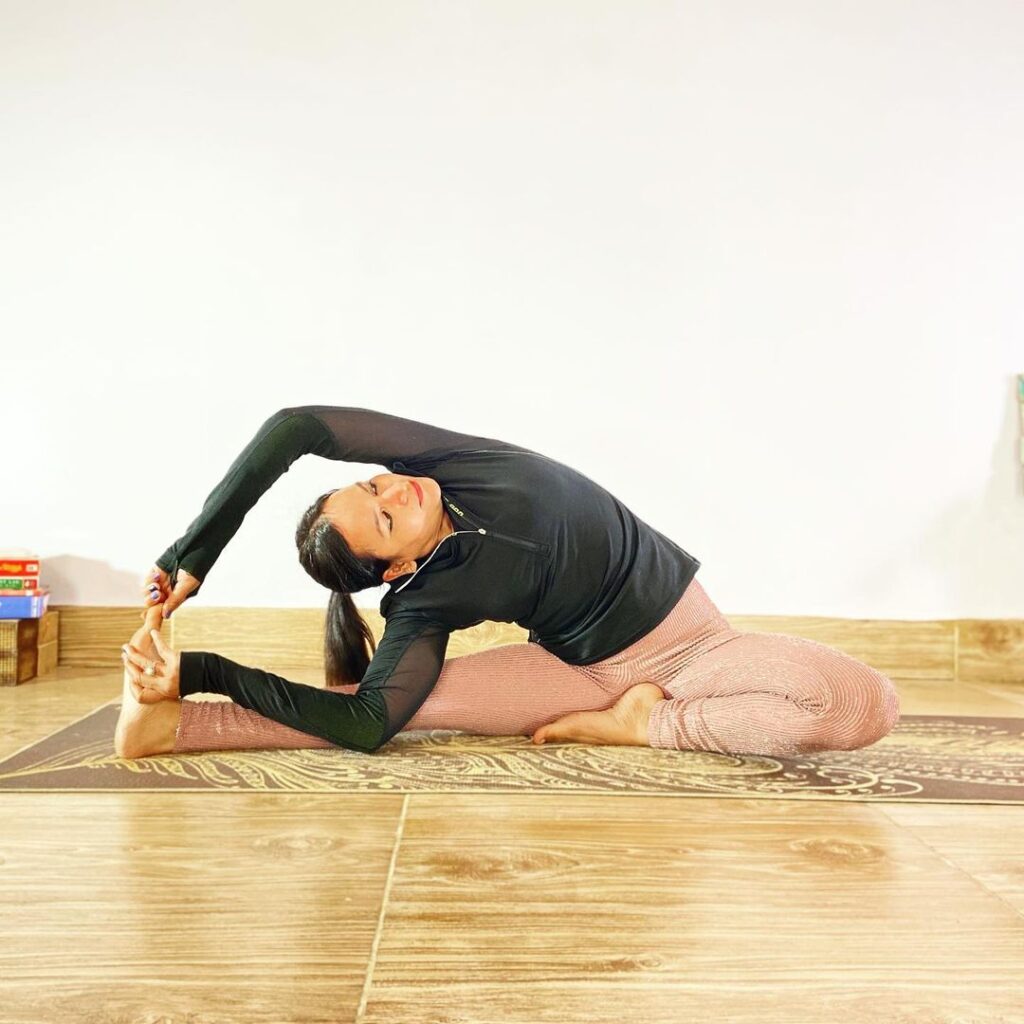
Parivrtta Janu Sirsasana (Revolved Head-to-Knee Pose) is a deep, seated bend that stretches your entire body, and strengthens the legs and core. This yoga posture also increases blood circulation in the spine and is actually helpful in back pain issues.
Instructions:
- Come on your mat and move your feet forward in the dandasana.
- Bend your left knee inward and pull your heel towards the perineum.
- Rotate the upper body to the right.
- Inhale, raise the arms up while keeping the back straight, and engage your right thigh muscles.
- Breathing out, bend your right hand to bring it inside the thigh. Place the right elbow on the floor and hold the leg.
- Bend more to reach your right foot with your left hand.
- Now, as far as possible rotate the trunk, opening the arms to the chest and head.
- Look at the terrace.
- Stay in the last pose for five deep breaths.
- Breathing is to leave the feet and bring the hands and upper body up.
- Exhaling, bring the hands to the floor and rotate them towards the center.
- Repeat the steps, rotating the legs.
- Then, stretch both legs and relax in Dadasana.
Note: An individual suffering from asthma or diarrhea, avoid practicing this Mudra Yoga Mudra in case of injury to the hips, back, shoulders or knees.
11. Supta Virasana (Reclined Hero Pose)
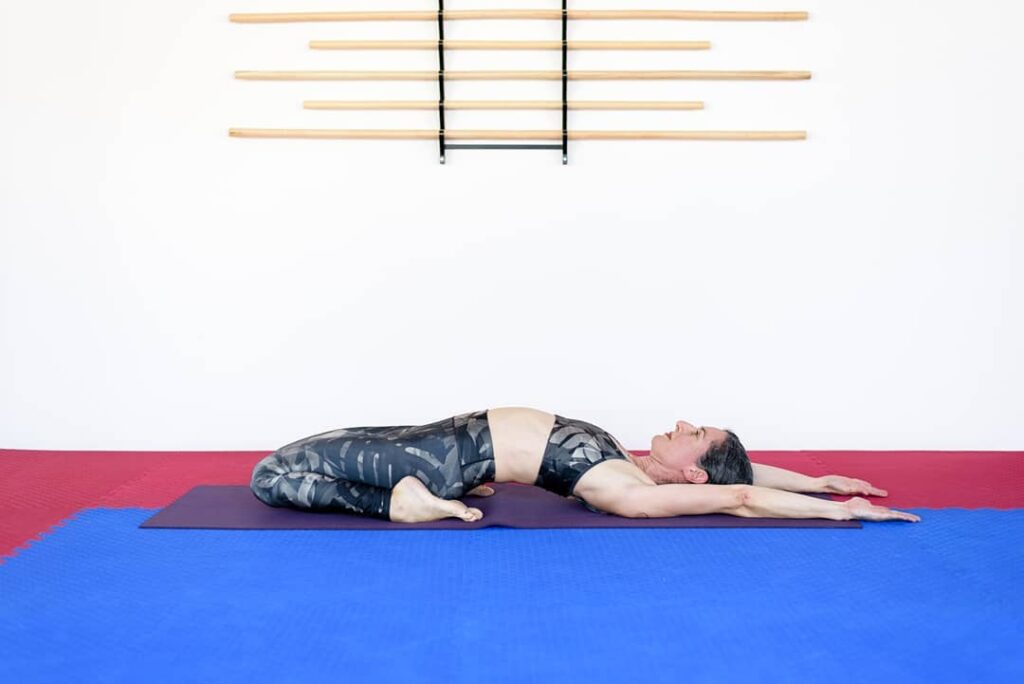
The Supta Virasana (Reclined Hero Pose) provides an intense stretch for the front part of your body, including your thigh, leg, and abdominal muscles. Research confirms that this pose is helpful for reducing muscle tension, but also that it benefits the nervous system through improving blood circulation.2
Supta Virasana is a good restorative yoga pose. This means that it can help relax and unwind your body. If you have chronic low back pain, then relaxing in yoga can reduce pain even without the use of medicines. 3
Instructions:
- To start, you should do the desolation.
- Kneel on the floor. Make sure that your knees are placed directly under the hips. Rest your hands on the knees.
- Bring the knees close to each other so that your legs automatically widen. They should be wider than the width of the hips.
- Press the top of the feet firmly on the floor.
- Gently lower the hips, as if you find yourself sitting on the mat. Roll the calves away, and make sure your hips are right between the heel.
- You need to make sure that when you come to the posture, you do not feel any sharp sensation in the knees.
- Allow the toes to turn outward and backward. Your inner ankles should be pulled to protect the knees.
- Pull in your navel. Extend the tailbone from the crown of your head to the floor.
- Keep the hands by your sides, and exhale and bend backwards. Slowly bend until the back rests on the floor.
- Then, shift the body weight to your elbows.
- Release your lower back and buttocks, and push yourself toward the tailbone.
- Once you rest comfortably on the floor, move your arms above the head, and make sure that your palms face the ceiling.
- Hold the pose for about 60 seconds. Then, come back slowly.
Note: Individuals should avoid this yoga asana if they have a serious knee, back, or ankle problem.
12. Chakravakasana (Cat-Cow Stretch)
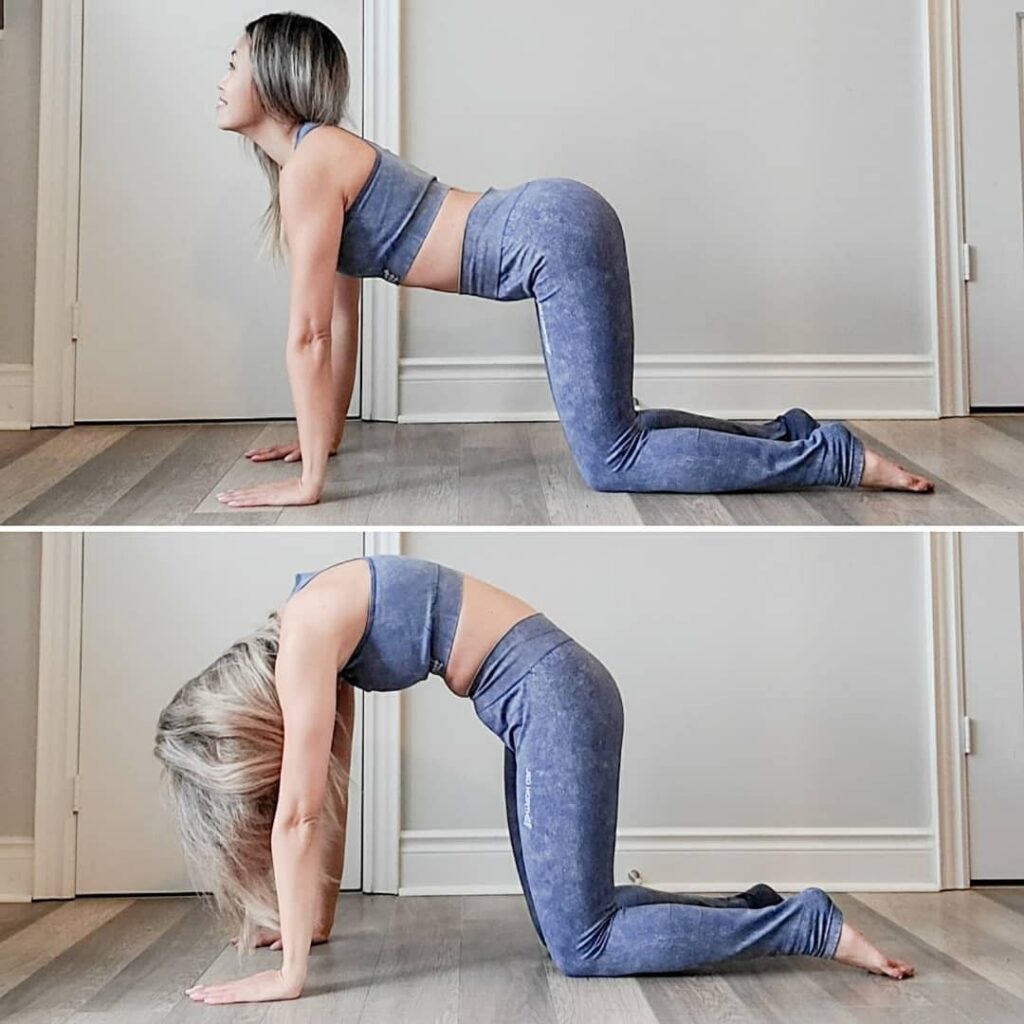
It’s a gentle flow between the two poses that warms the body and brings flexibility to the spine. This yoga pose extends the torso and neck of the back, and gradually stimulates and strengthens the abdominal organs. It also opens the chest, making breathing slow and deep. The spinal movement of the two poses stimulates the kidney and the adrenal glands. Coordinating this movement with the breathing relieves stress and calms the mind.
Instructions:
- Start with your wrists on your hands and knees directly under your shoulders and your knees directly under your hips. Point your fingers at the top of your mat. Keep your shins and knees hip-width apart. Keep the head in a neutral position and soften your gaze downward.
- Start by going into cow’s posture: When you release your stomach towards the mat, then exhale. Raise your chin and chest, and gaze toward the ceiling.
- Widen your shoulder blades and pull your shoulders away from your ears.
- Next, move to the cat pose. As you exhale, pull your stomach towards your spine and round your back towards the ceiling. The pose should look like a cat pulling its back.
- Leave the crown of the head towards the floor, but do not attach your chin to your chest.
- Inhale, coming back to Cow Pose and then exhaling as soon as you return to Cat Pose.
- Repeat 5-20 times, and then sit back on your heel with your torso relaxed.
Note: Individuals with neck injuries should keep the head consistent with the torso, not forward or backward. Pregnant women and people with back injuries should only pose the cow, bring the spine neutral between poses – do not let the abdomen fall between repetitions, as this can cause lower backstretch. Always work within your own limits and abilities.
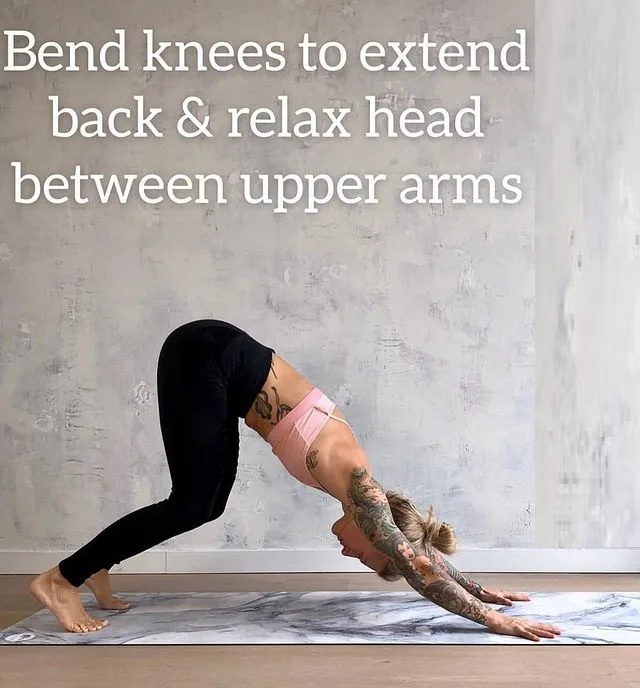
13. Adho mukha svanasana (Downward Dog Pose, or Downward-facing Dog Pose, or Adho Mukha Shvanasana)
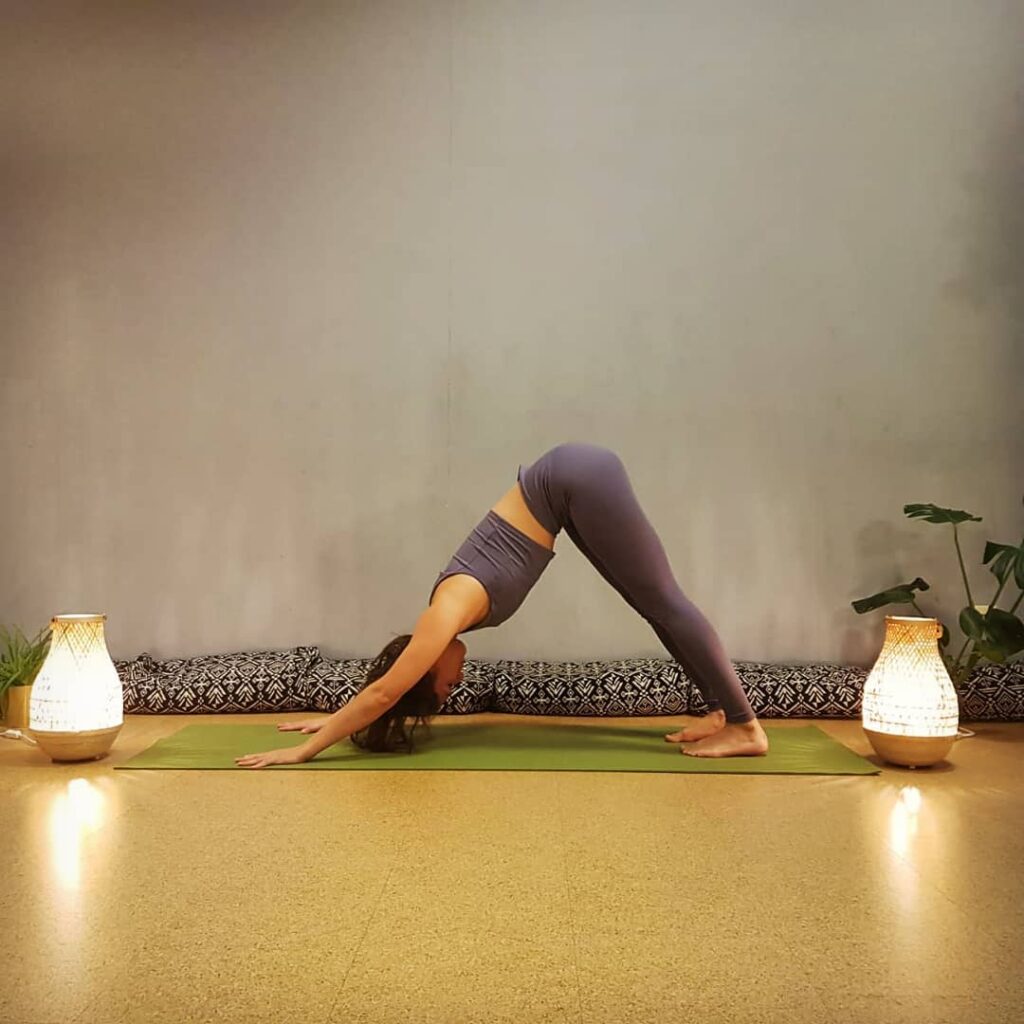
The Adho mukha svanasana yoga pose stretches the hamstrings and calves and strengthens the arms, legs, and back. This can help relieve back pain. As a mild reversal, it acts as opposed to normal forces on your spine and brings more blood flow to your brain. The posture also strengthens the deep abdominal muscles, which helps to stabilize the spine.
Instructions:
- Begin with all fours position. Prepare a table that has your back as a table top, and your hands and feet form the legs of the table.
- As you exhale, raise the hips up, making an inverted V-shape with the body, straightening the knees and elbows.
- The hands are separated by shoulder width, feet are hip width and parallel to each other. Toe straight forward.
- Push your hands into the ground. Widen through the shoulder blades. Keep the neck long by touching the ears with the inner arms.
- Hold the posture under the dog and take long deep breaths. Look at the navel.
- exhale. Bend your knees, return to the table pose. Take rest
Note: Individuals suffering from hypertension, carpal tunnel syndrome, isolated eye retina, weak eye capillaries, dislocated shoulder/shoulder injury or diarrhea should avoid doing this yoga asana.
14. Utthita Parsvakonasana (Extended Side Angle Pose)
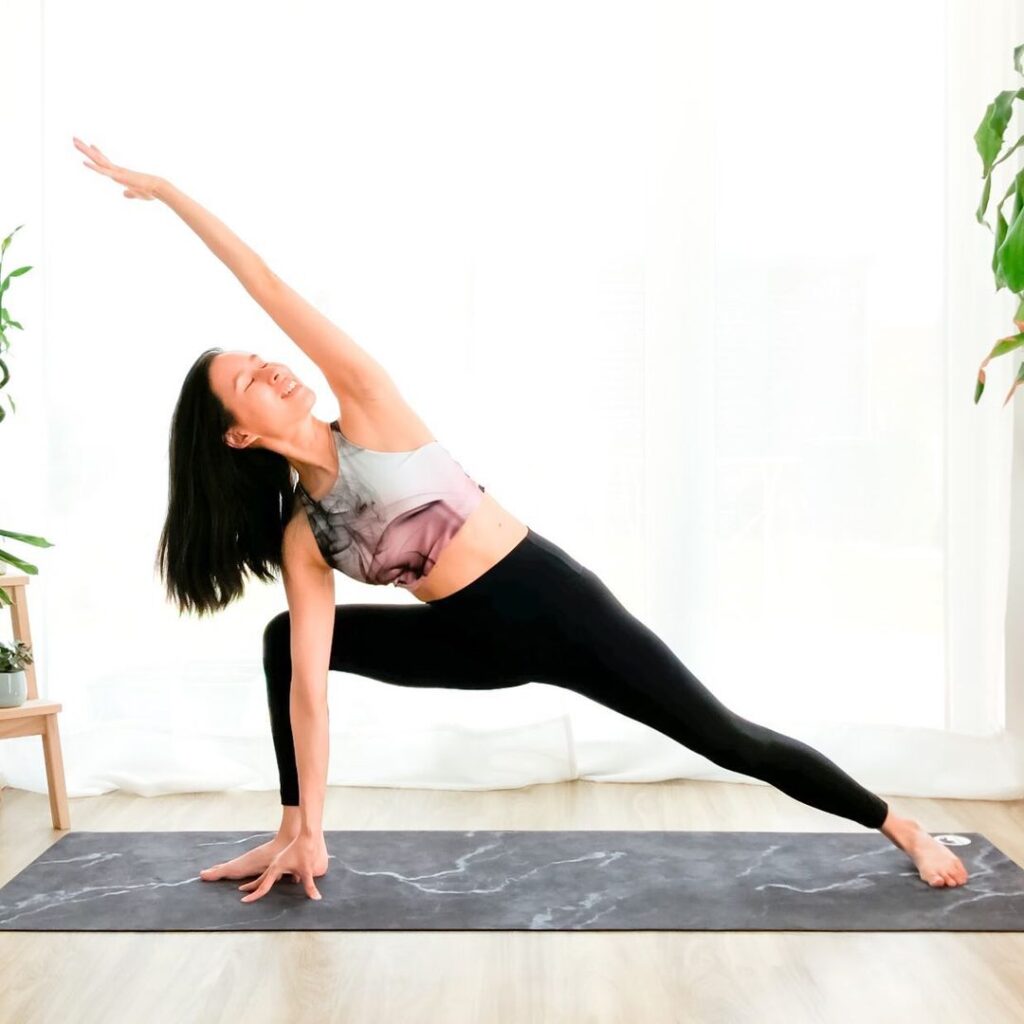
The Utthita Parsvakonasana tightens and stretches the legs, hips, and hamstrings. This yoga pose also opens the chest and shoulders, which can be beneficial if you have any kind of stiffness in your shoulders or back. The extended side angle is also a great side body stretch.
Instructions:
- Relieve stress with hands and stand in Tadasana.
- Move the right leg about 3 – 4 feet apart.
- Rotate the right foot towards the right foot, with the toes pointing straight to the right.
- Exhale and bend the right knee. Bring the trunk to rest on your right thigh.
- Place the right hand on the ground near the right foot.
- Inhale and place the left hand on the head with biceps touching the left ear.
- Gaze at the tip of the fingers of the left hand.
- Maintain this last pose as long as you are comfortable. The right angle should be between the thigh and leg and the other leg should not bend at the knees. Your both soles should be in contact with the ground.
- To release the pose, return the left hand to the edge of the left thigh. Pull yourself upward to straighten the right leg. Combine both legs together and return to Tadasana.
- The same can be repeated on the left side.
Note: Individuals with heart problems should avoid doing this yoga pose. Apart from this, do not perform this asana if there is any injury to knees, hips, and shoulders or ankle. Avoid practicing Extended Side Angle Pose if you have high or low blood pressure.
15. Utthita Trikonasana (Trikonasana, or Triangle Pose)
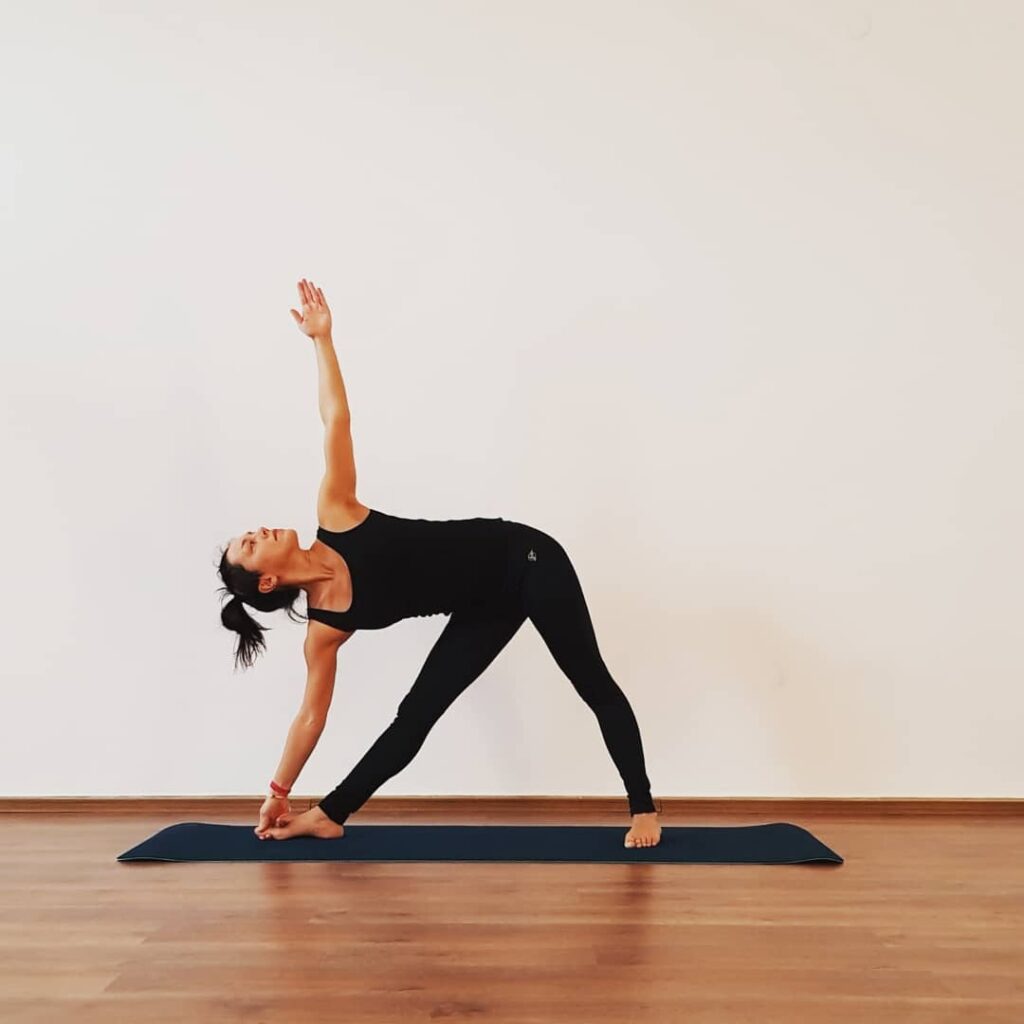
The Utthita Trikonasana yoga pose tightens the legs and extends the hips, back muscles, waist, hamstrings, and hips and opens the chest and shoulders. It also challenges and improves balance and stability.
Instructions:
- Stand apart with the feet facing the long side of the mat about a foot distance.
- Bend your right foot so that your toes are pointing towards the short edge of the mat and rotate your left toes at about 45 degrees. You are seeking stability through both legs.
- Attach your legs and roll out the right thigh so that the right knee is in line with the first two paws.
- Long through both sides of the waist, pull your lower abdomen in and up and raise your arms parallel to the floor.
- When you reach over your right leg to extend your body, rotate your hips towards the back of the mat. Exhale, bring your right hand down, place your hand on either the foot, the floor, or the block. Turn your ribs towards the ceiling.
- Point the left arm straight towards the ceiling, hands with your shoulders, palm forward.
- Lengthen through the sides of your neck, keeping your neck in line with the spine. Look straight ahead, or tilt the chin slightly and look at the left hand.
- Keep your face relaxed and breathe slowly as you press through the feet, extend through the fingers and crown of the head, and rotate your ribeck.
- To come out, press your feet firmly on the floor, inhale and push your left arm up to the ceiling as soon as you are standing upright.
- Stretch your heel and repeat on the other side.
Note: Individuals with migraine, diarrhea, low or high blood pressure or neck and back injury avoid doing this yoga pose. People with high blood pressure can do Utthita Trikonasana, but without raising their hands upward, as it can increase blood pressure.
16. Parivrtta Uttanasana (Revolved Triangle Pose)
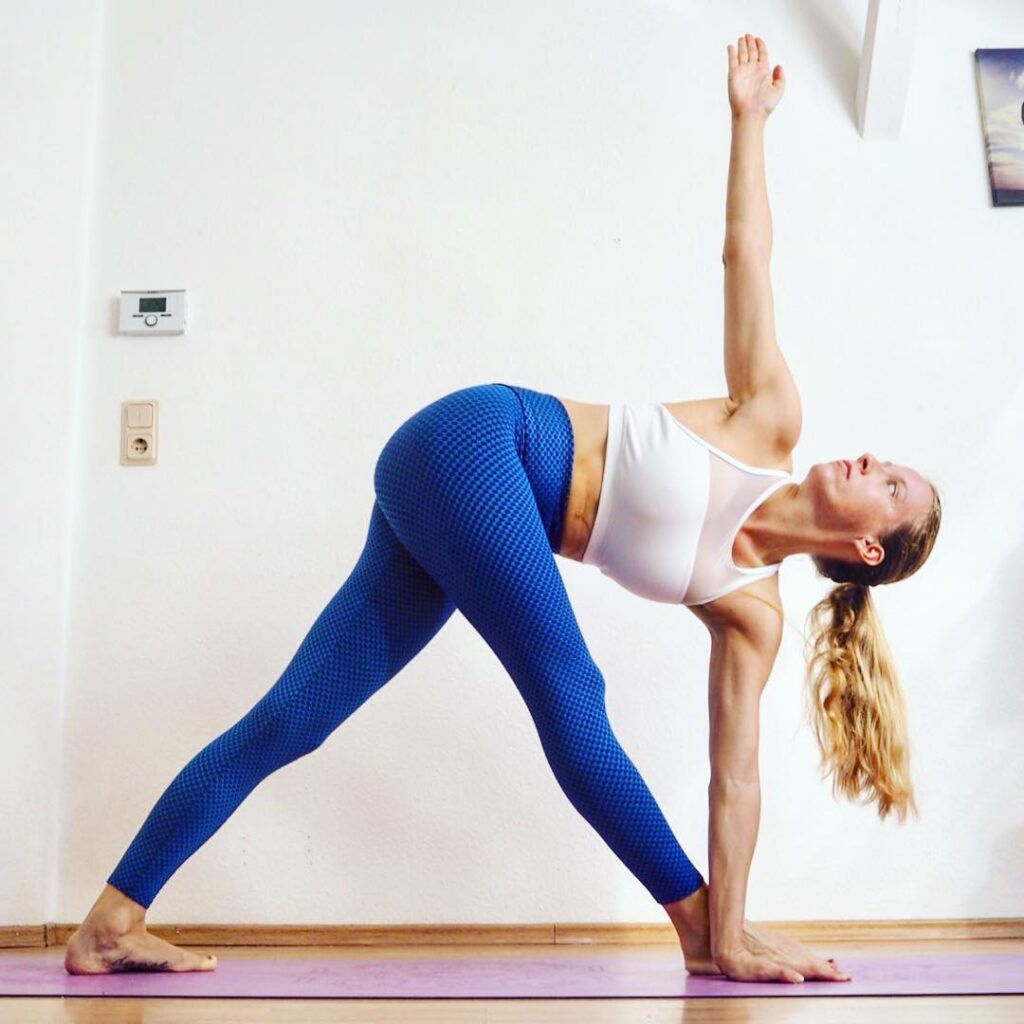
Parivrtta Trikonasana levies to tone the hip joints and hip muscles, massaging the digestive organs, thus improving digestion. This posture also gives strength and flexibility to the muscles of the back and relieves lower back stiffness and sprains. It also opens the chest and gives flexibility to the shoulders.
Instructions:
- Start facing the long side of the mat in a wide toe stance about a meter, heel with each other, toes pointing.
- Bend your right leg 90 degrees in about 45 degrees. You are looking for a strong foundation.
- Bend your hips to face the small edge of the mat.
- Attach the ground, your legs and pelvic floor muscles through your feet and pull your lower abdomen in and up.
- When you breathe out, lengthen the spine and raise the left hand.
- To bring your upper body parallel to the floor, breathe out while raising the hips – keep the left hand forwards, the spine and the back of the neck.
- Place your left hand on a block on the outer edge of your right foot.
- Bring your right hand to your sacrament.
- Press firmly through both legs and move the right seated bone backwards.
- When you inhale, keep the spine long
- As you turn to the right, bring your right shoulder to the left and raise your right hand up.
- If you are feeling stagnant, look at your head to the side, or to your top hand.
- Stay for 5 breaths, keep your feet strong, and your pelvic floor and lower abdominal muscles are engaged.
- To come out of the pose, bend your right hand downward and come out of the bend. Bring your hands back to your hips and stand while breathing.
- Pivot your feet and repeat on the other side.
Note: Individuals with lower back pain should seek the guidance of an experienced teacher, or do so after fully recovering from the pain. A person with knee pain should be very cautious while practicing this.
17. Matsyasana (Fish pose)

Practicing fish poses is like saying goodbye to increasing one’s body energy level and stress, anxiety and fatigue caused by a daily schedule. Yoga posture relieves headaches caused by the tension of the cervical muscles. It calms insomnia, strengthens the upper back and neck muscles. Reduces the discomfort associated with hemorrhagic inflammation. It lengthens the intercostal and peso muscles. Expands lungs, increases their respiratory capacity and helps people with asthma. Activates the functions of the digestive system and helps resolve constipation.
Instructions:
- Start by lying on your back straight and flat, making sure that your two legs are close to each other and your hands are on the sides of your body.
- Place both your palms under your buttock in such a way that your palms are in the direction of the ground. Now bring both of your elbows together so that they come closer to your waist.
- Cross our two legs with each other, making sure that you touch your torso and your thighs. Make sure your knees are laid flat on the floor.
- Take a deep breath in and lift your chest in such a way that your head is also up. Make sure your crown is touching the floor.
- Remember to make sure that the entire weight of your body rests not on your elbow but on your head. When you lift your chest, lightly press your shoulder blades.
- Stay in this position as long as you feel comfortable breathing properly.
- You exhale while exhaling. Do this by raising your head first and then dropping your chest to the ground. Separate your feet and bring them to a normal resting position.
Note: Individuals with high blood pressure or low blood pressure, migraine and insomnia patients should avoid posing for fish. Those who have severe lower back injury are strongly advised not to practice this mudra.
18. Supta Matsyendrasana (Supine Spinal Twist Pose)

Supta Matsyendrasana (Supine Spinal Twist Pose) is a restorative spinal twist, which lengthens and strengthens the spine by detoxing the internal organs. It is a gentle asana that stretches the spine, shoulders, back, thighs and neck and stimulates internal detoxifying processes, while the body relaxes. Regular practice of this yoga pose can relieve lower back pain and tight shoulders.
Instructions:
- Lie on your back with your arms outstretched to the sides horizontally with the shoulders extended.
- Extend your left leg in front of you and bend your right knee, stick it in your chest.
- Inhale, and while exhaling, slowly cross your right knee to the floor on your right and left side of your body. Turn your head to the right and look at the right palm.
- Make sure that both of your shoulder blades are touching the ground, even if it means that your knees do not touch the floor completely. When twisting, there is a tendency to lift a shoulder blade off the ground.
- Feel the stretch in your thighs, waist, arms, neck, abdomen and back as you hold the pose. With each exhalation, relax deeply into the posture.
- Hold for several minutes.
- Slowly move your head back to the center and straighten your torso and legs.
- Repeat your left posture.
Note: Individuals with Spinal, knee or hip injuries should avoid the practice of this yoga pose.
19. Ardha Matsyendrasana (Half Lord of the Fishes Pose, or Seated Twist Pose)
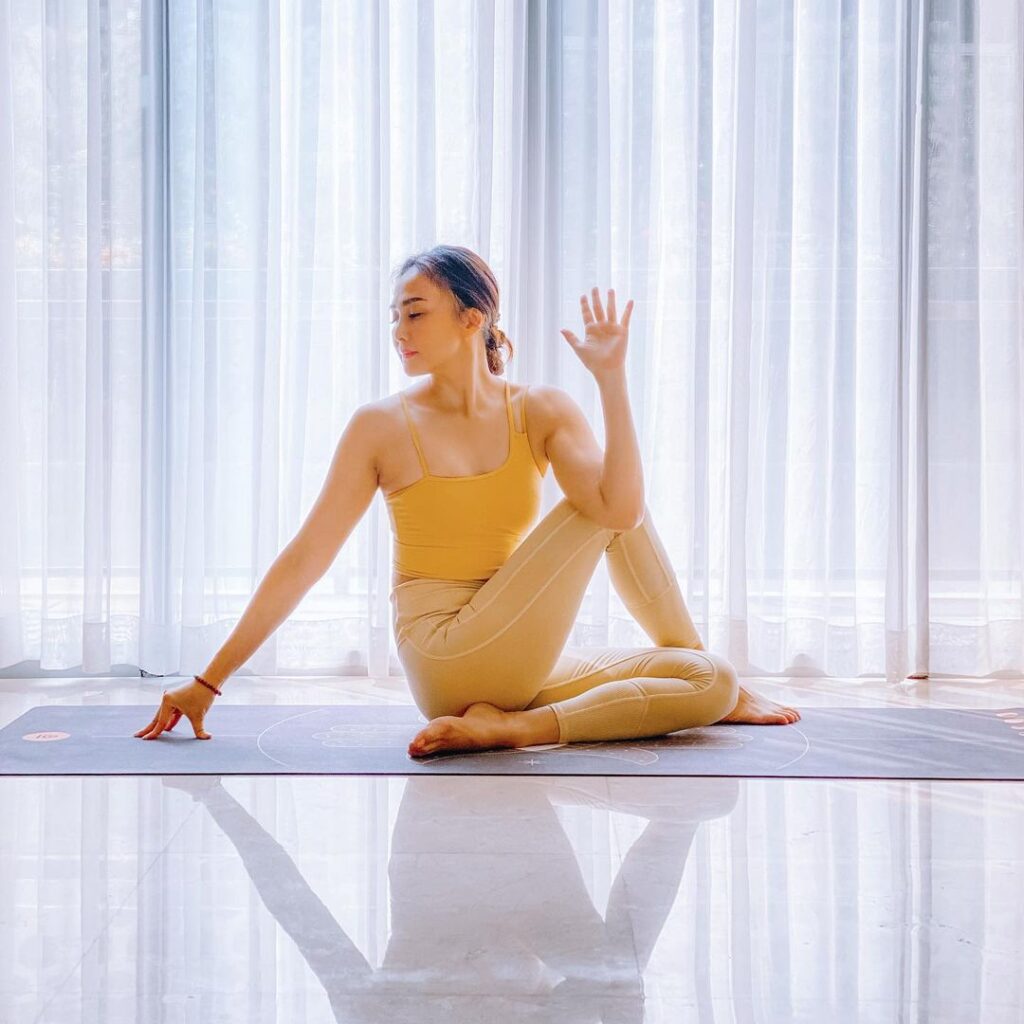
Ardha Matsyendrasana (Half Lord of the Fishes, or Seated Twist Pose) opens your chest muscles and lungs and reduces the risk of respiratory diseases. This yoga pose helps in relieving back pain, improves flexibility and massage of the spine and stimulates the functioning of the abdominal organs. This asana can help manage slip-disks. It calms the mind and reduces stress and anxiety. Regular practice of this asana stimulates blood circulation and detoxifies the organs, and can help manage the symptoms of UTI.
Instructions:
- Sit with your legs spread. Make sure your legs are held together and your spine is perfectly erect.
- Now, bend your left leg in such a way that the heel of the left foot is next to the right hip. You can also spread the left leg if you want.
- Then, move the right leg above the knee and place it next to the left knee.
- Bend your waist, neck and shoulders to the right, and gaze at your right shoulder. Make sure your spine is erect.
- There are several ways by which you can place your arms to increase and decrease the stretch. But to do this simply, you can place the right hand behind you, and the left hand on the right knee.
- Hold the pose for a few seconds, about 30 to 60 as you breathe slowly, yet deeply.
- Exhale and release the right hand, and then the waist, chest and finally the neck. Rest as soon as you sit up straight.
- Repeat the steps on the other side, and then exhale and come back.
Note: Women should be completely avoided during menstruation and pregnancy due to the powerful twist in your stomach. Individuals with stomach, brain, or heart surgery never practice this yoga pose or asana.
20. Jathara parivartanasana (Revolved Abdomen pose, Belly twist, or Spinal twist)
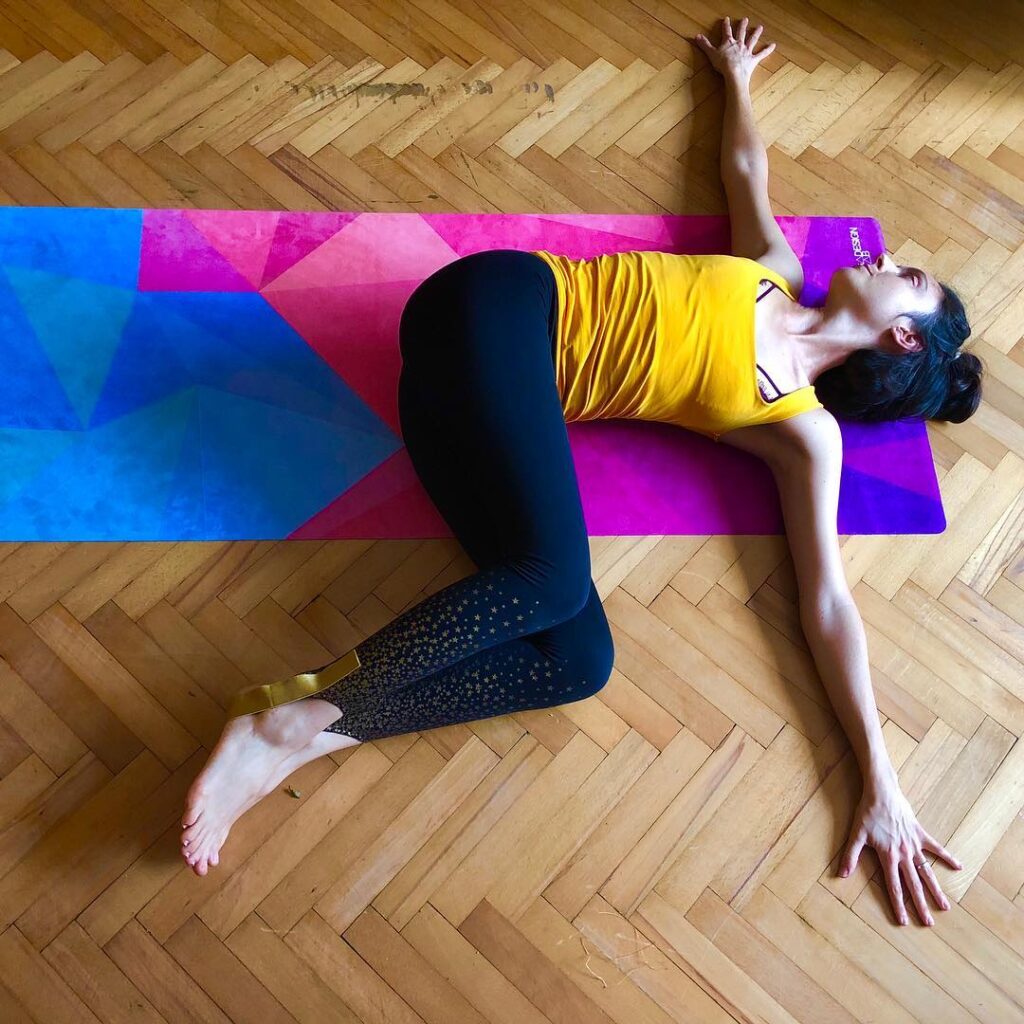
Jathara parivartanasana, Revolved Abdomen pose, Belly twist, or Spinal twist yoga pose enhances the back muscles, feeling and lengthen the spine, and hydrates the spinal disc.
Instructions:
- Lying on your back, bring your arms in a tee position with palms facing downward. Bend both knees from the chest.
- While exhaling, release both knees on the left side of your body, rotate the spine and lower back. Slide the knees as close to the left hand as possible. See right finger tips.
- Keep the shoulders flat from the floor, close the eyes and relax in the posture. Allow gravity to lower the knees, so that you do not have to use any effort in this posture.
- Inhale and hold for 6-10 breaths.
- To release: Inhale and roll the hips back to the floor.
- Repeat on the other side.
Note: Individuals with recent or chronic injury to the knees, hips, or back avoid practicing this yoga pose.
21. Balasana (Child’s Pose, or Child’s Resting Pose)

Balasana (Child’s Pose, or Child’s Resting Pose) is the most important relaxation posture of yoga and is a good way to gently spread it to different parts of your body. This yoga pose is a gentle stretch for the back, hips, thighs, and ankles. This can help relieve back pain.
Instructions:
- Begin with the knee position. Keep feet and toes together.
- Now, spread your knees slightly apart. Inhale slowly and deeply.
- Slowly lean forward and rest your chest between the thighs. Exhale as you are bowing. Allow your hands to be in front of you and rest on the floor, palms facing the mat.
- Adjust the pelvis and sacrum in such a way that your abdomen rests between your inner thighs and back.
- The forehead should rest on the floor and the palms facing downward, fully touching the mat. The arms should conform to the knees and be fully stretched and relaxed. If you have difficulty resting the forehead on the floor, you can use a pillow for support.
- In this position breathe normally and feel deep relaxation. Stay in this position as long as you are comfortable.
- To release the pose, move your hands backward and slowly raise yourself to the knee position. To rest further, the person can lie down in a supine position (shavasana) to rest the legs and lower back if necessary.
Note: If you have any knee pain or severe lower back injury, avoid practicing Balasana. Also, people with high blood pressure should avoid this mudra.
22. Bharadvajasana

Bharadvajasana stretches the spine, shoulders, hips, massages the abdominal organs. Helps lower back pain, neck pain, sciatica, relieves stress and improves digestion. This yoga is especially good in the second trimester of pregnancy to strengthen the lower back and therapeutic for carpal tunnel syndrome.
Instructions:
- To start, sit on the floor with the legs straight in front of you. Shift to the right buttock, bend the knees, and swing your legs to the left. Place your feet on the floor outside your left hip, the left ankle rests in the right arch.
- Inhale and lift through the apex of the sternum to lengthen the front torso. Then exhale and bend your torso to the right, keeping the left buttock on the floor or very close. To keep the lower back long, extend your tailbone towards the floor. Make the stomach soft.
- Tuck your left hand under your right knee and bring your right hand to the floor near your right buttock. Pull your left shoulder back slightly, pressing your shoulder blades firmly against your back until you continue to rotate the chest to the right.
- You can turn your head in two directions: keep turning the torso to the right; Or bend the torso to the left and look at the left shoulder at your feet.
- With each breath lift up a little more through the sternum, use the push of the fingers on the floor to help; A little more twist with each exhalation. Stay for 30 seconds to 1 minute, then exhale, return to the starting position, and repeat to the left for the same length.
Note: Individuals with diarrhea, headache, high blood pressure, insomnia, low blood pressure, menstruation, avoid the practice of Bharadvajasana.
23. Dhanurasana (Bow pose)
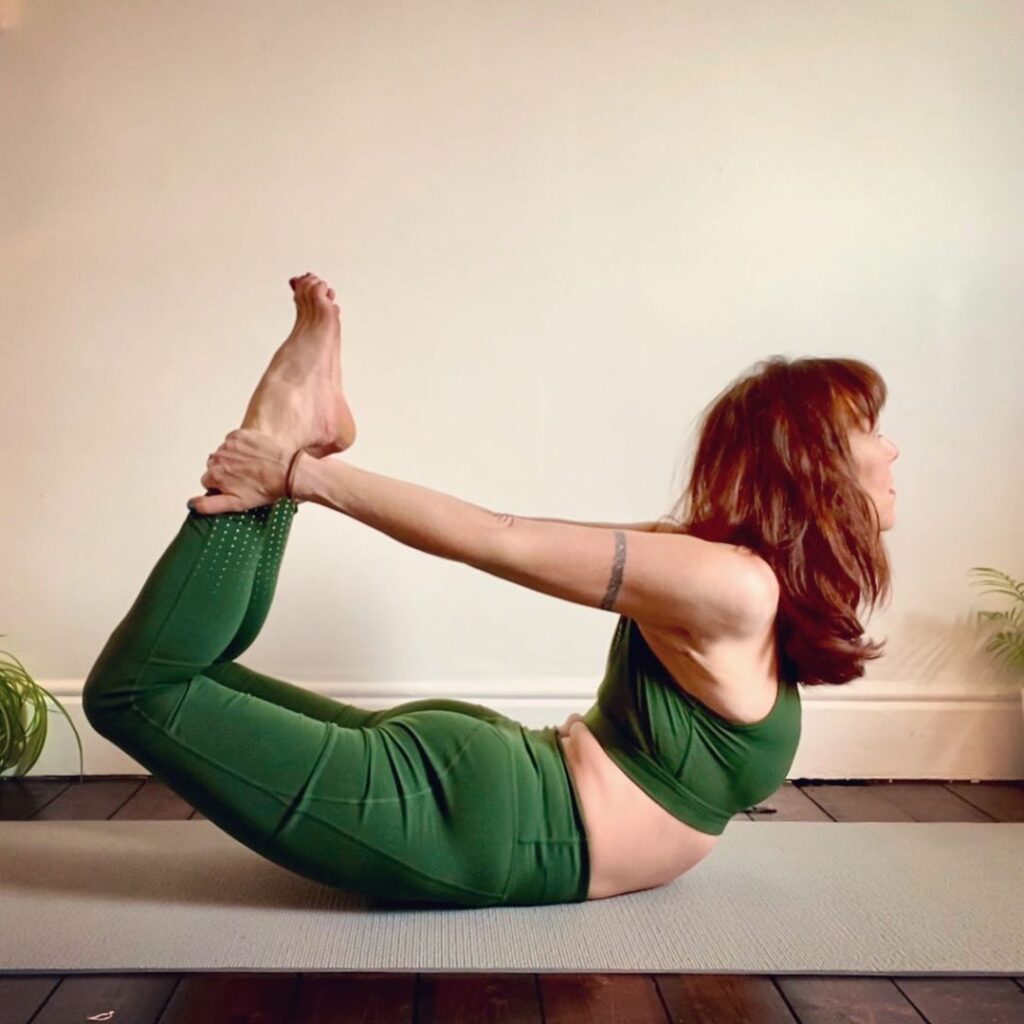
Dhanurasana (Bow pose) strengthens the muscles of the back and abdomen, stimulates the reproductive organs, opens the chest, neck, and shoulders. It tones the muscles of the feet and arms. This yoga posture brings more flexibility in the back and relieves tension and fatigue. Relieves menstrual discomfort and constipation and helps people suffering from kidney (kidney) disorders.
Instructions:
- Lie on your stomach with your feet, with your hips, and your hands from the sides of your body.
- Bend your knees, move your hands backward, and hold your ankles.
- Inhale and lift your chest above the ground and pull your legs up and back.
- Look straight ahead with a smile on your face.
- Keeping your breath steady the posture. Your body is now curved and taut as a bow.
- Take long, deep breaths while resting in this posture. But, bend as far as your body allows you. Do not overdo the stretch.
- After 15 -20 seconds, as you exhale, gently bring your feet and chest to the ground. Release the ankles and relax.
Note: Individuals with high or low blood pressure, hernia, neck injury, lower back pain, headache or migraine, recent abdominal surgery do not practice Dhanurasana. Also, women should avoid practicing this yoga pose during pregnancy.
24. Ustrasana (Camel pose)
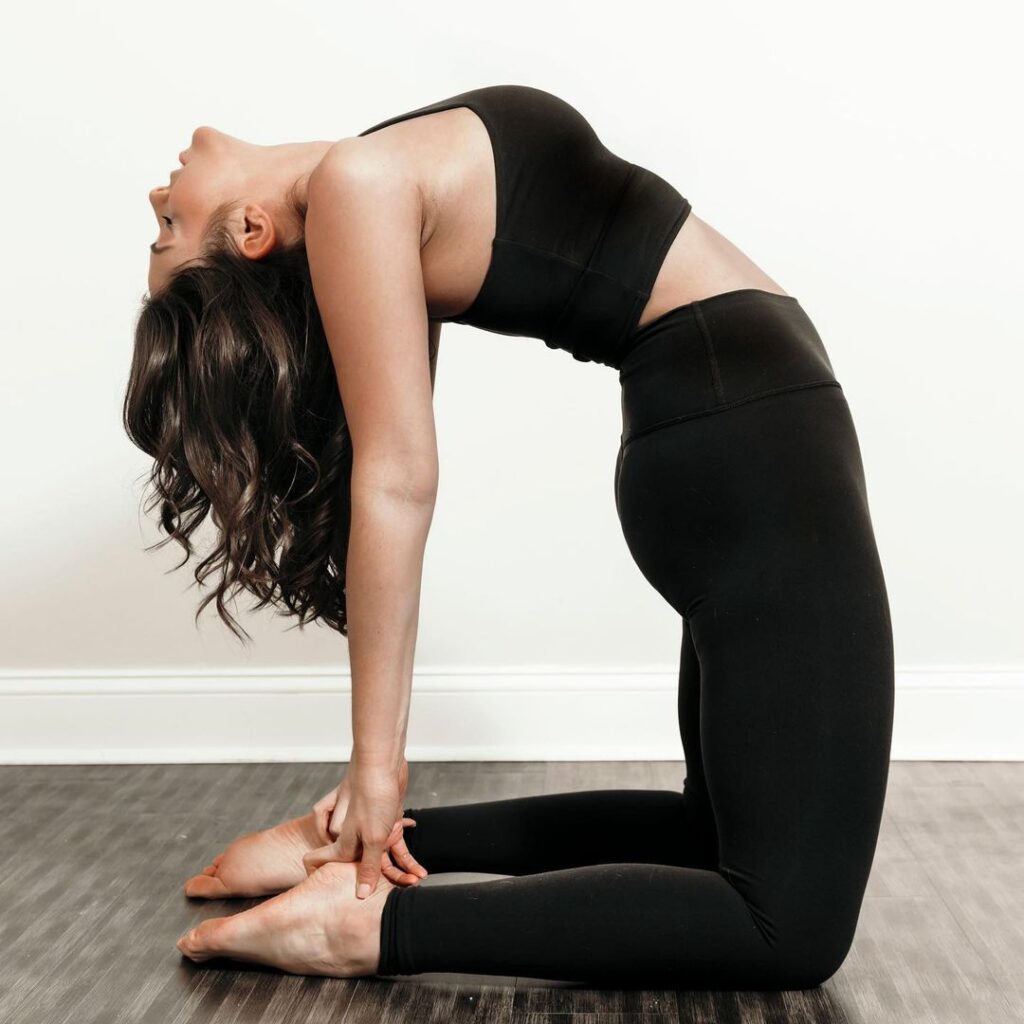
Ustrasana (Camel pose) stretches to the front of the body, including the chest, abdomen, and quadriceps. This improves spinal mobility, on which day you are likely to sit or bend your spine and bend. By backbending, you are flexing it in the opposite direction, and it can help you develop better posture. It is said to open the heart chakra, which is the energy center for your love, care, and compassion.
Instructions:
- Begin the asana by bending your knees on your mat and placing your hands on your hips.
- You should make sure that your knees and shoulders are in the same line, and the soles of your feet are towards the ceiling.
- Inhale, and pull your tailbone towards your pubis. You should feel a stretch on the navel.
- While you are doing this, arch your back. Gently slide your palms to your feet and straighten your arms.
- Keep your neck in a neutral position. It should not be taut.
- Hold the position for about 30 to 60 seconds before releasing the pose.
Note: If you have any injury or chronic problem in your knees, shoulders, neck or back, then you should not do Ustrasana.
25. Ardha Pincha Mayurasana (Dolphin Pose)
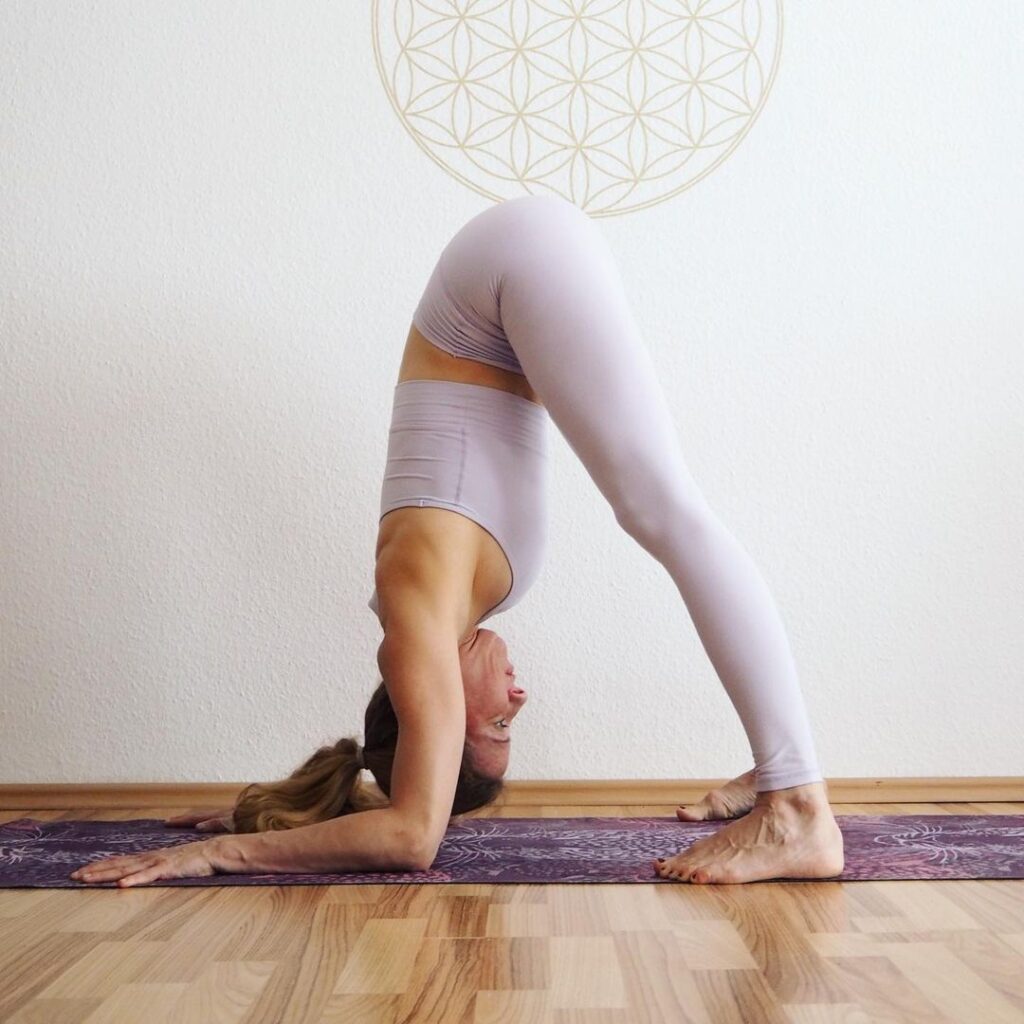
Ardha Pincha Mayurasana (Dolphin Pose) strengthens shoulders, arms, stomach, back, hips and hamstrings. Chest, middle and lower part, spreads hips and hamstrings. It is excellent to keep adequate strength and flexibility in the shoulders to practice Headstand to the body.
Instructions:
- Start the posture after landing your knees and hands.
- Keep your opponents on the floor; Make sure your elbows and shoulders are in parallel line.
- Now raise your spine (back) and the butt, because you tuck your toe and keep your feet directly.
- Make sure, your shoulder blade should be firm and in your ribs. Now lift your shoulders away from the ear and leave your neck (free).
- After that go to your arms.
- Take 4 to 6 deep breath at that point. Take three long and deep breath and place the situation for 30 to 60 seconds.
Note: People with recent or recurrent shoulders or neck injuries should be careful while practicing Ardha Pincha Mayurasana. People with very weak core and/or backs can find this currency quite challenging. Those who experience extremely tight hamstrings should turn them into knees in this yoga pose.
26. Garudasana (Eagle Pose)
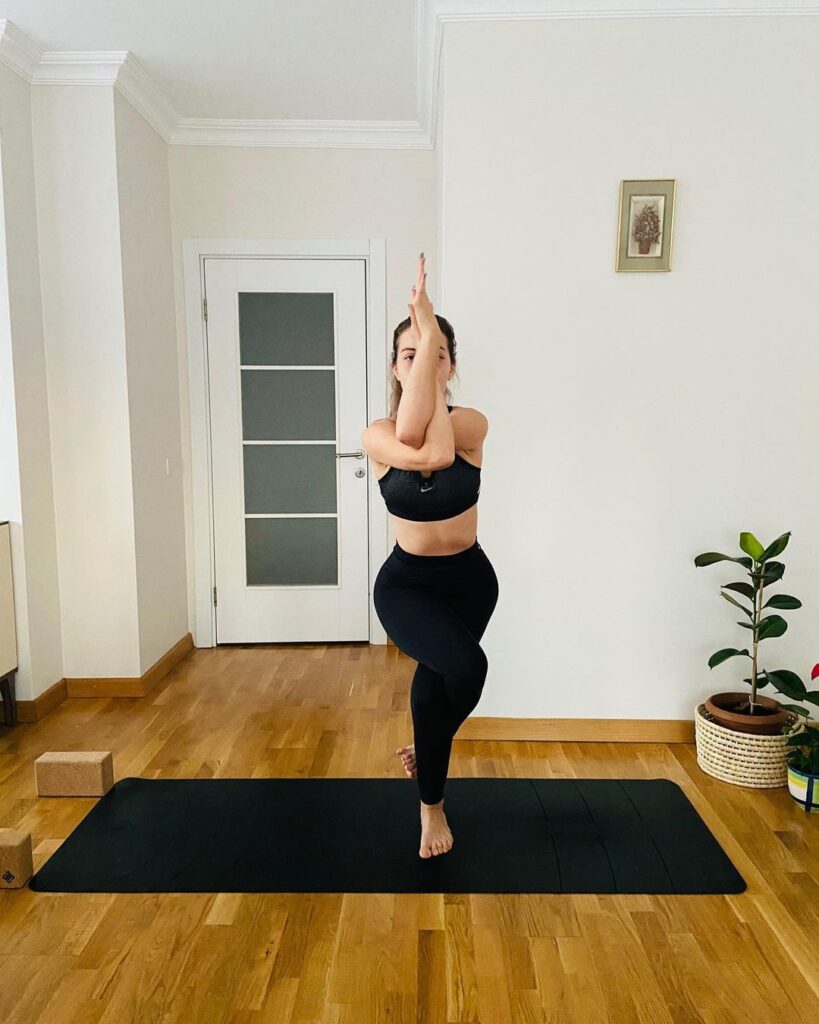
Garudasana strengthens your calves, ankles, thighs, and hips because you make your balance and original power. This helps you to develop a better concentration. Some people feel beneficial for less back pain or sciatica. The Garudhasana (Eagle Poss) is actually an antidote for the stress of the shoulder that you feel that when your work sits for a long time.
Instructions:
- Tilt your knees from Mountain Poss, and come to the chair pause.
- Bring weight at your left foot and look forward to a certain point – this is your Drishti.
- With your arms for the sides to balance, raise your right foot and increase it on your left thigh as you can. Squeeze your thighs together.
- Hook up your right foot behind your left calf.
- Remove and move your right hand to your left, tilt your fingers in the sky.
- Bring the back of the hands in front of each other.
- Hold your left thumb with your right hand, if you can, or press behind your hands together.
- Pick your elbow slightly.
- Keep the neck and your face and jaw base comfortably.
- 5 Hold for breath.
- To come out of the currency, come back to your arms and feet unwanted and mountain currency.
- Repeat on the other side.
Note: If you have a knee, elbow, wrist, or shoulder injury then you should not practice Garudasana. If you have difficulty with balance, be sure to practice it against the wall to stop the decline.
27. Agnistambhasana (Double Pigeon Pose)

The Agnistambhasana (Double Pigeon Pose) stretches the thighs, grins, and pesos and stimulates the abdominal organs. Although this yoga pose strongly opens the hips, a moderate level of flexibility of the hip is required to not injure the knees.
Instructions:
- Seated in a comfortable cross-legged position on a mat.
- Bring your right calf in front of the pot.
- Keep the left ankle directly above the right knee, bring the left calf parallel to the right.
- Inhale and lengthen your spine.
- exhale.
- Flex both legs.
- Hold about five full breaths for a minute or more.
- Repeat on the other side.
Note: Individuals with recent or chronic knee or low back injury or inflammation avoid from practicing this yoga pose.
28. Ardha Chandrasana (Half Moon Pose)
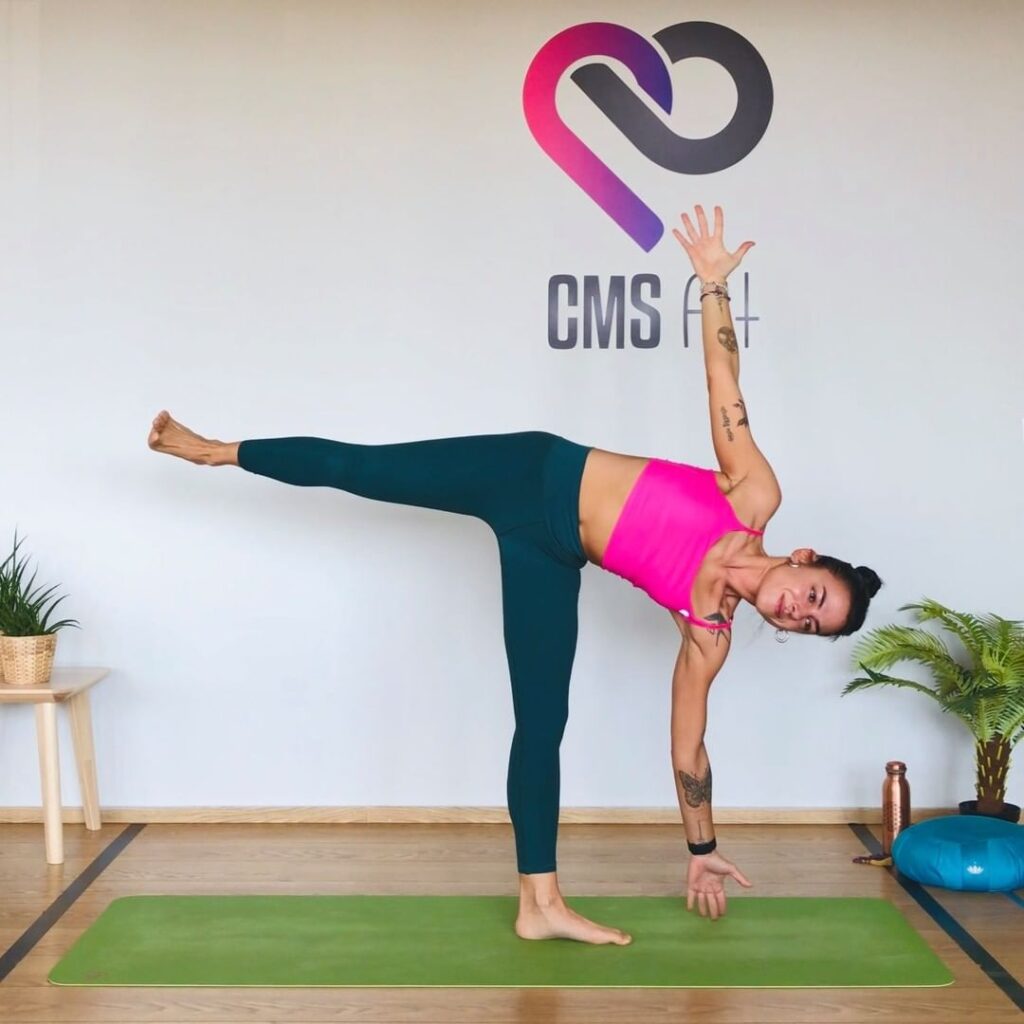
Ardha Chandrasana (Half Moon Pose) removes the lower back stiffness and tones the sacred area. It develops the legs by strengthening the lateral muscles of the knees and feet. This yoga pose reduces pressure in the abdominal area. This posture also improves coordination and balance. This is a good standing posture for women who are menstruating and can be taken with the back against the wall. The mudra reminds yogis that they are aware of both parts of their body.
Note: Individuals who have hamstring tears should do this yoga asana carefully. Elderly, weak and pregnant physicians should perform this asana under a wall. Looks forward or down for people with any neck injury.
Instructions:
- Keep the feet about 3 feet apart, like taking trigonasana
- Raise the both hands and bring them parallel to the ground
- Folding the right foot, bend the right leg to the right.
- Bend to your right and bring your right hand down from the side of the right foot. Touch the floor with fingers to balance.
- Now bend the right knee until the lower leg is 90 degrees to the thighs.
- Pull your right hand away from the right foot and proceed to your right. Let the right palm remain on the floor for support. The right leg may be slightly bent at this stage. Simultaneously raise your left leg off the floor. The left hand points to the sky at this stage.
- Now straighten the right leg and support your entire leg on your right leg as well as your right weight.
- Straighten the left leg. Let it be parallel to the ground. The left hand is directly upwards towards the sky. Try to keep the head, neck, torso and left leg as straight as possible.
- Instead of flat left palm, try to advance yourself by balancing on the fingers.
- Stay in this position as long as you are comfortable, for beginners, 30 seconds to one minute is sufficient.
- To release the pose, bend the right leg slightly and at the same time bring the left foot to the floor. Straighten the right leg and slide the right hand near the right leg. Raise yourself up in a standing position with both hands. Bring the right leg backwards to the normal front position.
- Repeat the same on the left.
29. Viparita Karani (Legs up the wall pose)
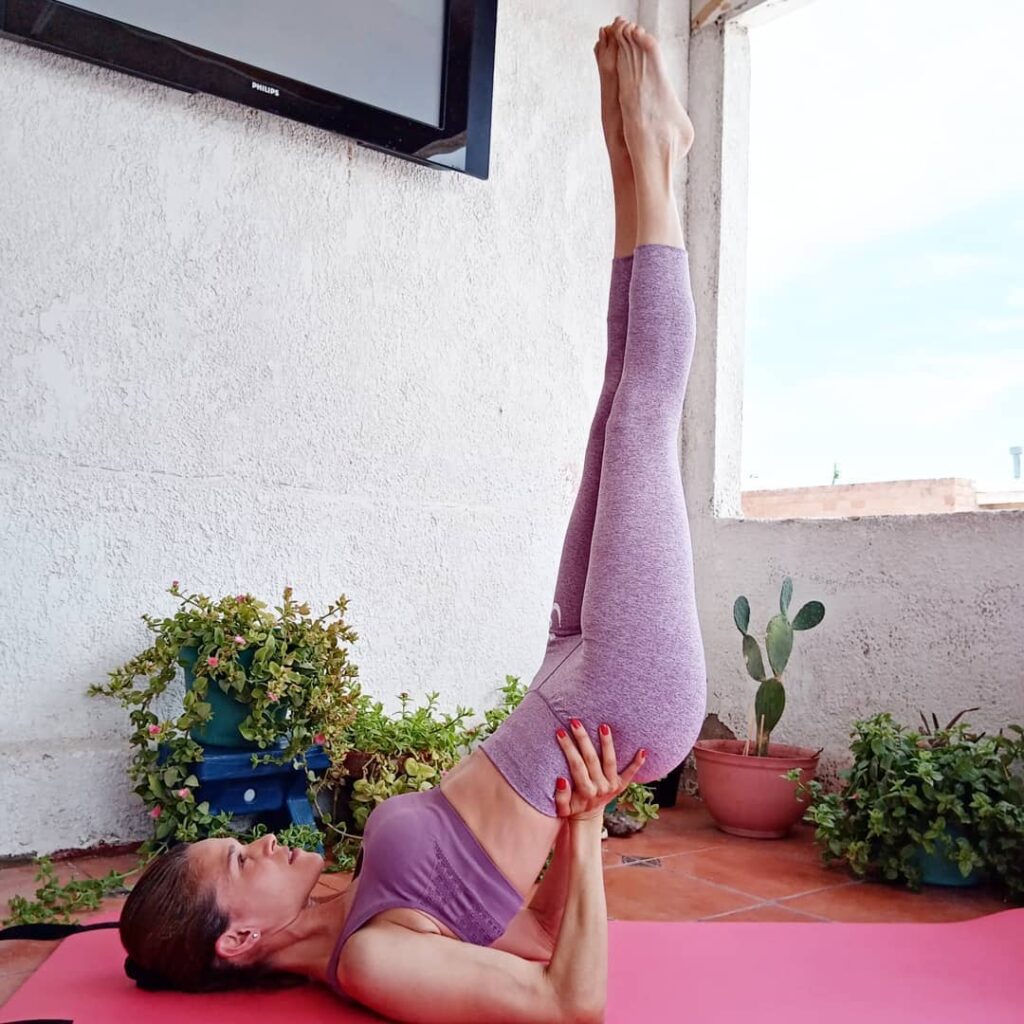
The restorative nature of this asana allows blood to flow to the parts of the body that need it, making it good for any disease including arthritis, high or low blood pressure, respiratory diseases and menopause. This yoga pose extends to the back of the neck, the front torso and the back of the legs. Improves eye and ear problems, relieves mild back pain, provides relief from migraine and headaches, especially when wrapped tightly behind the forehead and scalp with a bandage.
Instructions:
- Being a restorative pose, many people enjoy using props such as bolts, pillows and folded blankets while performing this asana. While doing this asana, keep a prop of your choice next to you. Then, follow these steps.
- Find an open space near a wall and sit next to it, as if your feet are on the floor, stretched out in front of you, and the left side of your body is touching the wall.
- exhale. Lie on your back, make sure the back of your feet presses against the wall, and the soles of your feet are upward. To get comfortable in this position you have to do a little movement.
- Keep your buttocks slightly off the wall or press them against the wall.
- Make sure the back and head are resting on the floor. You will find that your body makes an angle of 90 degrees.
- Raise your hips up and slide a prop under them. You can use your hands to support your hips and create that curve in your lower body.
- Keep your head and neck in neutral position and soften your throat and your face.
- Close your eyes and breathe. Hold the position for at least five minutes. Release and roll in one of the sides. Breathe before sitting.
Note: If you have high blood pressure, heart problems and thyroid disorders, you should avoid this inverted yoga posture.
30. Halasana (Plough pose, or Plow Pose)
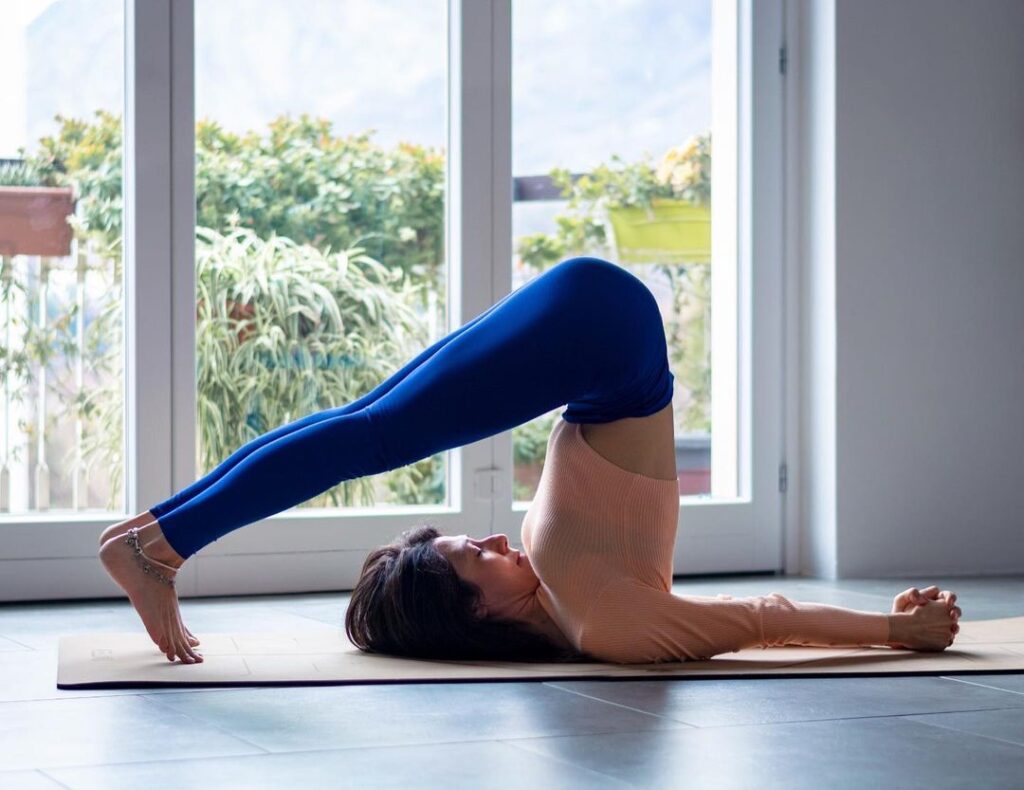
Performing Halasana yoga posture strengthens the muscles of the neck, shoulders, abs, back and calms the nervous system, reduces stress and fatigue. Tones the feet and improves leg flexibility, stimulates the thyroid gland, strengthens the immune system and helps women during menopause.
Instructions:
- Laying the hands on the floor with the palms facing downward, bend the knees and bend the knees and bend the legs up and backward, bring the knees to the forehead and place the hands under the hips.
- Slowly straighten the legs, moving the claws from the top of the head to the floor.
- When the toes touch the floor, you can release the arms in one of three positions:
- Palms behind your back, along the floor;
- Knead the fingers behind your back and gently squeeze the shoulder blades together;
- Hold the arms above your head and hold the claws.
- Breathe in and hold for 4-10 breaths.
- To release, bend your knees behind the head, and carefully and slowly roll the spine on the floor.
Note: Recent or chronic shoulder, neck or back injury or swelling, unimproved high blood pressure, menstruation, pregnancy (after the first trimester).
31. Supta Padangusthasana (Reclining Hand to Big Toe pose, or Supine Hand to Toe pose)
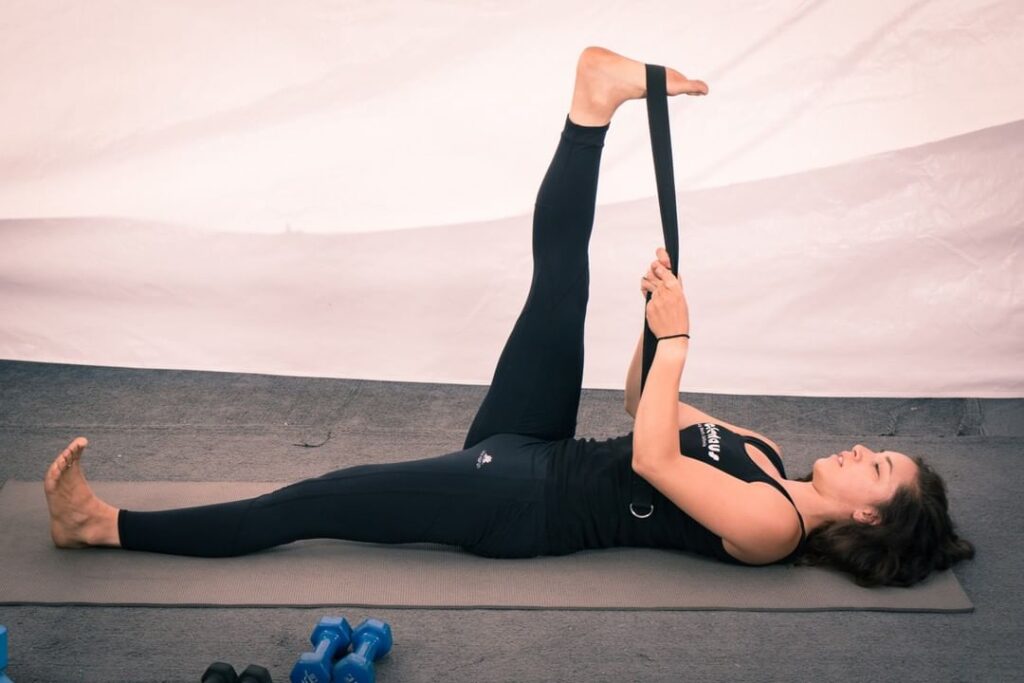
This yoga posture gives you an incredible vibe, so much so that it opens your legs completely. It is also said to improve both the overall physical and mental health. It gives a good stretch to the thighs, hips, calves, hamstrings, and waist. The knees become stronger, the prostate gland is stimulated, the digestive organs are stimulated, and therefore, digestion is improved. Decreases back pain, sciatica, and menstrual discomfort. This asana helps in healing flat feet, blood pressure and infertility.
Instructions:
- Lie on your back, legs extended, your feet bent while pressing against the heel.
- On exhaling, pull the right knee into your chest, loop a strap around the arch of the right foot, or hook your first two fingers around your big toe.
- Extend the right leg to the ceiling. Straighten your arms but keep both of your shoulders on the mat.
- Keep your left leg engaged and press the top of your left thigh with your hand. Create a comfortable stretch in your hamstring through the right heel.
- Stay for 5 breaths, then open your right leg and bring your right side towards the floor. Keep the left hip close to the ground. Stay for 5 more breaths.
- Bring your foot back to the center and then move it back to the mat. Repeat on the other side.
Note: People with hamstring, menstruation, diarrhea, headache, high blood pressure, pregnancy, and tight thoracic spine problems avoid practicing this pose, or practice under the supervision of a specialist and the advice of a doctor.
32. Parivrtta Parsvakonasana (Rotated Side Angle or Revolved Crescent or Crescent Twist)
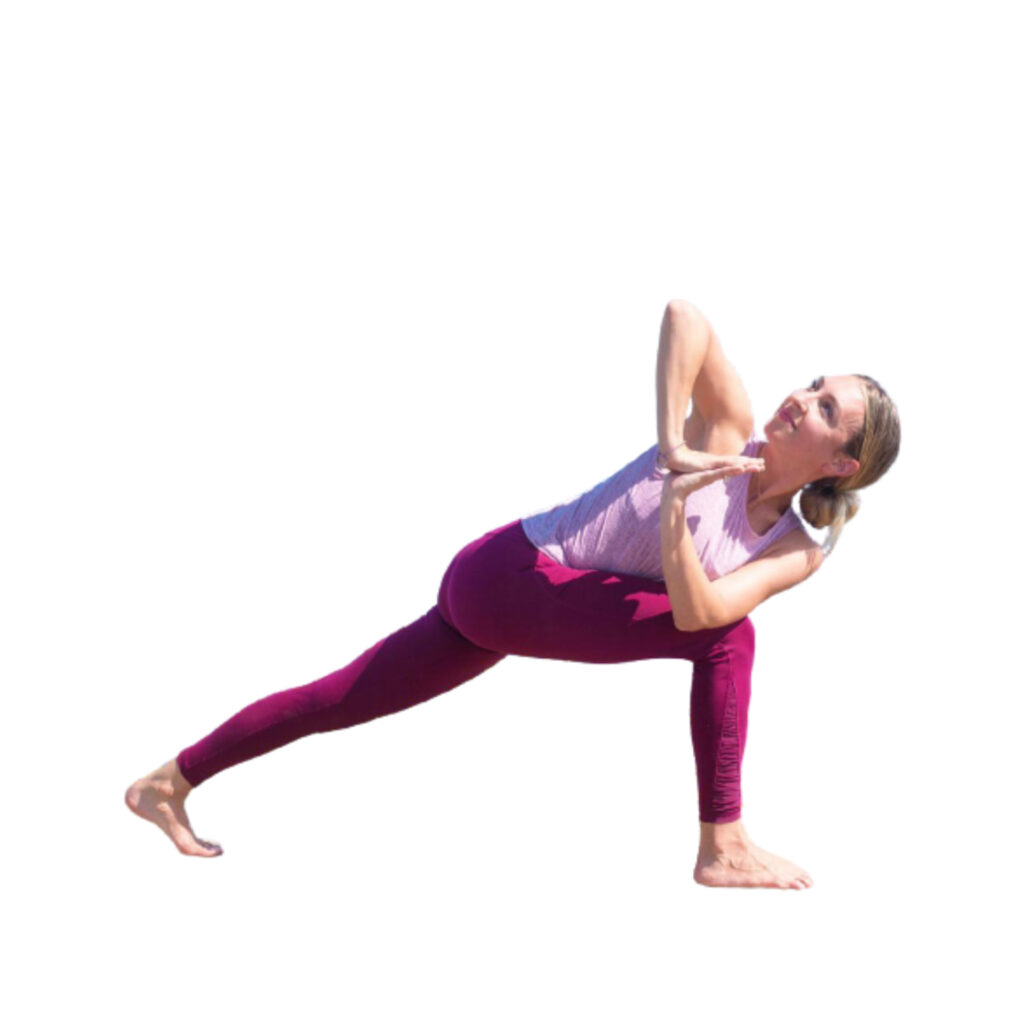
Parivrtta Parsvakonasana (Rotated Side Angle or Revolved Crescent or Crescent Twist) is a powerful permanent yoga pose that stretches and flexes your entire body. This Yoga asana strengthens, tones and stretches the spine, hips, legs, and buttocks. It stimulates and detoxifies internal organs and kidneys, aids digestion and metabolism, improves balance and stability.
Instructions:
- Starting in the downward facing dog, raise your right leg high and push it forward with your hands for a lower lunge.
- From here, you want to keep that 90-degree angle to the right knee and then straighten and attach your back foot, lift your knee cap and keep your left heel high towards the ceiling.
- Next, place your hands on your hips as you inhale slowly and come up, keeping your hands for each other to see if your hips are square. Make the necessary adjustments to ensure that they are. You may need to widen your stance or bring the back leg inward so that you feel equally balanced in both the hips and feet. As your lower body is set and strong, raise your arms up (keeping that knee fully at 90 degrees).
- Then tilt the tailbone down slightly so that you are reminded to engage your core and bring your hands to the center of the heart. Take a breath, lengthen the spine.
- This is the fun part. While exhaling bend slowly so that your left elbow faces out of the right knee.
- In prayer in the center of the chest, work to bring the hands to the correct position, rotate a little more so that you feel a rinse of toxins in your internal organs. Stare at the sky.
- With each breath, lengthen the crown of the head towards the front of the room. Exhale, and bend slightly deeper. Repeat this step at least three times.
- Leave slowly the way you came in and repeat the posture on the other side.
Note: People with knee or spinal cord injury, high blood pressure or heart problems should avoid practicing this yoga pose. Do not practice if you are pregnant.
33. Kapotasana (Pigeon Pose)

Kapotasana (Pigeon Pose) is an excellent stretching pose, spanning almost every part of the body. Along with flexibility, the strength of the muscles of the body, especially the back, pelvis, and thigh muscles increases. In Kapotsana, blood flow spreads better around the spinal column. It strengthens the tone and the entire spine. Tones the core muscles because during this asana there is a stretch on the abdominal area. In this asana, the chest is expanded, and the diaphragm is elevated properly. It helps in keeping the heart healthy.
Note: If you have any recent or deep injury to your spine, neck, shoulders, chest, core, hips, thighs, back and ankles, do not do this asana. As this asana affects blood flow, therefore, you should avoid the following disorders: high blood pressure, insomnia, headache, migraine, and depression. Women should avoid Kapotsana during pregnancy or menstruation.
Instructions:
- Begin the practice by assuming Ustrasana.
- Inhale and raise your lower abdomen. But before you grow it, make it sure. When you do this, move your tailbone downward to stabilize the lower back. Exhale slowly.
- Inhale, and pull both of your arms up, as if they are near your ears. If possible you can bring your palms together. Exhale and then move backwards, ensuring that your lower back is long but stable. Ensure that there is no pain or stretchiness. Inhale and then forward, first the sternum.
- Slowly raise your shoulders and squeeze your elbows towards each other. Move your head back, and hold the pose for at least 5 breaths.
- Inhale again, and allow your arms to reach the floor. Push your feet into the floor, and then bend the knees only as much as is necessary to reach the palms of the hands, to the outside of your feet. Periodically keep moving backwards, checking your lower back.
- Move your hands backwards towards your knees so that the fingers meet the heel. Once they do, close them tightly.
- Now as you hold both your legs, squeeze the elbows towards each other, and keep the hips forward and backward while keeping your lower back facing backward.
- As you exhale, bend the elbows and fix them on the floor. Hold the position for about 30 seconds to a minute, or as long as you are comfortable.
- Keeping your breath normal, slowly come out of the posture. Roll on your spine and assume the posture of balasana or baby before coming back to normal.
- Whitehead, Phyllis Brown PhD, APRN, ACHPN, RN-BC: “The Effect of Yoga on Chronic Nonspecific Low Back Pain.” AJN, American Journal of Nursing: February 2018 — Volume 118 — Issue 2 — p 64. doi: 10.1097/01.NAJ.0000530250.68582.9d[↩]
- Slathia D. “Effects of yogic practices on different organs of an athlete.” Indian J Res. 2014;3(1):216-18. doi:10.1.1.681.4563[↩]
- Highland K, Schoomaker A, Rojas W, et al. “Benefits of the restorative exercise and strength training for operational resilience and excellence yoga program for chronic low back pain in service members: a pilot randomized controlled trial.” Arch Phys Med Rehab. 2018;99(1):91-98. doi:10.1016/j.apmr.2017.08.473[↩]


