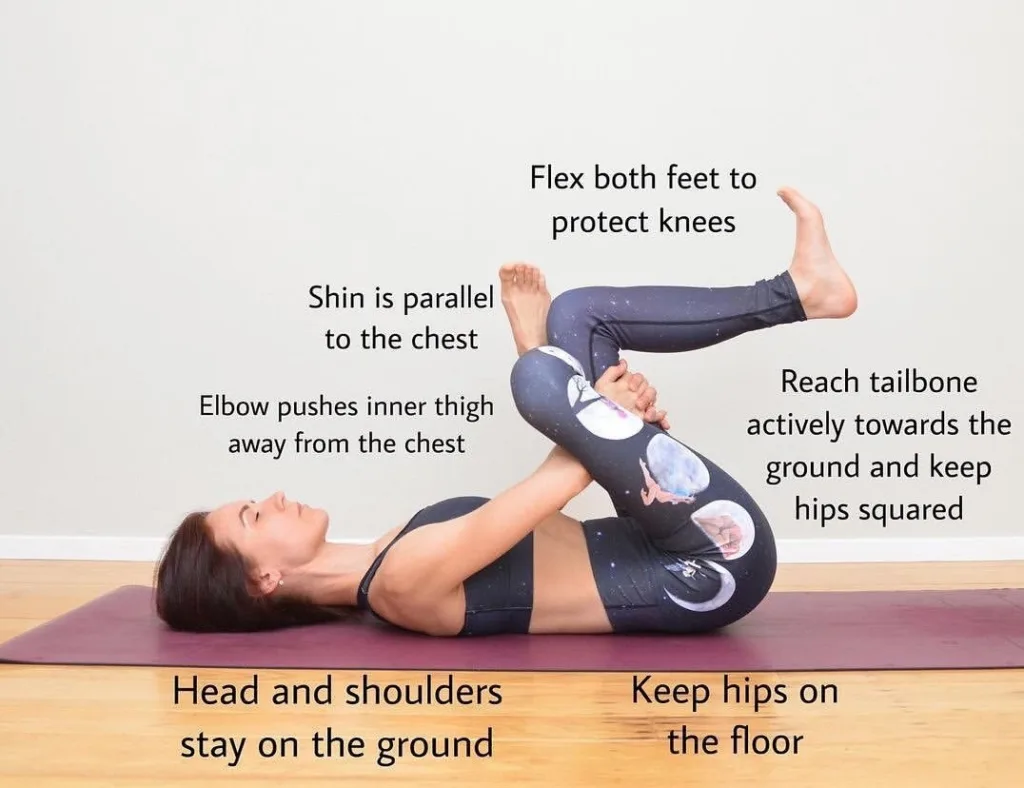
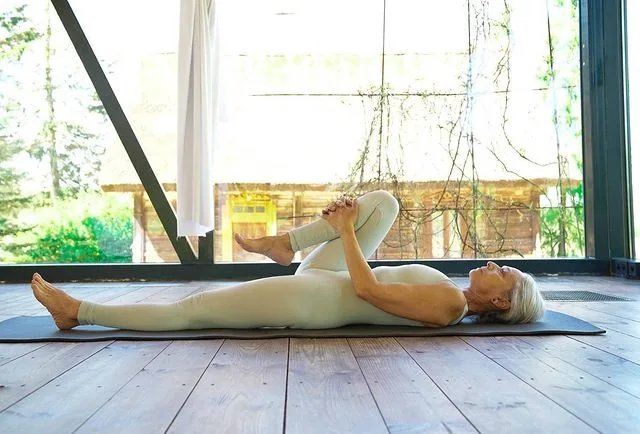
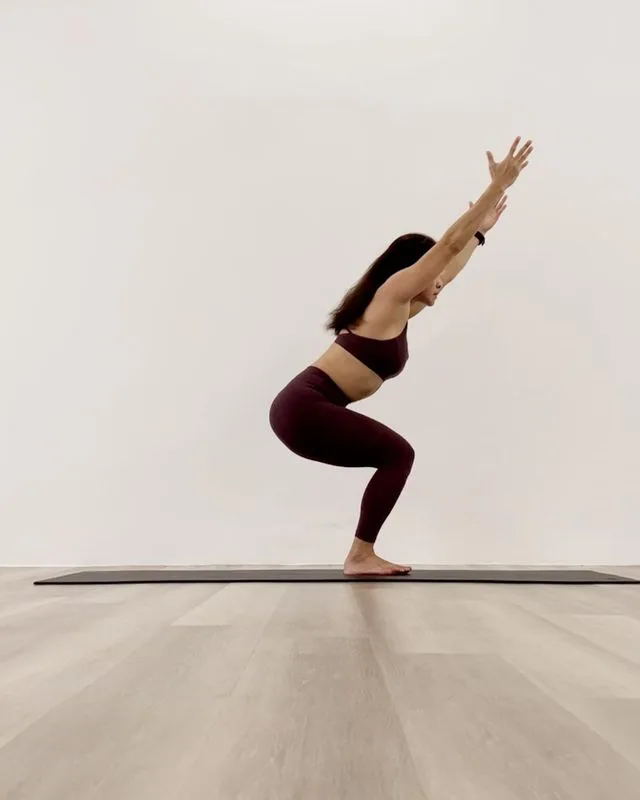
These 15 yoga poses for back pain facile tip for relieving your pain quickly, release tight muscles in your back and alleviates pain quickly make you happy forever.
It has been proven that yoga benefits our body in end number of ways. Yoga plays its part in our health, both physical and mental, release our stress, boosts up our concentration level. Yoga, which is a mind body therapy, that’s often recommended treating not only back pain but the strain that accompanies it.
15 Yoga Poses To Back Pain Relief Quickly
These appropriate yoga poses can relax and strengthen your body. Keep reading to learn more about how these 15 poses may be useful for you in treating your back pain.
1. Hero Pose (Virasana)
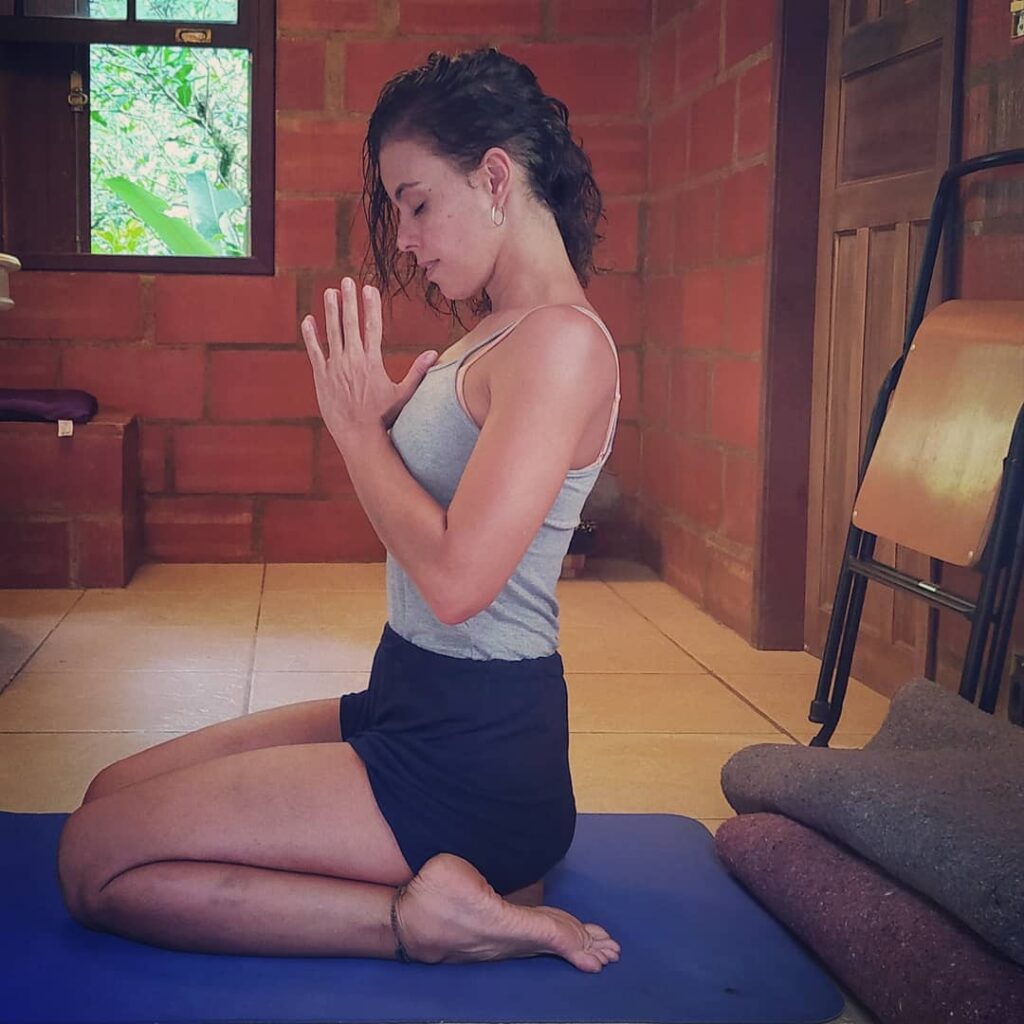
Focus: Arches of the foot, Knee, Thigh, Ankle
Level: Beginner
Total Time: 30 to 60 seconds
Indications: Spine, Dyspepsia or an upset stomach, Flatulence (gas), Menstrual pain (dysmenorrhea), Flat feet, Ankles
Contraindications: Injury at the knees or ankles
Note: Before taking on this pose consult a doctor or an experienced instructor, avoid this pose, If you experience heart problems or have a headache.
Start with Virasana or Hero Pose, is one of the best “anti-sitting” poses for those who spend a lot of time at a desk. It is one of the most ancient and traditional postures used for meditation and breathing exercises (Pranayama). The hero pose builds the deepest flexibility of the knee joint, keeps the knee joint healthy and mobile, and increases blood circulation through the legs. It strengthens and stretches the arches of your feet while building flexibility in your knees joints, thighs muscles, ankle joints, lower spine and tops of the feet.
This yoga pose improves the posture of your spine by straightening the spine and low back, and is great for virility, alleviating symptoms of menopause, menstrual pain, improving digestion and flatulence. Experts believe that Virasana or Hero Pose is therapeutic for hernia, sciatica, high blood pressure and asthma.
How to do:
- From all fours, bring your knees close together and your feet slightly apart from the hip distance.
- Press the top of your feet down and slowly bring your hips back down, until sitting on the mat (or props) between the heel.
- Use hands to roll the flesh of the calves away, pulling your navel in and up, ground through the sitting bones and extend through the crown of the head.
- Hold for 5-10 breaths, the way you came in, come out of it, by placing the hands in front of you and lifting the hips back up to all fours.
2. Happy Baby (Ananda Balasana)
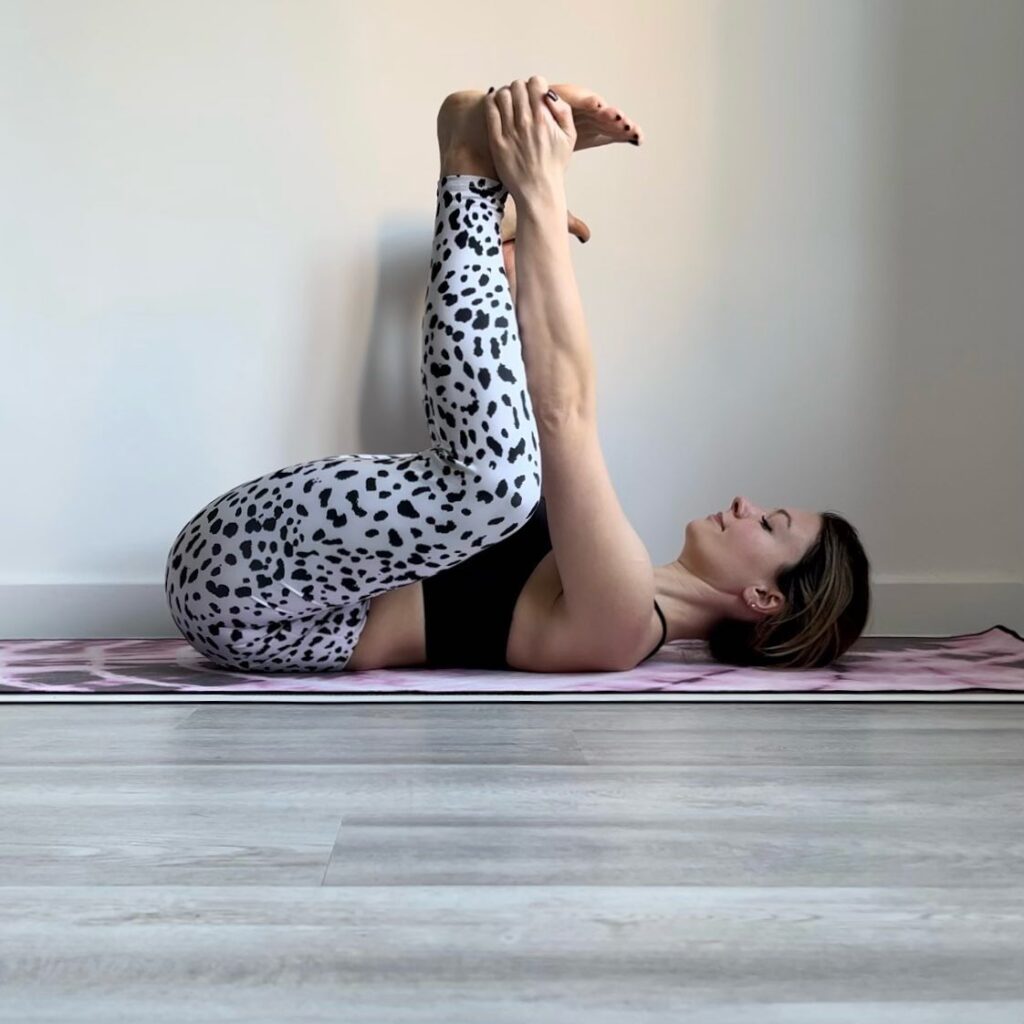
Focus: Hip joints, hamstrings, groin
Level: Beginner
Total Time: 30 to 60 seconds
Indications: Rejuvenates brain, anxiety, stress, fatigue, heart health
Contraindications: Ankle, neck, knee injury, pregnancy, modification for neck, and shoulder injury
Note: Avoid this pose, If you are pregnant or have a knee, or neck injury.
Happy Baby Pose lengthens and re-aligns the spine, works to open up the hip joints and chest while greatly stretches the hips, hamstrings, calves, chest, triceps, biceps, abdomen, back spine and inner groin.
This yoga pose treats the stiffness of your lower back and reduces the hips, and provides relief from lower back pain, stress and fatigue.
How to do:
- Start by lie down flat on your back. Exhale and bend your knees towards your chest.
- Inhale, grasp the inner or outer sides of your feet – whichever is most comfortable, hold it at a 90-degree angle and the soles of the feet should be facing the ceiling.
- Gently spread your knees to hip-width apart, and it should be wider than your armpits.
- Bend your ankles and move gently from side to side. Take a deep breath in and out as you continue to rock it out.
- Stay in this pose for 30 to 60 seconds, then release yourself from it and return to the original position.
3. Fish Pose (Matsyasana)
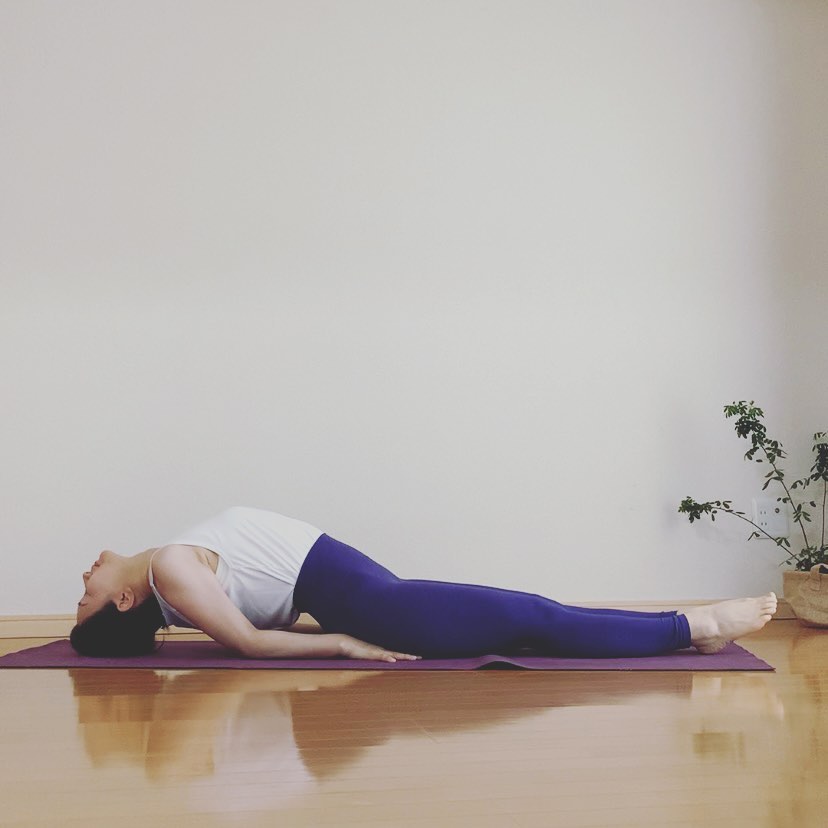
Focus: Neck, Upper Back, Hip flexors, Spine
Level: Beginner
Total Time: 30 to 60 seconds
Indications: Rib muscles, Backaches, Internal organs, Constipation, Menstrual pain, Exhaustion, Anxiety, Lungs capacity, Respiratory conditions, Spine flexibility, Stress
Contraindications: Major neck or lower back injury, Blood pressure (high or low), Restlessness, Insomnia, or migraine
Note: The pose involves deep breathing, so it may not be comfortable for a person suffering from the heart disease.
The Fish Pose (Matsyasana) build strength in the upper back and back of the neck, while stretching and opening the throat, the front of the front of the body, particularly the shoulder, the deep hip flexors, rib muscles and the neck. Modern research suggests that regular performance can improve the spinal flexibility and posture.
Experts also claim that this yoga pose can help opens up the lungs (thereby improving breathing and relieving respiratory ailments), massage the internal organs, provide relief for constipation, menstrual pain. It energizes the body and reduces the back pain, fatigue, anxiety and respiratory conditions.
How to do:
- To start, lie down on your back with the knees bent, the sole of the feet flat on the ground, the arm alongside the body and the palms up.
- Inhale, raise your hips and abdomen above the ground and slid your hands underneath your hips. Lower the hips on top of your hands, and press into the elbows, shoulder blades up and lift the chest up.
- Bring either the back or top of your head to the ground, the weight should be very low on it and avoid crunching your neck.
- Stay for 30 to 60 seconds and breathe continuously.
- To come out from this asana, exhale, press your elbows down to lift your head and slowly lower the upper body to the ground before letting your head on the ground and bring the knees near the stomach and squeeze with hands as you relax the back muscles.
4. Bridge Pose (Setu Bandha Sarvangasana)
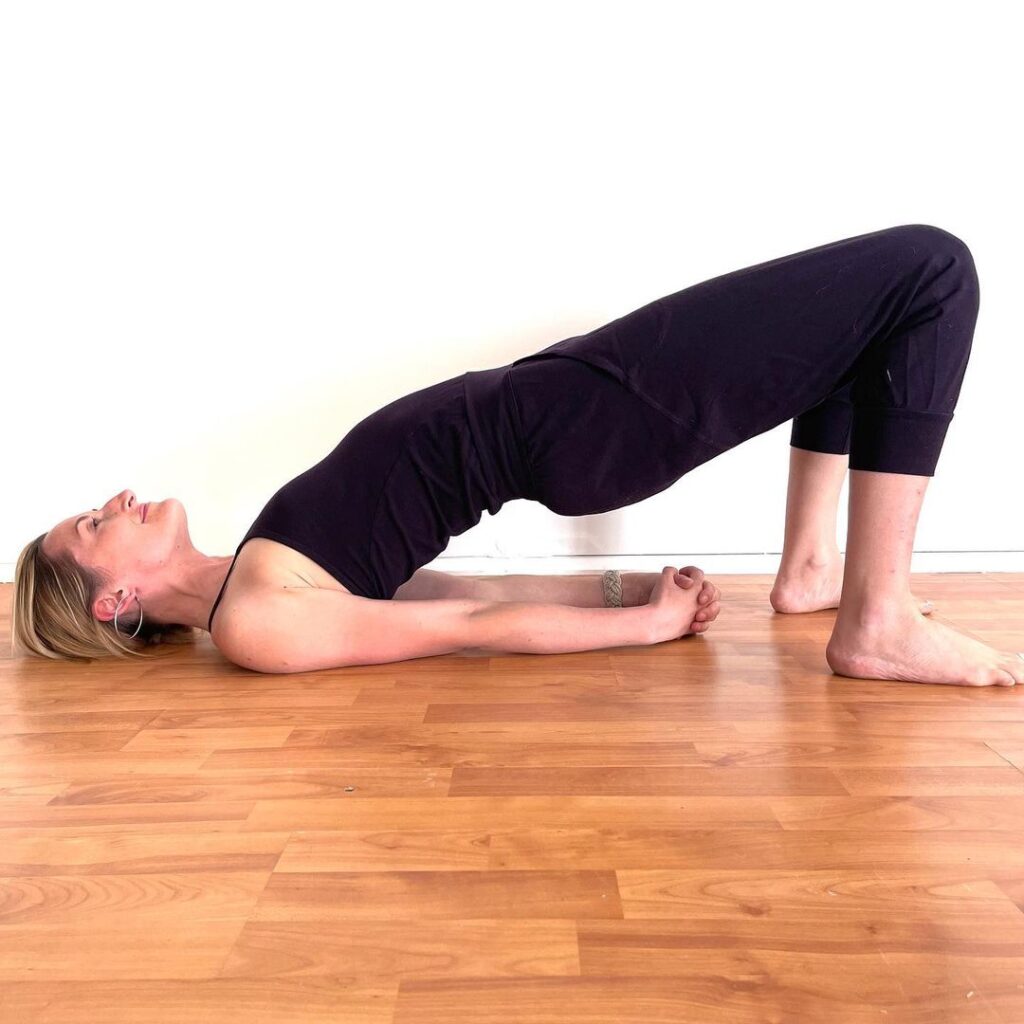
Focus: Hip, Spine, Neck, Chest
Level: Beginner
Total Time: 60 to 120 seconds
Indications: Fatigue, Anxiety, Stress, Headaches, Asthma, Sinus problems, Energizes thyroid, Abdomen organs, Lungs, Relieves eye, ear ailments, insomnia, mid-depression, menstrual pain, Menopause symptoms;
Contraindications: Chronic injury to the back, neck, or shoulders
Note: If performed incorrectly, Bridge pose can lead to neck or shoulder injury.
Bridge Pose (Setu Bandha Sarvangasana) improves posture, help relieve low back pain, great for many parts of the body, but it primarily stretches out the abdomen, hip flexors (front hip joints), spine, the back of the neck, chest, and the area around the shoulders. This yoga pose builds core and lower body strength, strengthens the spine, back, thighs, glutes, ankles, helps to rejuvenate and re-energize the tired legs.
It improves digestion, reduces thyroid problems, can help prevent your headaches, fatigue, and insomnia. Very helpful and soothing for who suffering from asthma, sinusitis, osteoporosis and high blood pressure.
Helpful for the women in relieving the symptoms of menstrual pain and menopause. Setu Bandha Sarvangasana can also stimulate the abdomen and improves the lung capacity.
How to do:
- Start lying down on the back with knee bend knee and your feet flat on the ground hip width apart. If you desire, you can place a blanket underneath the shoulders, for support.
- Exhale as you press the feet into the ground, slid your arms alongside the body with your palms facing down, push the tailbone up to activate your glutes and lift off your hip of the ground.
- Gently squeeze your knees, keep your knees hip width apart and keep the knees remained directly above your feet.
- Press your arms and shoulders into the ground to lift your chest up.
- Pull the chin away from your breastbone, engage your shoulder blades, legs, buttocks, mula bandha and press the sternum up.
- Stay for up to 60 to 120 seconds, keep breathing easily. To release yourself from pose, exhale and gently lower the spine and hips back to the ground.
5. Extended Puppy Pose (Uttana Shishosana)
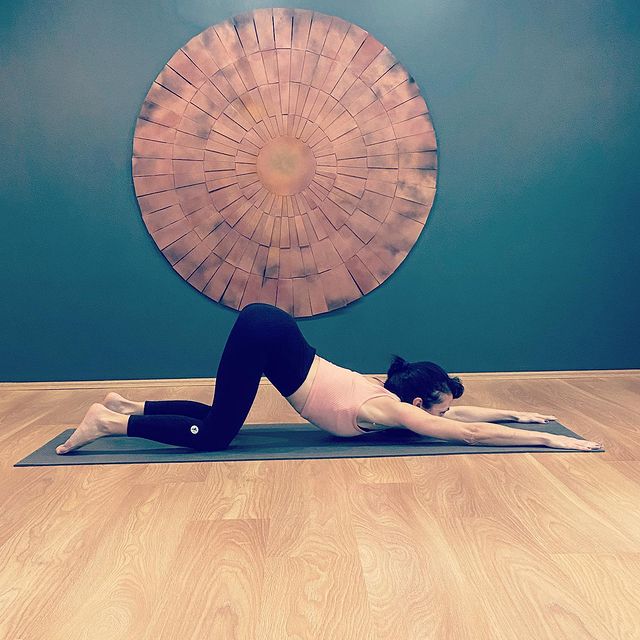
Focus: Spine and shoulders
Level: Beginner
Total Time: up to 60 seconds
Indications: Insomnia, Stress, Anxiety
Contraindications: Only knee injury
Extended Puppy Pose stretches the spine, shoulders, upper back and arms, opens the spine and shoulders, as well as chronic tension and therapeutic for stress, anxiety, insomnia.
How to do:
- Get on all fours (tabletop position), rest the shoulders on the wrists, the hips on the knees, and the tops of the feet comfortably on the mat.
- Slowly, start moving the fingers and bring the chest to the mat.
- Lift the hips up toward the ceiling, opening the chest and arching the back.
- Stay in the pose for 5 to 10 breaths, then gently lift the forehead and press up to the tabletop with the palms facing the body.
6. Sage Pose (Marichyasana)
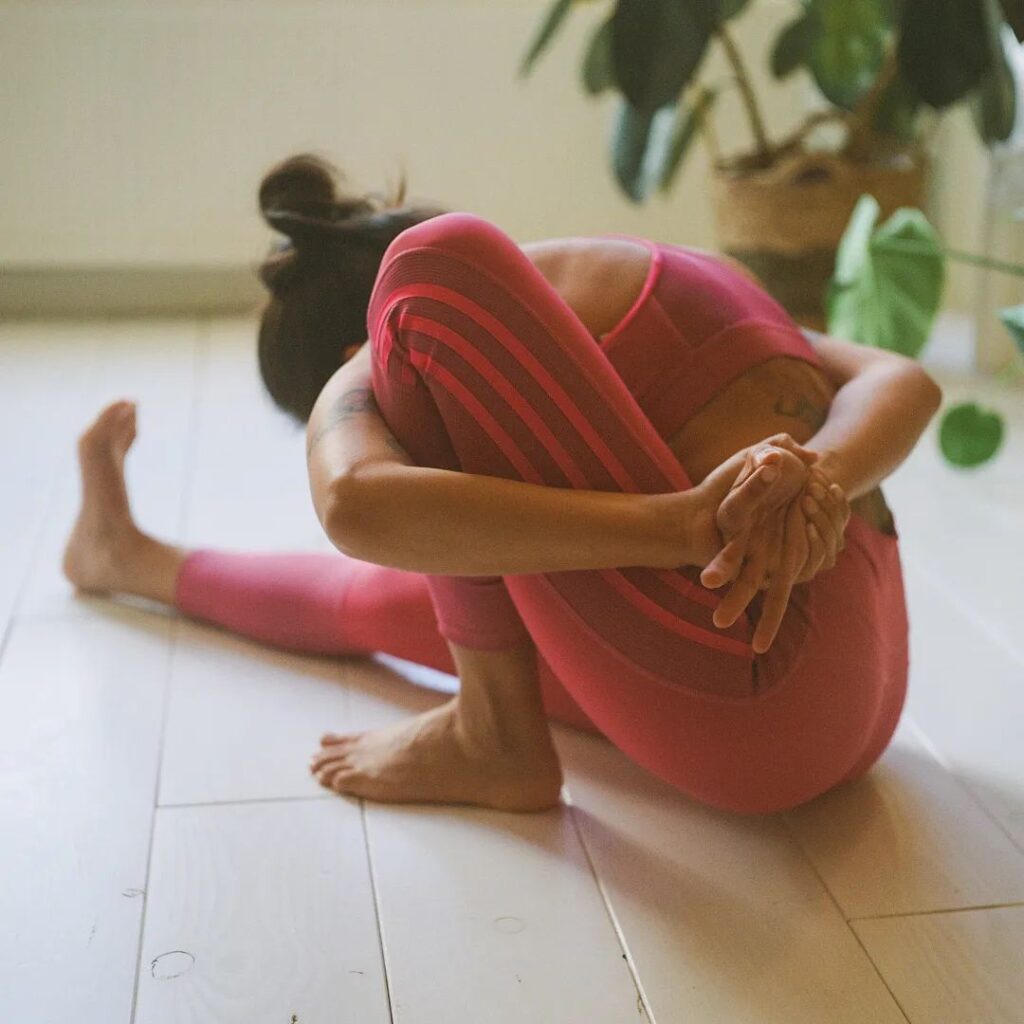
Also known as: Sage Twist Pose, Marichyasana, Marichi’s Pose, One-Legged Seated Spinal Twist Pose
Focus: Lower body, hamstrings, spine, shoulders
Level: Intermediate
Total Time: up to 60 seconds
Indications: Calms mind, spine, backache, asthma, exhaustion, internal organs, constipation, indigestion, hamstrings
Contraindications: High blood pressure or low blood pressure, spinal, or knee, or hip injury, insomnia, diarrhea, migraines
Bending forward in Sage Pose (Marichyasana) not only improves the flexibility of the neck and shoulders, but also gives good strength to the muscles.
After interlocking your wrist with a grip of the thigh, apply pressure to the hip in Sage Pose (Marichyasana). This pressure on the hip creates a feeling of deep balance, which ensures alignment of the hips and makes the base of the spine perfect. It strengthens the base, the sacrum, giving a great support to your entire spine and relief to sufferers of back pain.
How to do:
- Begin in Dandasana (Staff Pose), bend left knee, bring heel close to left sitting bone, foot flat on floor with knee raised. Keep a space between the left leg and the right thigh.
- Keep the right leg straight and active by engaging the thigh muscles and pointing the toes to the ceiling.
- Inhaling, reach the left arm upwards, lengthening the spine and keeping the sit bones on the ground.
- Exhale as you bend forward, reaching the left-hand forward toward the inside of the left thigh.
- Rotate the shoulder inward while turning the palm away from you. Bend the elbow and wrap the arm around the bent leg, bringing the back of the arm toward the thigh or hip.
- Wrap the right hand behind the back, bring the hands towards each other, grabbing the left hand or wrist if they reach.
- As you exhale, twist forward, keeping lower abs engaged and right leg active, toes pointing upward.
7. Wide-Angle Seated Forward Bend Pose (Upavistha Konasana or Janusirsasana)
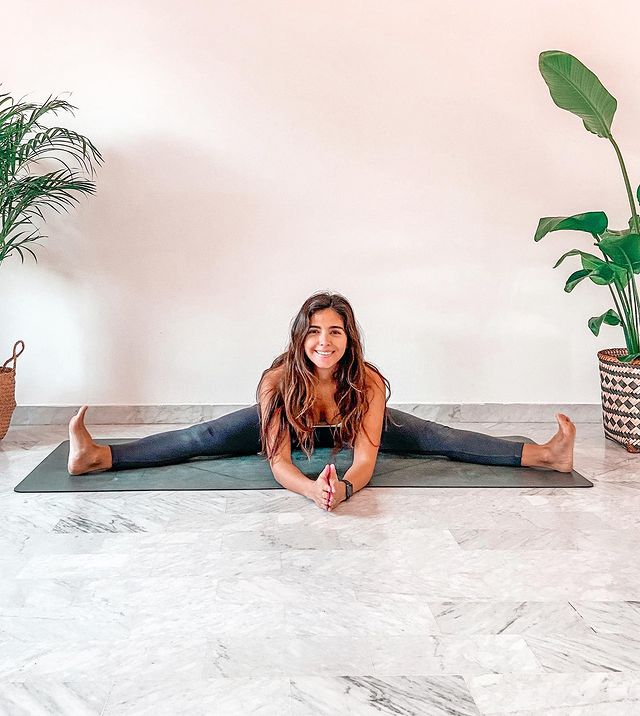
Known as: Seated Straddle Pose, Upavistha Konasana, Seated Wide Legged Straddle, Wide Angle Seated Forward Bend Pose, Open Angle Pose
Focus: Lower body, Spine, Back, Thighs, Calves
Level: Beginner
Total Time: 30 to 60 seconds
Indications: Mental calmness, Anxiety, Detoxify kidneys, Arthritis
Contraindications: Ankle, shoulder, hip, rib cage, pelvis, or knee injuries
The Wide-Angle Seated Forward Bend Pose (Upavistha Konasana) stretches the muscles around the spine and helps loosen the spine. The use of core muscles expands the lower backbone, sacrum, strengthening back muscles. This yoga posture makes the chest and shoulders, upper back muscles and spine strong and which helps in healing the pain.
How to do:
- Sit in Dandasana (Staff Pose), with sit bones upright.
- Open the legs to the sides as much as possible. Flex the feet and raise the toes.
- Press through the mound of the big toe and root down with the femur, so the quadriceps are also facing the ceiling.
- Inhale and lengthen the spine; Exhale and hinge at the hips, move the arms forward and lower the torso to the floor between the legs.
- Keep the back straight and avoid twisting the spine.
- To exit the pose, move the hands backwards and return to staff pose.
8. Spine Twist (Matsyendrasana)
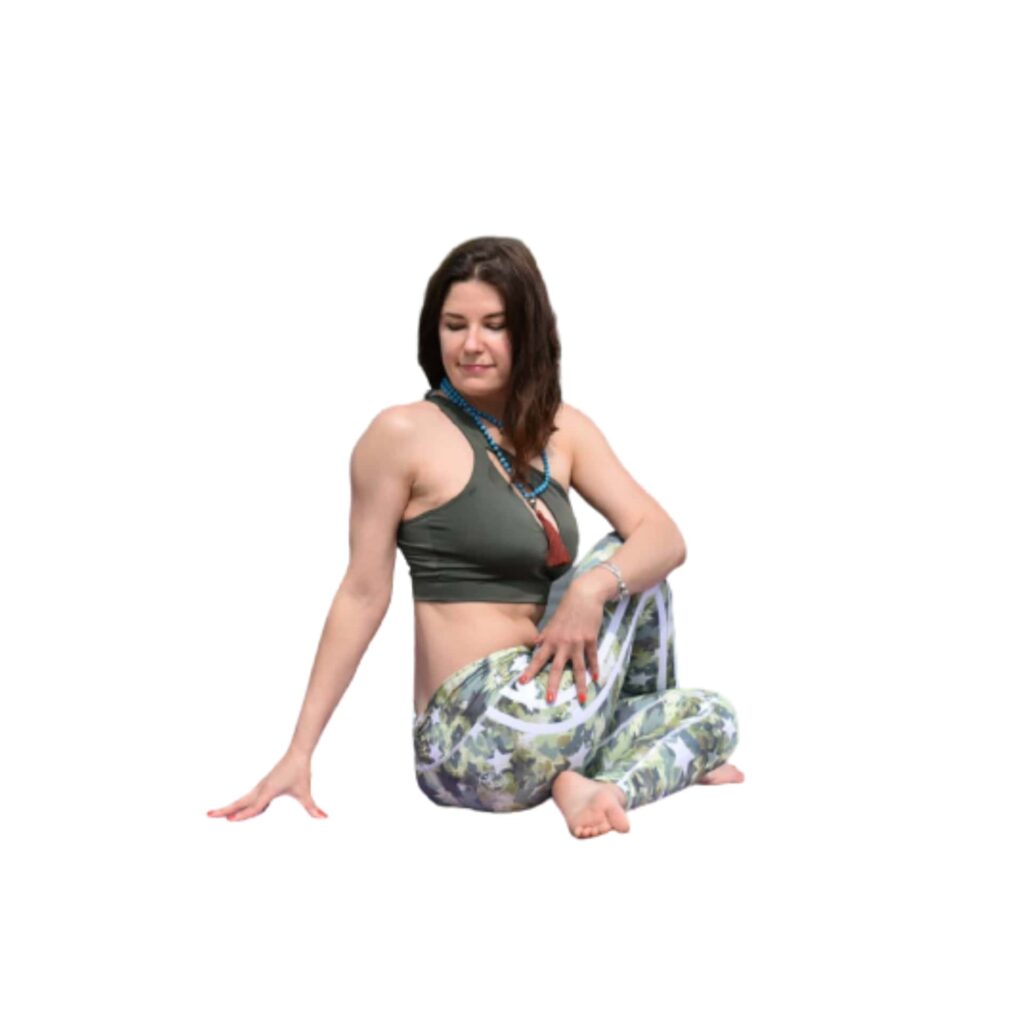
Known as: Spine Twist, Matsyendrasana, Sage Marichi Pose
Focus: Spine
Level: Beginner
Total Time: Up to 60 seconds
Indications: Sciatica, Neck pain, Lower backache, Second trimester pregnancy, Hips
Contraindications: Menstruation or sleeplessness, High blood pressure or low blood pressure, Headache, Diarrhea, Insomnia, Back pain or sore from a surgery
The spine twist shows agility of the spine and strengthens the shoulders, neck, and hips. This yoga pose releases the muscles of the lower back, provides relief to back pain, and stiffness between the vertebrae, is very useful for sciatica and slipped discs.
It massages the abdominal organs, relieve stress, and help manage mental health issues such as anxiety and depression, and with digestion. Pregnant women may find it therapeutic to perform during their second trimester.
How to do:
- Start by sitting in Sukhasana (Easy Pose). Cross the right knee over or over the left, bringing the feet in line with the hips.
- Lift the right knee to place the soul of the right foot on the mat on the outside of the left knee.
- Place the right hand on the floor on the outside of the right hip for support. Make sure you sit on both sit bones in the evening.
- Inhale and raise the left hand towards the ceiling. Exhale and bring the left elbow to the outside of the right knee. Press the knee and elbow together to create some resistance.
- While looking at the right shoulder, turn the head to the right. Make sure you don’t strain the neck.
- Breathe in as you hold the pose, lengthening each inhale and gently twisting a little more with each exhalation.
- To come out of the pose, inhale to reach the right hand and relax the body. Exhale and come back to the center. Repeat on the other side.
9. Sphinx Pose (Salamba Bhujangasana)

Known as: Sphinx Pose, Salamba Bhujangasana, Niravalasana
Focus: Spine, Invigorates the kidneys, Nervous system, Core body
Level: Beginner
Total Time: 6 to 10 seconds
Indications: Depression, Fatigue, Abdominal organs
Contraindications: Headache, Chronic injury to the back, Fractured ribs or wrists, or Recently underwent abdominal surgery, Pregnant woman
Sphinx Pose (Salamba Bhujangasana) is good to help individuals suffering from issues related to any part of the spine. This yoga pose helps relieve stress and in a therapeutic way to relieve back pain or neck pain when done under the guidance of a yoga teacher.
In the process of stretching the shoulders, abdomen, lungs, chest, lungs, it strengthens your spine, back, arms, and helps in tightening the gluteus muscles (buttocks). The tightening of these muscles supports your hips, spine, and pelvis.
How to do:
- Lie on your stomach, forearms flat on the floor, elbows under shoulders, chins on the floor and feet together.
- Press your forearms down to the floor and inhale and lift your head and chest off the floor, keeping your neck in line with your spine.
- Pull on your knee cap, squeeze your thighs and buttocks, engage the core ligament, and press your pubic bone down into the floor.
- Keep your elbows by your sides and use your arms to lift you even higher. Drop your shoulders down and back and press your chest forward. Draw your chin toward the back of the neck and gaze at your third eye point.
- Breathe in and hold for 6 to 10 breaths.
- To release yourself from the pose, exhale and slowly lower your chest and head to the floor. Turn your head to one side, slide your arms along the body and relax.
10. Cobra Pose (Bhujangasana)
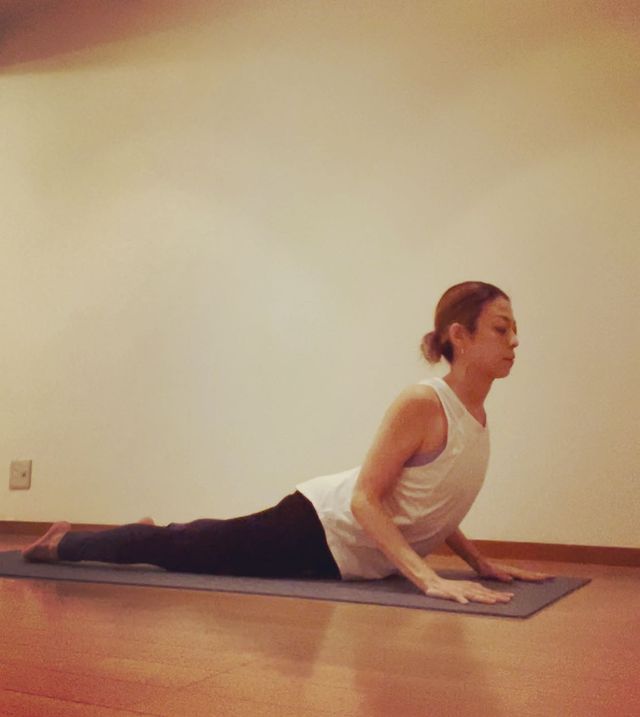
Known as: Cobra Pose, Bhujangasana
Focus: Spine, Shoulders, Abdomen, Lungs, Chest
Level: Beginner
Total Time: up to 30 seconds
Indications: Asthma, Depression, Backache, Anxiety
Contraindications: Major back injury, Headache, Pregnancy, Carpal Tunnel Syndrome, During an asthmatic attack, Hernia
Cobra pose (Bhujangasana) improves depressive symptoms. 1 2
This yoga pose enhances the mobility of the spine, builds strength in the spine, opens the shoulders, abdomen, lungs, and chest.
The pose can help improve low back pain, the anxiety that comes with chronic pain. 3 4
It also helps menopausal women to experience better sleep. 5
How to do:
- Stand on the stomach with the feet hip-distance apart and the hands near the ribs.
- Extend the big toes straight back and press with all ten toes to activate the quadriceps.
- Roll the inner thighs up toward the ceiling to widen the lower back.
- Pressing lightly with the hands, begin to lift the head and chest, rolling the shoulders back and down.
- Keep the back of the neck tall and focus on lifting the sternum instead of lifting the chin.
- Keeping the shoulders away from the ears, straighten the arms, and keep at least a slight bend in the elbows.
- To exit the pose, drop back onto the mat.
11. Locust Pose (Salabhasana)
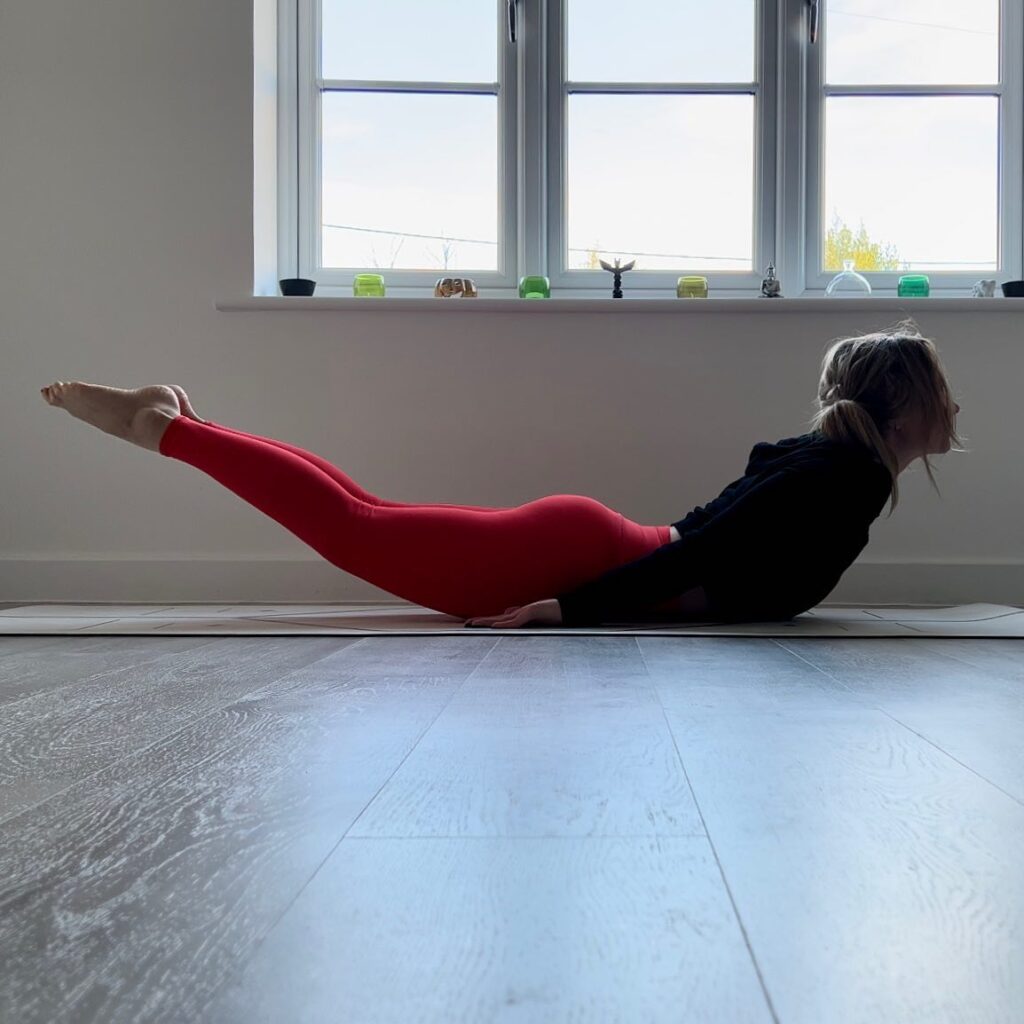
Known as: Locust Pose, Salabhasana, Shalabhasana, Salambhasana
Focus: Spine, Entire back, Mobility, Thighs, Legs, Buttocks
Level: Beginner
Total Time: Up to 60 seconds
Indications: Lower back pain, Tone of abdominal organs, Constipation, Gas, Exhaustion, Stress, Fatigue, Breathing capacity
Contraindications: Recent or chronic back or neck injury, Headache
Locust Pose (Salabhasana) fights stress, improves posture, mobility, and builds strength of the back muscles, especially the support muscles in the spine. This is good yoga for back pain, it can counteract slouching as well as back of arms, legs, and hips. This pose also stretches the thighs, chest, abdomen, and shoulders.
How to do:
- Begin on the stomach with the feet together and the hands behind you, palms reaching down.
- Extend the big toes straight back and press with all ten toes to activate the quadriceps.
- Roll the thighs up toward the ceiling to widen the lower back.
- Keeping the hands lightly on the mat, lift the head and chest and the legs up, leading the inner thighs.
- Roll the shoulders back and up off the floor. Keep the back of the neck tall and focus on lifting the sternum instead of lifting the chin. Don’t hold the glutes.
- Release slowly to come out of the pose.
12. Two-Knee Spinal Twist (Jathara parivartanasana)
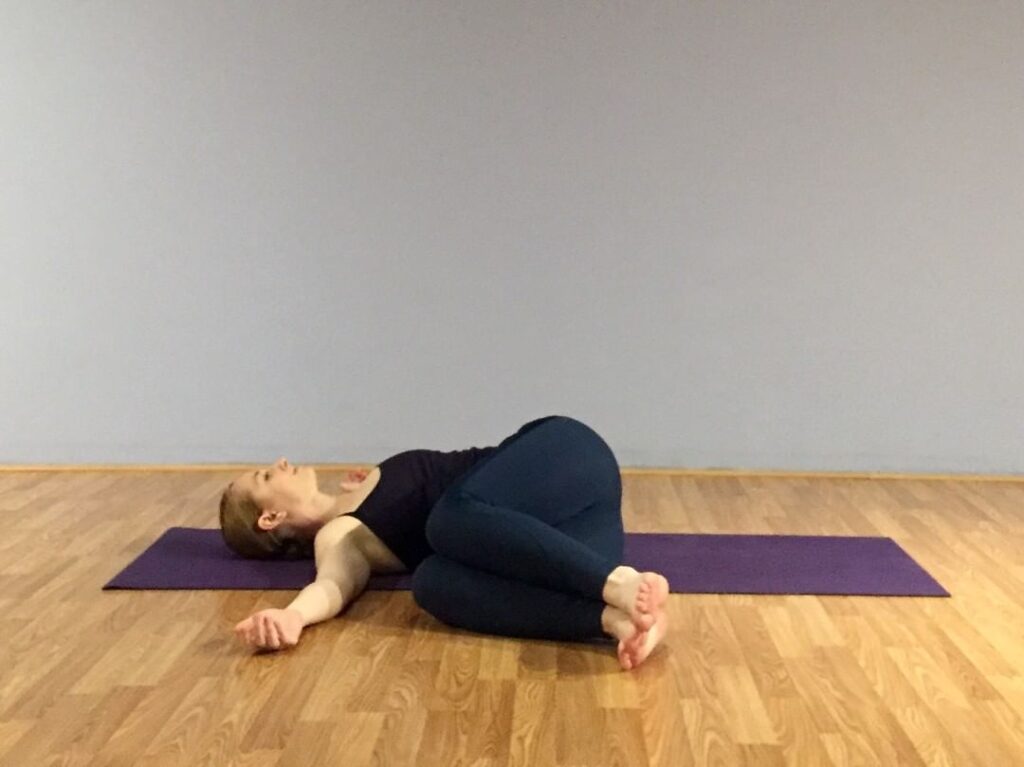
Known as: Two-Knee Spinal Twist, Supine Twist, Jathara parivartanasana
Focus: Spine
Level: Beginner
Indications: Lower back pain, Internal organs, Constipation, Digestion
Contraindications: Major back injury, Knee
Two-Knee Spinal Twist Pose is a restorative posture that improves your digestion and encourages mobility and movement throughout the spine and entire back, increasing your self-esteem and confidence. This yoga pose stretches the back muscles, realigns and lengthens the spine, and hydrates the spinal disks and offers a great pain reliever for the entire back, as well as the neck.
How to do:
- Start by lying on your back with your knees drawn into your chest and your arms extended to the side.
- Gently lower your legs to the left side while keeping the knees as close together as possible.
- You can modify it by placing a pillow under your both knees or in between your knees. And you may also use your left hand to gently press down on your knees.
- Keep the neck straight, or turn it to either side, focus on breathing deeply in this position.
- Repeat this process on the opposite side.
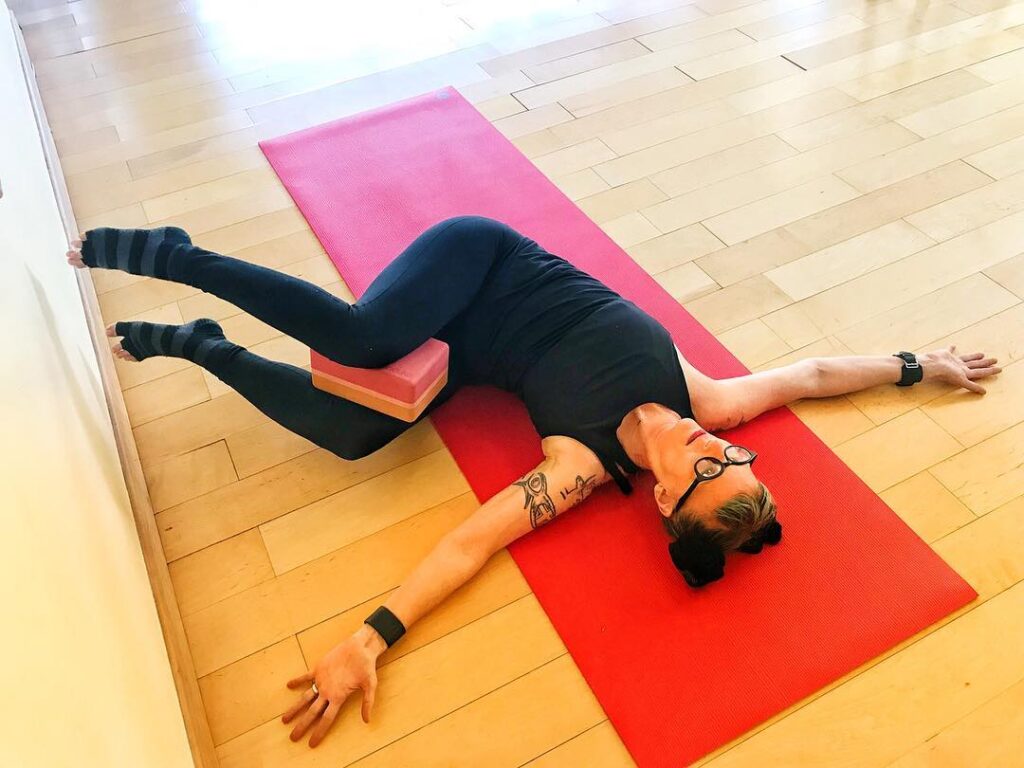
During pregnancy: It can be modified during pregnancy by placing a pillow between the knees for extra support. If your knees do not touch the ground, a pillow can also be placed under the knees.
13. Standing Half-Forward Bend Pose (Ardha Uttanasana)
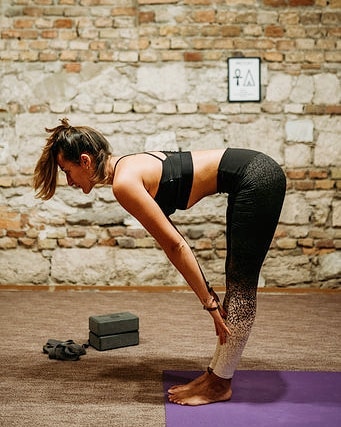
Known as: Standing Half-Forward Bend Pose, Ardha Uttanasana
Focus: Back, Quads, Glutes, Back, Hamstrings
Level: Beginner
Total Time: 30 to 60 seconds
Indications: Liver, Kidneys, Digestion, Insomnia, Core, Erector spinae, Torso
Contraindications: Neck injury, Herniated disc, Joint pains
The Standing Half-Forward Bend Pose strengthens the quads, glutes, back (especially the erector spinae muscles), core muscles, and improves your posture. It stretches the hamstrings, calf muscles, and stretches the front and rear torso.
Practicing this yoga pose offer relief back pain and stimulates the abdominal organs and belly, improving digestion. As part of the Sun Salutation sequence, standing half-forward bend pose also helps to teach the linking of breath with movement — an action that soothes and calms the mind.
How to do:
- Begin in Standing Forward Bend Pose (Uttanasana).
- Root down through your legs, engage legs, draw your lower abs up and up, and use back muscles to bring the upper body parallel to the floor.
- Draw your shoulder blades down and build a length through your spine, from the tailbone to the top of the head.
- Place the hands on the shins, or the fingers on the floor. You can also use blocks.
- Look forward, keeping the back of your neck long, open the front of your chest.
Individual with certain conditions should be mindful throughout their yoga practice.
- For pregnant women, to avoid compressing your belly, you may need to stand with your legs wider apart, and don’t fold deeper than is comfortable. In the later stages of pregnancy, do not be afraid to leave the posture if it is not comfortable for you.
- People with sciatica, or other lower back problems, can try to turn their toes in to make the pose more comfortable.
- Balance problems or are prone to falls people can use assistance, such as a chair, wall, or the physical support of another person, to prevent their injury.
14. Revolved Head To Knee (Parivrtta Janu Sirsasana)
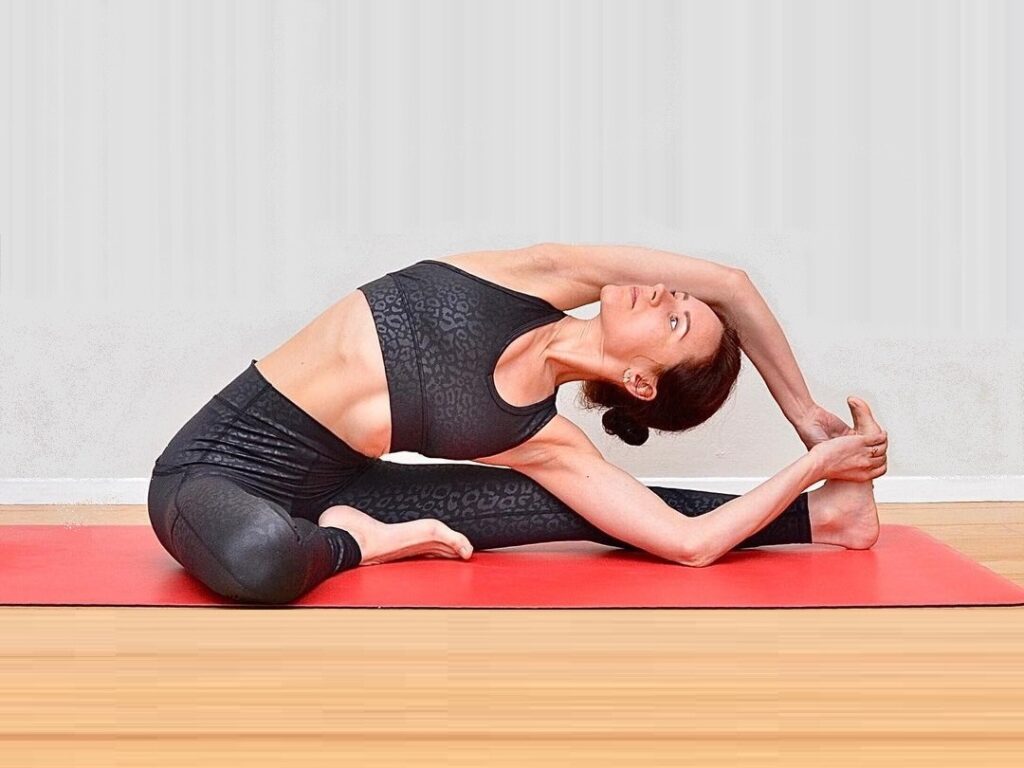
Known as: Revolved Head-to-knee Pose, Parivrtta Janu Sirsasana, Seated Side Stretch Pose, Parsva Upavista, Parsva Upavishta
Focus: Spine, Lower back,
Level: Intermediate
Total Time: Up to 60 seconds
Indications: Backache, Headache, Improve digestion, Liver, kidney function, Insomnia, Exhaustion, Rib cage, Breathing capacity
Contraindications: Diarrhea, Pulled hamstring, Herniated disk
The Revolved Head to Knee pose stretches the spine, shoulders, and hamstrings. It stimulates the abdominal organs, such as the liver and kidneys, and improves overall digestion.
It is a good yoga pose for back pain, neck pain, trouble sleeping, headache, exhaustion and improving breathing capacity.
How to do:
- Begin in Dandasana (Staff Pose).
- Open your right leg out to the side. Bend your left knee and bring your heel towards the waist.
- Land through your sit bones and expand as you inhale through the crown of your head. Engage the outstretched right leg. As you exhale, twist your upper body to the left and step one side toward your right leg.
- Weave the lower ribs inward, and gently roll the rib cage up.
- Bring your right elbow towards your right knee or the floor.
- Raise your left hand and bring it above your head. If you can reach it without tension, grab your right foot with both hands.
- Slightly bend your chin and turn your head towards the ceiling.
- Stay in the pose for 5 deep breaths. Reverse the process to come out of this pose.
- Stay in Dandasana (Staff Pose) for a few moments to allow the body to settle before switching legs and repeat on the other side.
15. Reclining Hero Pose (Supta Virasana)
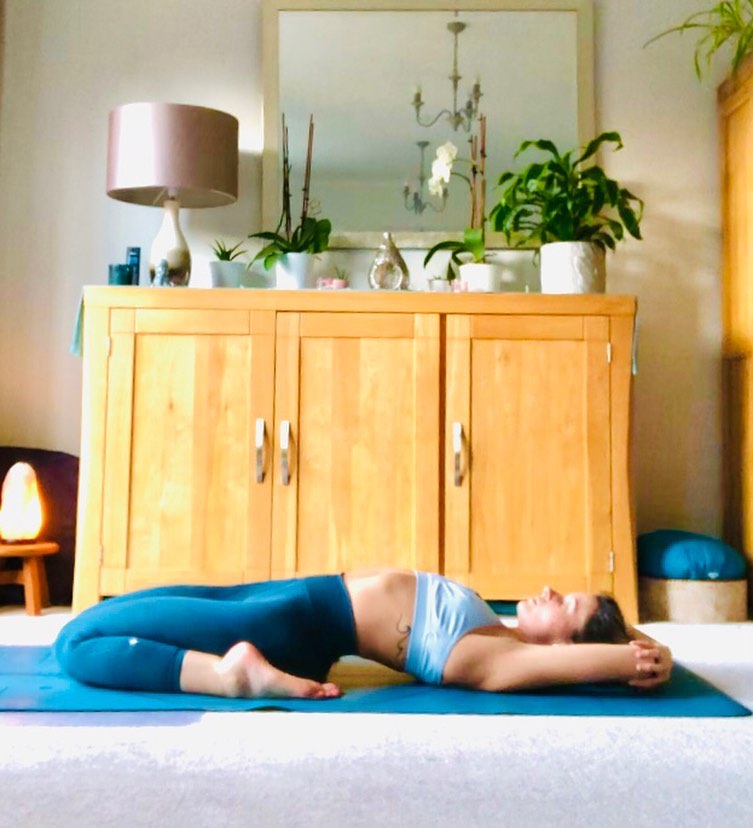
Known as: Reclining Hero Pose, Supta Virasana, Fixed-Firm Pose, Saddle Pose
Focus: Arches, Feet, Knees, Legs
Level: Intermediate
Total Time: Up to 60 seconds
Indications: Respiration, High blood pressure, Varicose veins, Sciatica, Infertility, Insomnia, Flat feet, Acidity, Arthritis, Headache
Contraindications: Injury to Back, Knee, or Ankle
Reclining Hero Pose (Supta Virasana) greatly improves your digestion, relaxing the muscles in the feet, knees and tired legs.
It relieves back pain, insomnia, infertility, headache, flat feet, acidity, diarrhea, arthritis, respiratory conditions, high blood pressure and gastritis.
Build strength in the arches and stretch the abs, thighs, and ankles.
How to do:
- Begin by kneeling. Spread the legs apart to sit between them.
- Do not sit on your feet. Keep the feet outside the hips. The toes should be pointing back, and the tops of the feet should be pressed to the floor.
- Keep the knees no wider than the hips. Now slowly lie down on the back using the hands first, then the elbows. (If you feel pain or discomfort in your back or knees, stop practicing the pose.)
- Stay in this posture for 60 seconds. Then slowly raise the body, using the hands to come back to the starting position.
- Published online 2014 Sep 3. DOI: 10.1016/j.apnu.2014.08.014. PMCID: PMC4254446. NIHMSID: NIHMS625499. PMID: 25457687. Potential long-term effects of a mind-body intervention for women with major depressive disorder: Sustained mental health improvements with a pilot yoga intervention. Patricia Anne Kinser, PhD, WHNP-BC, RN, corresponding author R.K. Elswick, PhD, and Susan Kornstein, MD.[↩]
- PLoS One. 2017; 12(3): e0173869. Published online 2017 Mar 16. DOI: 10.1371/journal.pone.0173869. PMCID: PMC5354384. PMID: 28301561. Treating major depression with yoga: A prospective, randomized, controlled pilot trial. Sudha Prathikanti, Renee Rivera, Ashly Cochran, Jose Gabriel Tungol, Nima Fayazmanesh, and Eva Weinmann.[↩]
- Med Sci Monit. 2016; 22: 3238–3247. Published online 2016 Sep 13. DOI: 10.12659/MSM.896599. PMCID: PMC5031167. PMID: 27619104. A Randomized Controlled Trial to Assess Pain and Magnetic Resonance Imaging-Based (MRI-Based) Structural Spine Changes in Low Back Pain Patients After Yoga Practice. Shirley Telles, Abhishek K. Bhardwaj, Ram K. Gupta, Sachin K. Sharma, Robin Monro, and Acharya Balkrishna.[↩]
- PLoS One. 2020; 15(9): e0238544. Published online 2020 Sep 1. DOI: 10.1371/journal.pone.0238544. PMCID: PMC7462307. PMID: 32870936. Yoga compared to non-exercise or physical therapy exercise on pain, disability, and quality of life for patients with chronic low back pain: A systematic review and meta-analysis of randomized controlled trials. Feilong Zhu, Conceptualization, Formal analysis, Methodology, Software, Writing – original draft, Writing – review & editing, Ming Zhang, Conceptualization, Funding acquisition, Dan Wang, Formal analysis, Investigation, Qianqin Hong, Methodology, Cheng Zeng, Formal analysis, Software, and Wei Chen, Conceptualization, Methodology, Supervision, Writing – review & editing.[↩]
- Clin Interv Aging. 2014; 9: 1913–1921. Published online 2014 Nov 7. DOI: 10.2147/CIA.S70064. PMCID: PMC4232038. PMID: 25422589. Complementary health approach to quality of life in menopausal women: a community-based interventional study.[↩]


