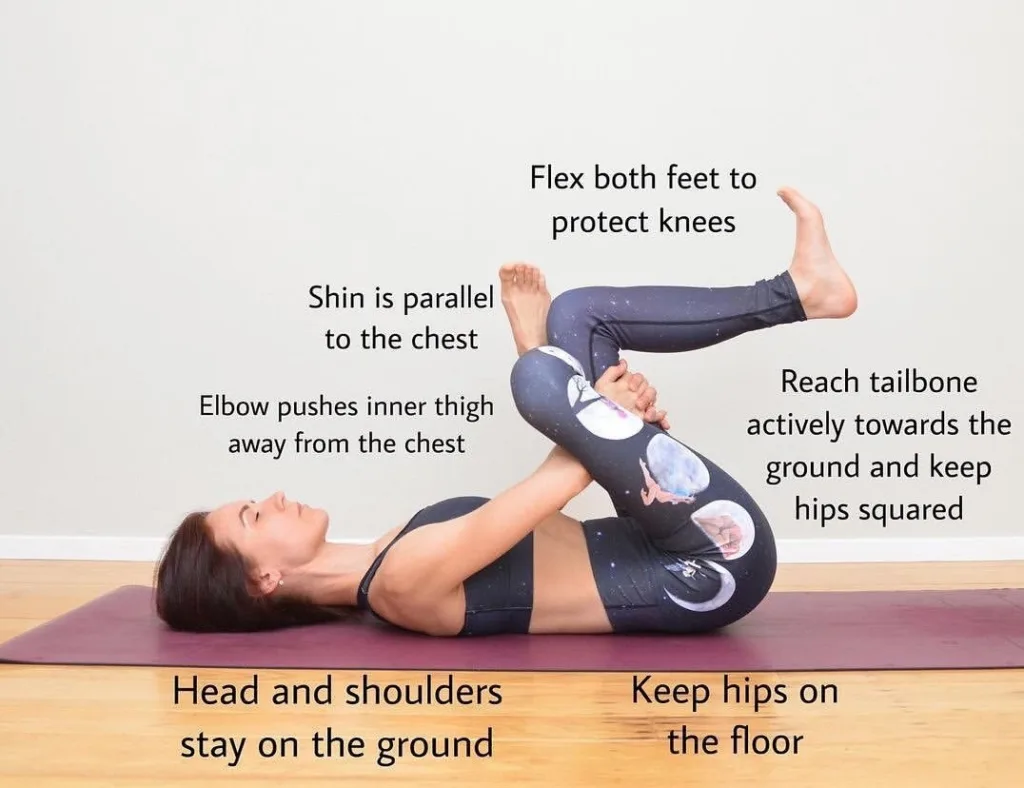
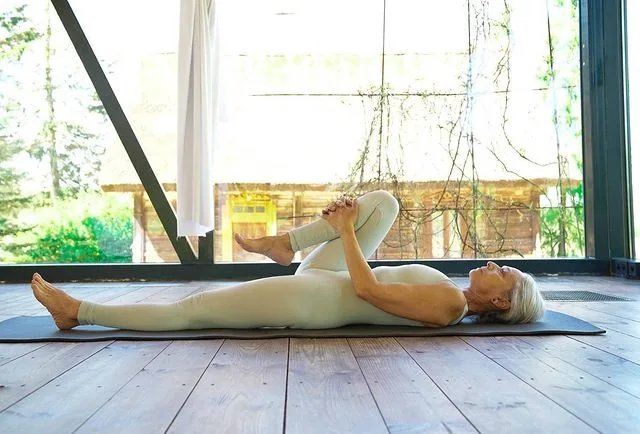
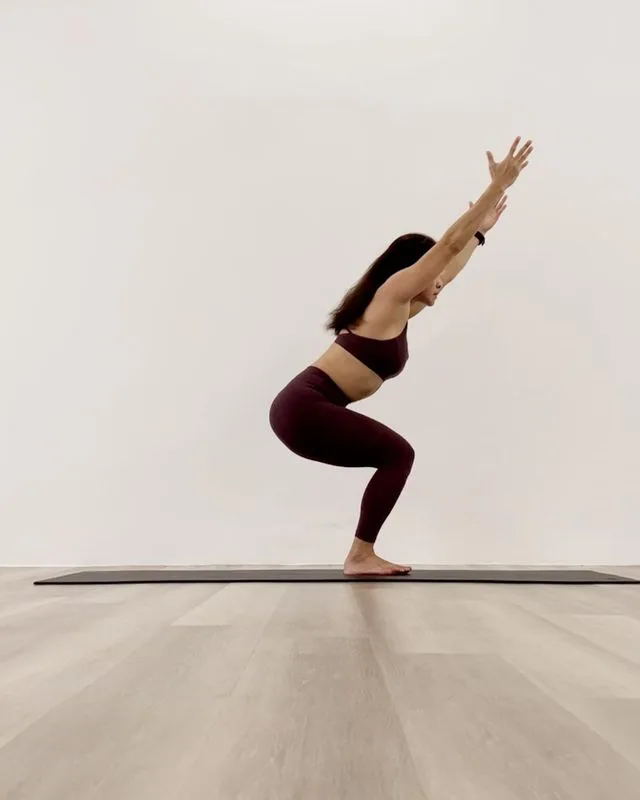
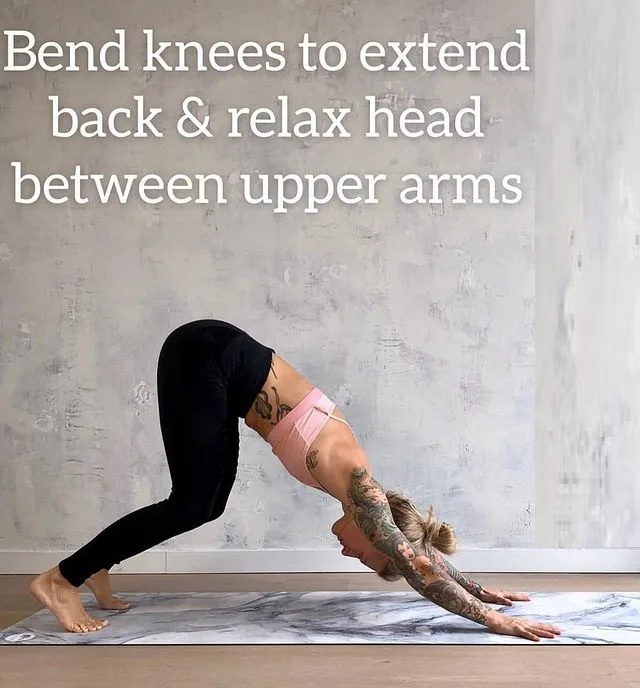
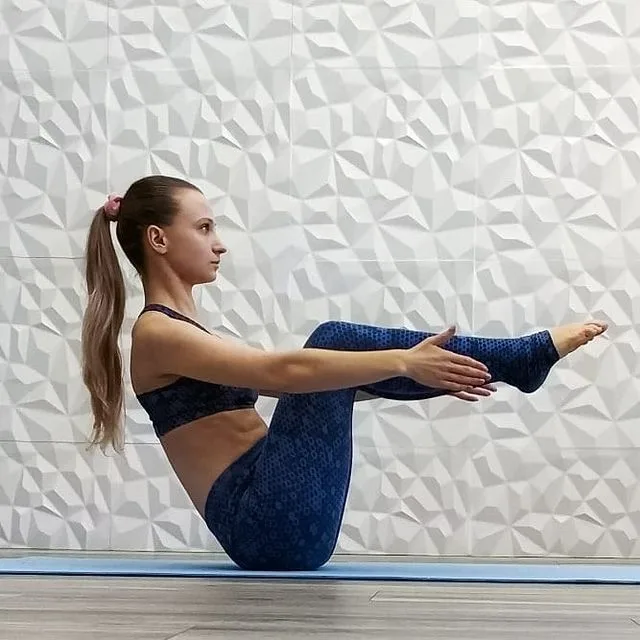
Stress Relief Pranayama and Yoga Poses — practicing these yoga not only helps to stress relief but also lower your blood pressure and relieves the symptoms of depression and anxiety.
It is not only a great stress reliever, but is also effective in relieving physical stress.
For most of us, stress is present on a daily basis. In some cases, it can be mild, in others it can be unbearable, so finding ways to relief stress and prevent it from creeping deeper into your life is a must. One way to relief stress is to practice yoga.
Yoga, meditation and other mind-body exercises enable your body and brain to deal with stress better and improve overall health and well-being.
How yoga helps you in stress relief?
Yoga – a mind-body practice – is considered one of a number of complementary and integrated health approaches. Yoga brings together physical and mental disciplines that can help you achieve peace of body and mind. It can help you to calm and manage stress and anxiety.
Many people turn to yoga when feelings of anxiety begin to subside in or during a state of stress. You may find that focusing on your breath and ability to be present in each pose can help calm negative mental gossip and boost your overall mood.
In the 2012 National Health Interview Survey, more than 94% of people doing yoga reported that it helped them relief stress. 1 Exercise is a very useful way to relieve stress, but is different from yoga spinning classes or weight lifting in that it combines both physical fitness with an underlying philosophy of self-compassion and awareness.
One of the main concepts in yoga is non-judgment towards both ourselves and others, which is a powerful tool for stress relief because a lot of our stress comes from us being disappointed by ourselves or others.
The basic principle of yoga is that your body and mind are one and connected. Stress in one domain will affect another and vice versa. Many of us live either in our mind or body, which creates imbalances and even lack of awareness.
For example, people with very analytical careers may spend a lot of time in their minds, and may not realize how much stress is stored in their bodies. Or if you are an athlete, you can be conscious of your body, but can benefit from being more aware of your mental state. Wherever you fall on this spectrum, yoga helps in creating and balancing between your body and brain.
From where to start practicing?
When you are stressed or anxious, your body and mind may feel stressed and excited. Taking a few minutes to breathe deeply and stretch your body helps to improve your mood and make you feel lighter, calmer and more emotionally balanced. If you can use a little break from the demands of life, do these relaxing yoga flow designed to welcome peace and tranquility.
Meanwhile, here it is a gentle yoga flow for pursuing our inner peace:
- I’d suggest you to start with pranayama (can be a simple nostril breathing exercise), then follow with a mild level of thorough full body warm up, such as 3 sets of Sun Salutations.
- Move with mindful breathing, hold on the pose for 8-10 breaths or as long as your body says so, and do both sides.
- For some modifications and options, you can use yoga blocks, blankets, bolsters, straps, or any yoga props needed.
- Let’s get something comfy and nestle in peace!
Pranayama – Deep Breathing Stress Relief Yoga Exercises
Pranayama has a set of breathing techniques that convert the breath to give beneficial results that relief stress. These are some of them.
- Bhastrika Pranayama
- Kapalbhati Pranayama
- Bahya Pranayama
- Ujjayi Pranayama
- Anulom Vilom Pranayama
- Bhramari Pranayama
- Udgeeth Pranayama
- Pranav Pranayama
1. Bhastrika Pranayama
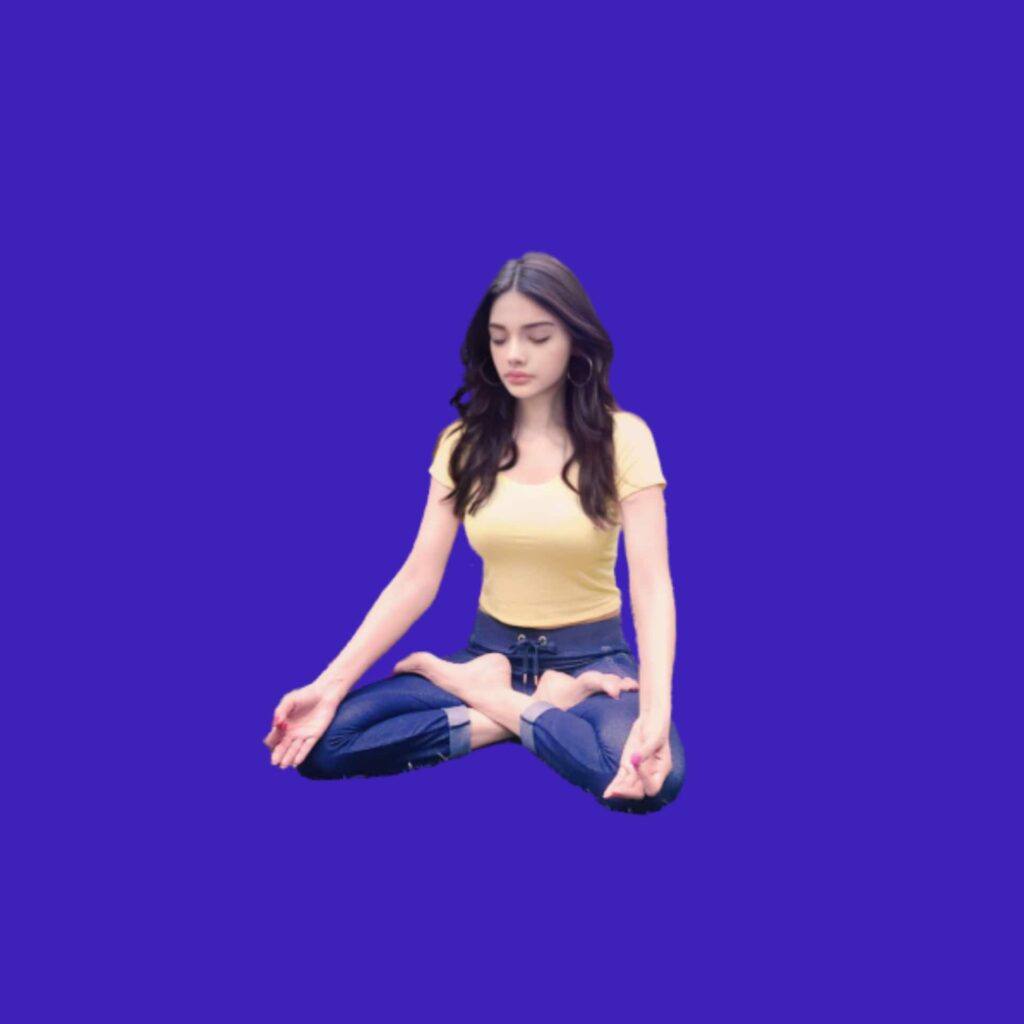
This makes the lungs strong and the heart and brain get pure vital air and they get health benefits. Those who have high blood pressure, heart disease or asthma should not do Bhastrika Pranayama at high speed.
How to do:
- Sit on your yoga mat in Vajrasana or Sukhasana (cross-legged position). Pranayama can be more beneficial in Vajrasana because your spine is erect and diaphragmatic movement is better.
- Makes fists and bend your arms, placing them near your shoulders.
- Inhale deeply, raise your arms straight up and open your fists.
- Exhale a bit forcefully, bring arms down next to shoulders and close your fists.
- Continue for 20 breaths and relax with palms on your thighs. Take some normal breaths and continue for two more rounds.
2. Kapalbhati Pranayama
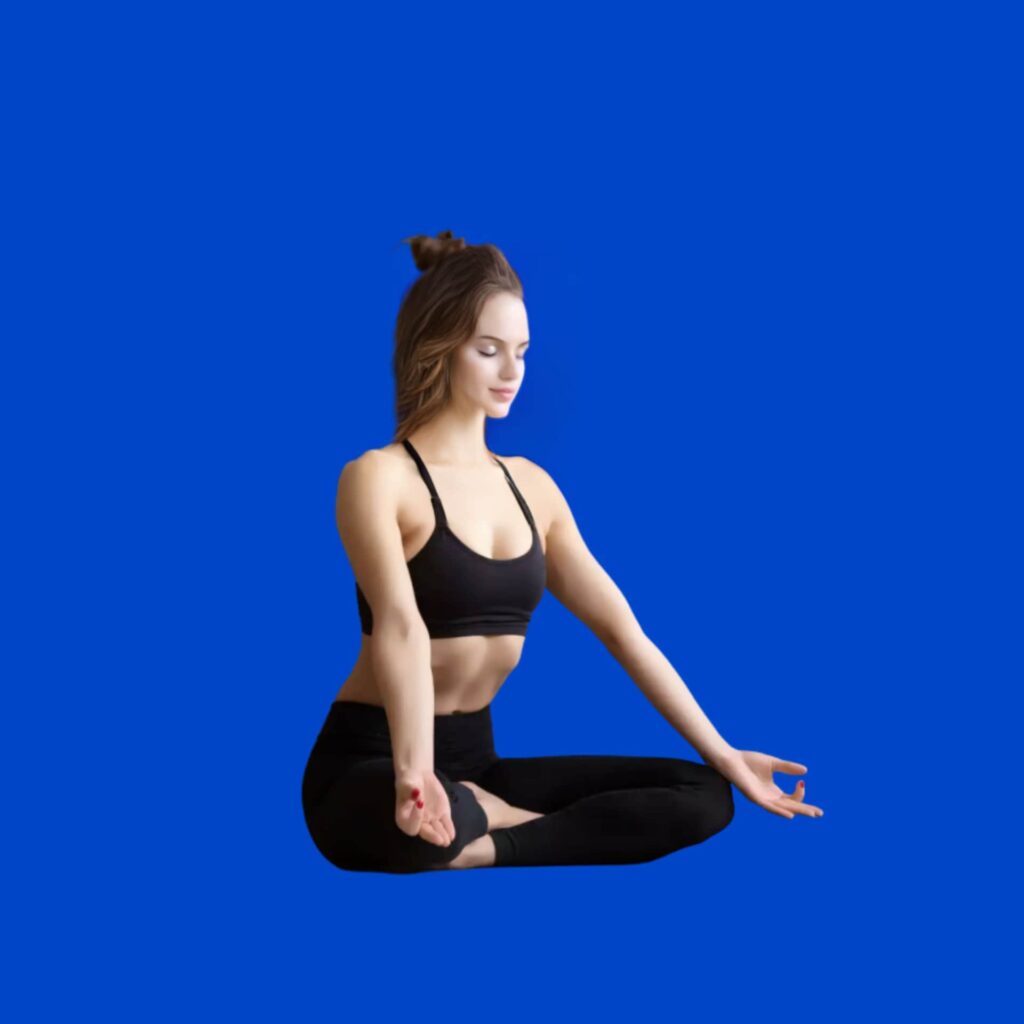
It is equally important to keep in mind that if you experience fatigue, blurred vision or nausea then you should not do Kapalbhati Pranayama. A single study has also reported a risk of pneumothorax due to the practice of cranial insufficiency, therefore, adequate care should be taken.
If you are affected by the following conditions or disorders should avoid its practice:
- High blood pressure (Hypertension)
- Epistaxis or a bleeding nose
- Migraine
- The strokes
- Gastric ulcers
- Epilepsy
- Vertigo
- Cardiac (Cardiovascular) disorders
- Hernia
How to do:
- To begin, sit in a comfortable position where your spine is straight, and your stomach is not constricted. Some options include: (1) An upright position, such as Easy posture (Sukhasana), (2) In Hero Pose (Virasana) sitting with his knees bent and high heels under his thighs, (3) Sit on a chair with feet on the floor.
- Inhale deeply through both nostrils.
- Place your hands on your knees, palms down.
- Bring your awareness to your lower abdomen. To increase your awareness, you can place your hands on your lower abdomen, one on top of the other, instead of your knees.
- Contract your lower abdomen or use your hands to gently press on this area, exhaling breath in a short burst.
- As you quickly release contractions, your breathing should be automatic and passive – your focus should be on exhalation.
- Start slowly, aiming for 65–70 contractions per minute. Slowly increase speed, aiming for 95–105 exhalation / inhalation cycles per minute. Always go at your own pace and stop when you feel faint or dizzy.
- After a minute of practice, inhale deeply through the nostril, and then slowly exhale through your mouth. Depending on your level of experience, you can repeat the exercise.
3. Bahya Pranayama
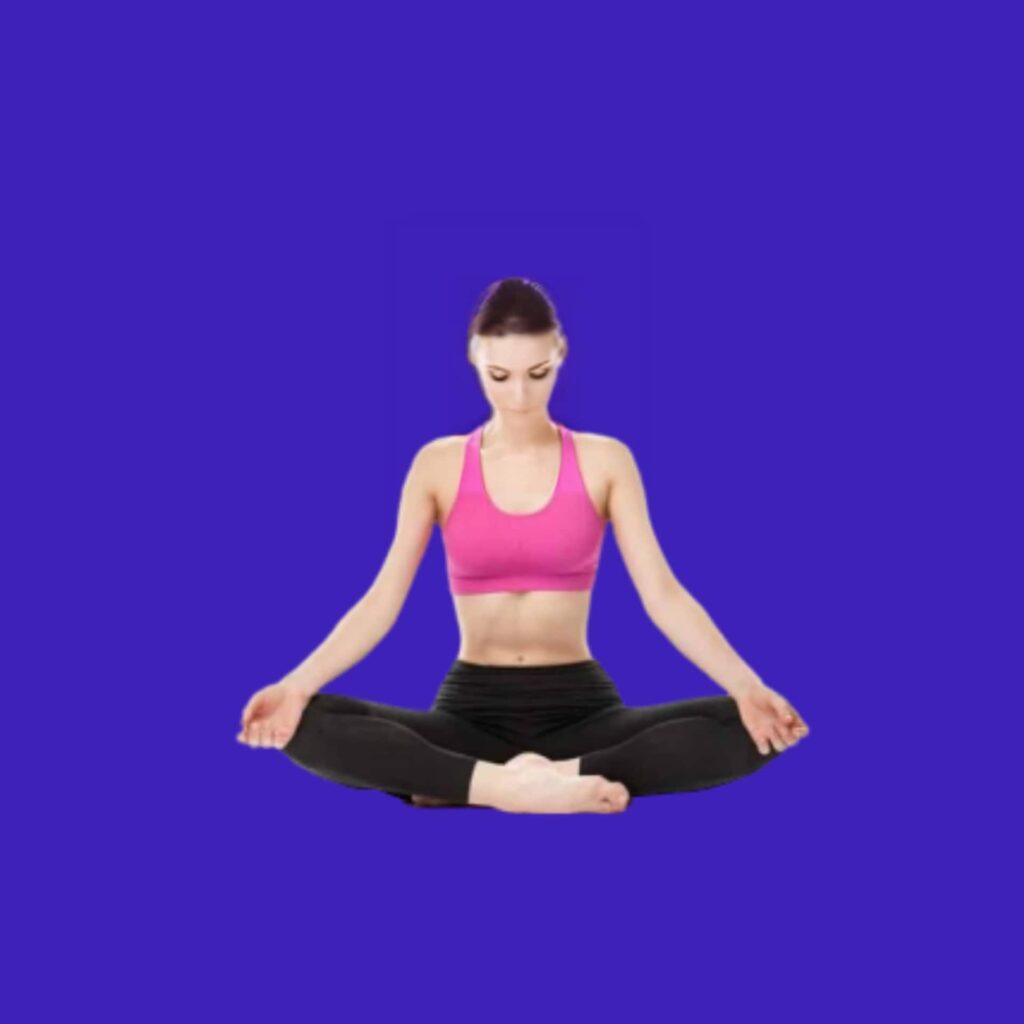
It is a three-step process of exhaling, exhaling and maintaining the breath. This is an important breathing technique.
A person suffering from high and low blood pressure and heart diseases should not practice Bahya Pranayama. People with Headaches, migraine patients should also not practice it. In the beginning, a person should make the body and mind compatible with other pranayamas by not practicing this pranayama. Bahya Pranayama is a high quality compound breathing exercise.
How to do:
- Sit upright in Padmasana or Vajrasana, breathe deeply and exhale fully.
- While pulling the abdomen up hold your breath there and lift the chest towards the chin and release your neck towards your chest. Hold this position for 5 to 10 seconds. Then, inhale deeply and free your chin and abdomen.
- Repeat this process for about 5 minutes.
4. Ujjayi Pranayama
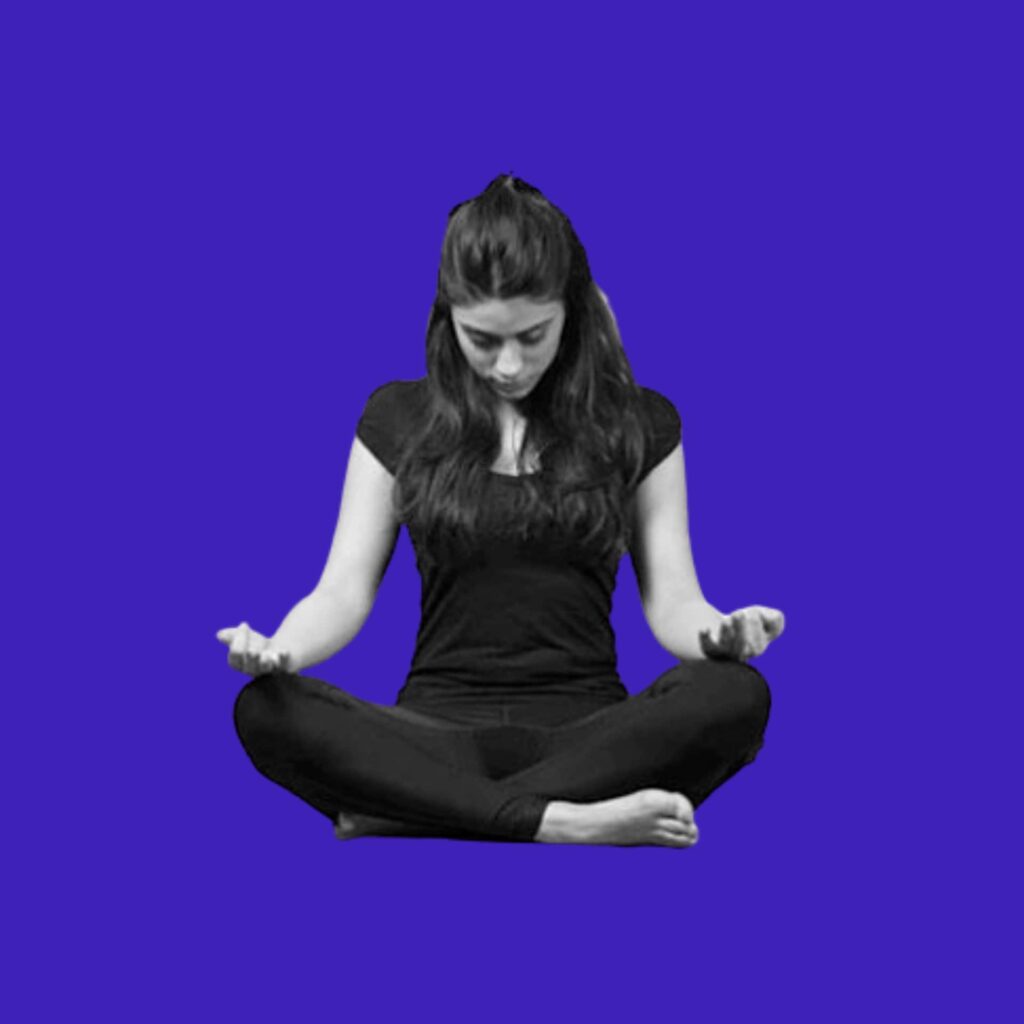
Ujjaya sadhana is done in every posture. The stability, sound, and depth of a bright breath helps to connect your mind, body and soul to the present moment. This integration adds richness and depth to your practice.
Excess oxygen and deep breaths make your physical practice stronger and stronger. Ujjai is especially beneficial for calming the mind. It is considered beneficial for people suffering from stress, insomnia and mental stress.
While practicing Ujjai Pranayama, take care that your throat is not tightened. Do not try bright breathing exercises when you have respiratory conditions like asthma or emphysema. Stop exercising if you faint or feel dizzy. Always work within your own limits and abilities. If you have any medical concerns, talk to your doctor before practicing yoga.
How to do:
- Sit upright with your shoulders away from your ears and close your eyes. To prepare, become aware without trying to control your breath. If you are breathing through your nose then exhale through your mouth and exhale.
- Bring awareness to your throat. On exhaling, begin to tone the back of your throat (your glottis or soft palate), slightly obstructing the passage of air. Imagine that you are fogging a pair of glasses. You should hear a soft hissing sound.
- Once you are comfortable with exhaling, begin applying the same contraction of the throat to the residents. You should hear the sound of soft hersing once again. This is where Sansa’s name comes from: it sounds like an ocean. (It also sounds like Darth Vader.)
- When you are able to control the throat on both breathing and exhaling, close the mouth and start breathing through the nose. Continue to apply the same toning to the throat that you did when the mouth was open. The breath will still make a sound coming in and out of the nose. It is a bright breath.
- Now start using this breath during your practice. If the teacher asks you to move on one breath, make it a bright breath. If you need something extra to support you while holding the pose, remember this breath and apply it.
5. Anulom Vilom Pranayama
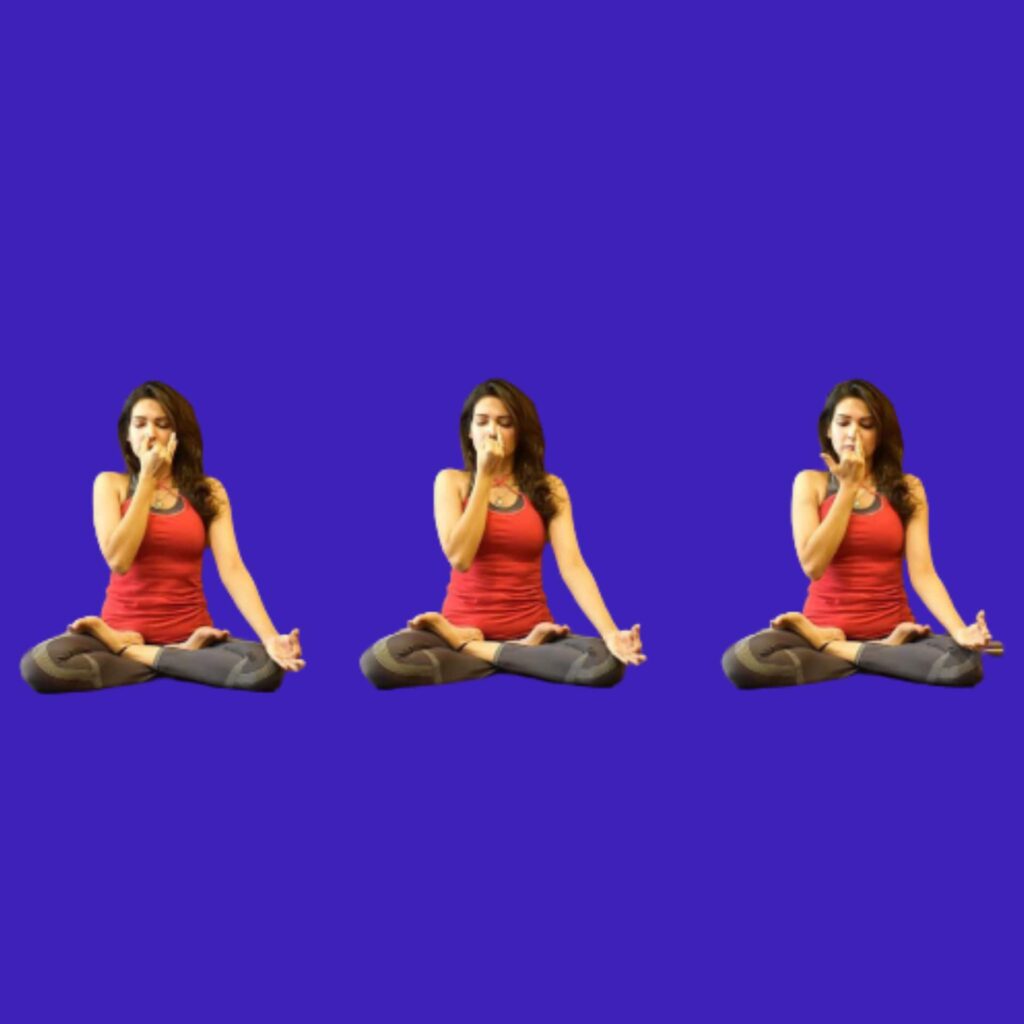
In yoga breathing exercises, Anulom Vilom Pranayama (Alternate nostril breathing) has many physical and psychological benefits, including stress relief and breathing and circulation improvement. There is scientific evidence that supports some of these claims.
How to do:
- Sit upright in Padmasana, Sukhasana or Vajrasana. Keep your back straight and tuck your chin slightly towards your chest. Close your eyes.
- Place your left palm on your left knee and allow it to be upward in the wisdom posture.
- Raise your right hand and place your right thumb towards your right nostril. Inhale deeply, slowly and silently through your left nostril.
- After breathing, press the little finger of your right hand towards your left nostril. Exhale through your right nostril – slowly, deeply and silently.
- Then, inhale through the right nostril. Press the edge of your right nostril with your right thumb and exhale through your left nostril. Which completes one round of anulom antonyms.
- Initially do about 5 rounds, and then increase it as per convenience.
6. Bhramari Pranayama
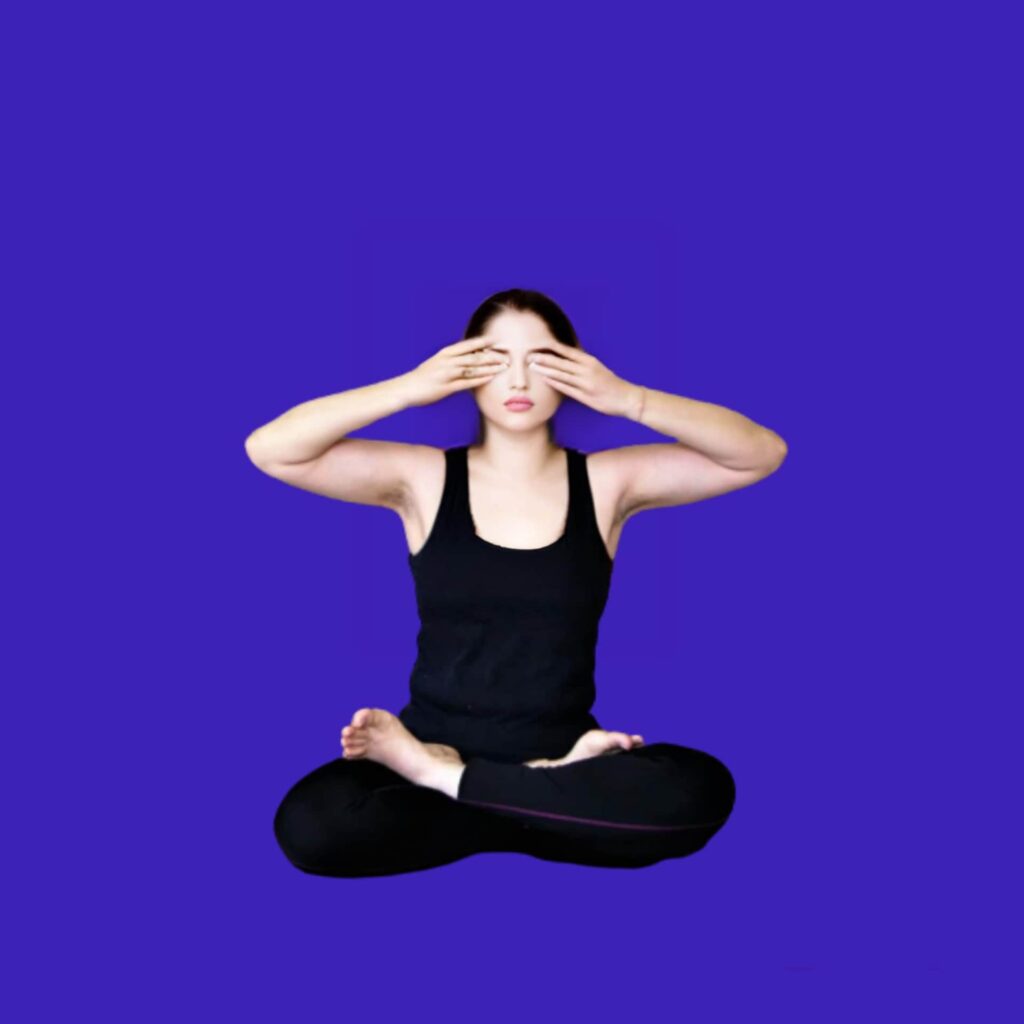
Bee Breathing (Bhramari Pranayama) works on calming the nerves and soothes them especially around the brain and forehead. Humming sound is a natural calming effect of vibration.
How to do:
- Sit upright in Padmasana, Sukhasana or Vajrasana and close your eyes. Keep a light smile on your face.
- Keep your eyes closed for some time. Look at the sensations and inner peace in the body.
- Keep your index finger over your ears. There is a cartilage between cheek and ear. Place your index finger on the cartilage.
- Take a deep breath and as you exhale, gently press the cartilage. You can hold the cartilage or make it in and out with your fingers, making a loud lukewarm sound like a bee.
- You can also make a low pitched sound, but it is a good idea to make high-pitches for better results.
- Breathe again and continue the same pattern 3-4 times.
7. Udgeeth Pranayama
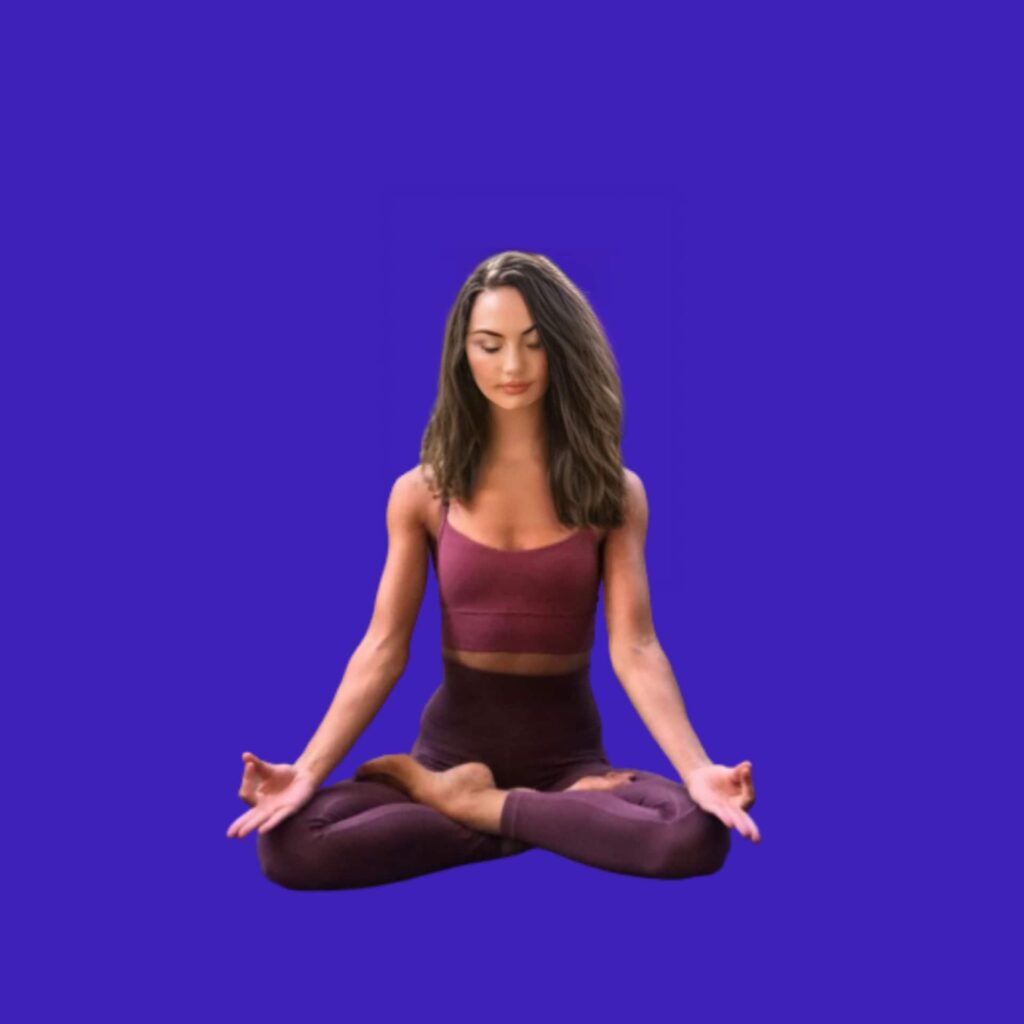
Udgith Pranayama has much the same mechanism as in Bhramari Pranayama (bee breath).
In Udgeeth Pranayama, we chant ”Om” whereas in Brahmari Pranayama we used to generate the hum of a bee (which is similar to the sound of “Om”).
The similarity is that both pranayams can be used as a respiratory exercise to treat bronchial asthma and pulmonary disease.
How to do:
- Sit upright in a comfortable meditative position. You can use Padmasana, Siddhasana, Swastikasana, Sukhasana or Vajrasana or you can also sit on a chair.
- Keep your spine straight and align in the head position. Put your hands on your thighs in “Gyana Mudra“.
- Take a deep breath through your nose, until your diaphragm is completely filled with air.
- Then slowly take the breath out of your nose very slowly. With exhalation, pronounce the word ”Om”.
- While chanting the sound of “O”, “O” must be longer than “M”. (it is to be pronounced as a a a o o o o o o m m m…..).
- Your sound should be audible to you and concentration should be only on your breath.
8. Pranav Pranayama
Pranav pranayama is the simplest pranayama of all, and is the last pranayama according to the “Patanjali Yoga Sutra”. You can also call it 2 or 3 minute instant meditation. People of all age groups can practice Pranav Pranayama.
In this pranayama you have to maintain your concentration on your breathing (breathing and exhaling) or you can concentrate on the word “Om” in your mind while breathing and exhaling, it is your choice whether your breath or “Om” word Have to focus on.
How to do:
- Sit upright in Padmasana, Sukhasana or Vajrasana
- Breathe normally and focus on getting your brain in and out.
- While practicing Pranava Pranayama, imagine that God is everywhere in every particle.
- Practice from 3 minutes to 1 hour according to your available time.
Tip: Bhramari, Udgeeth, and Pranav Pranayama – These three pranayamas will be practiced one after the other without interruption. During these pranayama your eyes should be closed. If possible do all pranayama early in the morning otherwise you can try in the evening too but keep a time gap between your food and pranayama. Practiced Pranayama in fresh air.
Yoga Poses for stress relief (inner peace)
It is about fulfilling yourself where you are? If you are open to practice, then practicing one or two postures for a few minutes per day can make a big impact.
To get the most out of your session, pay attention to the sensations revolving in your body as you come into each pose. Allow yourself to feel and experience emotions.
If you feel that your thoughts are beginning to shatter, then slowly bring your mind back to the mat and continue your practice.
Read on to learn how to do our favorite stress relief (inner peace) yoga postures:
- Accomplished Pose
- Supine figure four
- Bridge pose
- Reclining bound angle pose
- Legs up the wall pose
- Rabbit Pose
- Head to knee pose
- Child’s resting pose
1. Accomplished Pose
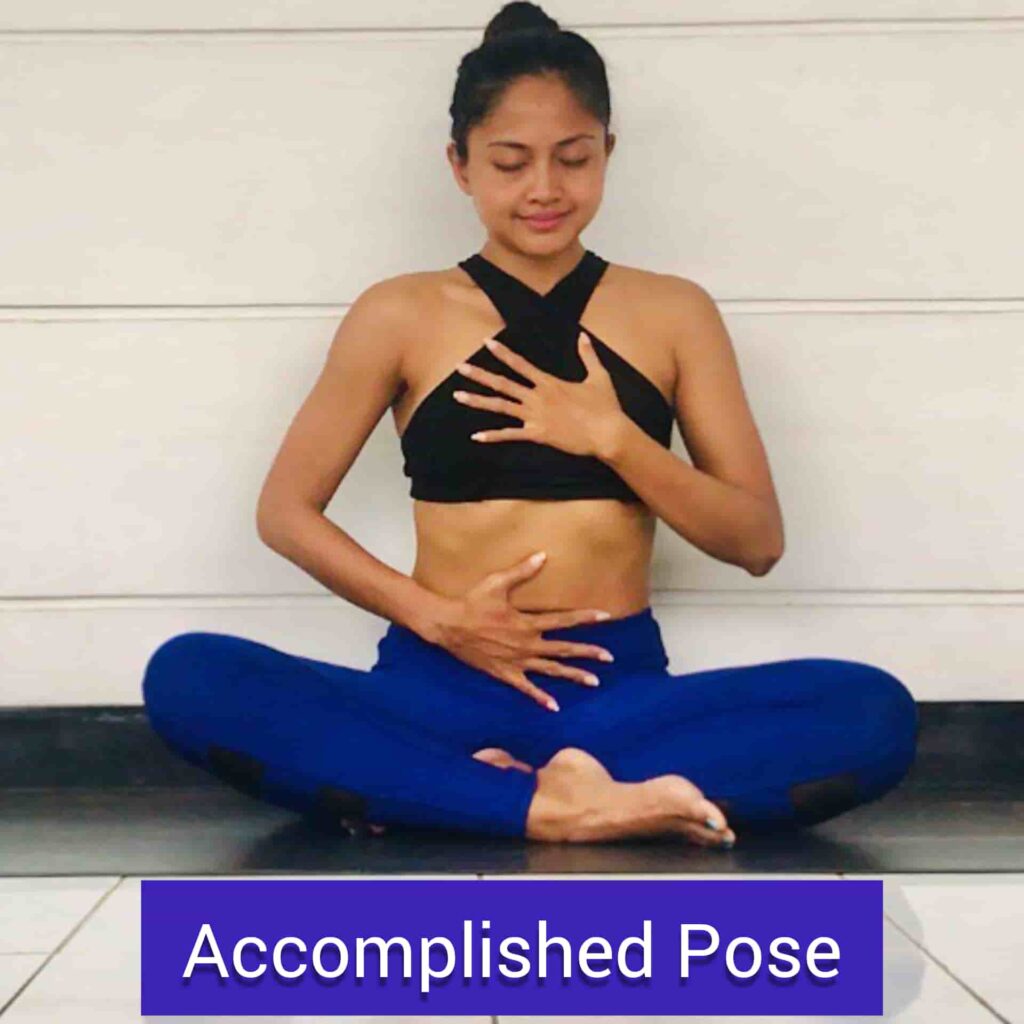
By practicing deep breathing, you will get the most benefit from Accomplished Pose (Siddhasana) by staying in the position for a long time. This allows you to focus on the tight areas of your hips and slowly, through mindful breathing, slowly open the area as you do the pose.
Practicing Siddhasana regularly can help reduce stress levels and reduce symptoms associated with anxiety. Also, sitting in a meditation yoga posture while practicing deep breathing helps bring you to the ground and encourages both physical and mental relief from the daily stresses of life.
How to do:
- Begin by sitting on the floor with your feet straight in front of you and placing your hands on your hands. For additional cushioning, consider sitting on a yoga mat or blanket.
- Bend your left knee and bring your left heel closer to your body through your waist area.
- Bend your right knee and move it towards the front of the left ankle.
- From this position, while exhaling and exhaling, raise your right leg and place it just above your left ankle. Bring your right heel to your waist area. This step should feel comfortable. do not force it.
- Slide the paws of your right foot into the space between the muscles of the left calf. This will help keep your posture stable.
- Take your hands from your sides and place your palms on your knees. Your knees should touch the floor. You can extend your arms straight to the sides and rest your palms back or wrists to your knees, so your palms are upward. If you cannot do this or you experience discomfort, use one of the modifications until your hips have more flexibility.
- Sit with your mouth facing forward. There should be a good, straight line from the top of your head to the floor.
- Stay here and take a deep breath for a minute or more.
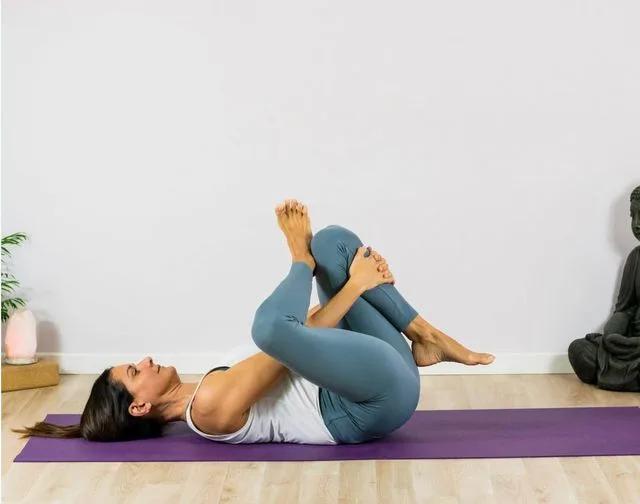
2. Supine figure four
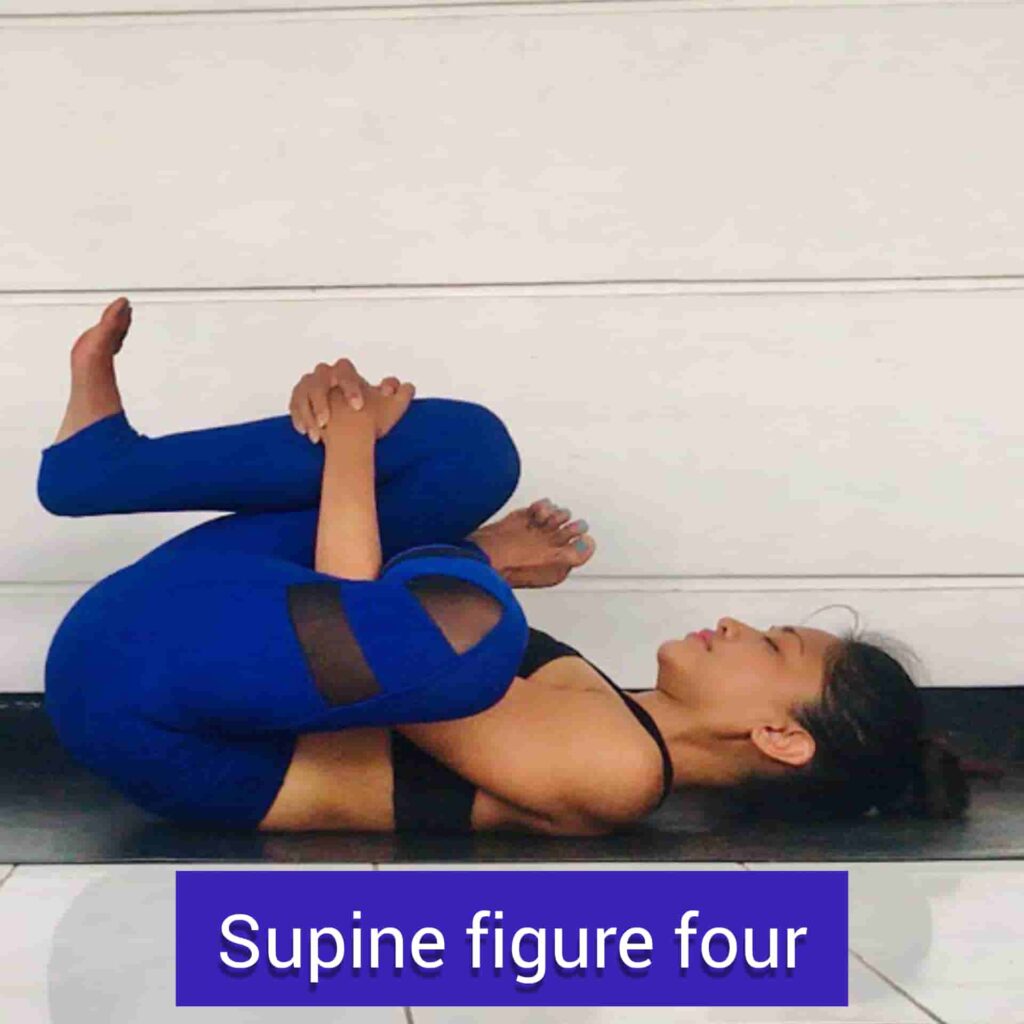
The Supine figure four also known as Eye of the Needle or Dead Pigeon, can help keep your hips and glutes healthy and mobile. There are six different muscles when performing it – the piriformis, the genelus superior, the obturator internus, the genellus inferior, the obturator externus, and the quadratus femoris. This group of muscles helps to rotate the thigh outward at the hip joint.
Due to being close to the sciatic nerve, problems with the piriformis muscle (such as swelling, tightening, or muscle spasms) can irritate the sciatic nerve and cause pain and discomfort in the hip and buttocks – a painful condition called piriform syndrome. Having the piriformis mobile can reduce irritation or compression of the sciatic nerve.
How to do:
- Lie on the back with your feet flat on the floor.
- Cross your right ankle above your left knee and keep your right leg flexed.
- Bring your left knee towards your chest. Reach your right hand through your feet and place your fingers just below the crease of your left knee.
- Using your arms, pull your left knee towards your chest, when you feel a stretch in your right glute and hip.
- Stop there for at least five breaths (although you can hold the stretch for two minutes) then leave and repeat on your left.
Tip: Want to change the intensity of Supine figure four? One of the easiest ways is to change the angle at which you are bending the leg from the knee. More knee bend will increase stretch, and less knee bend will decrease stretch, you can also press your fingers in front of your calf instead of behind the knee for a deeper stretch.
3. Bridge pose
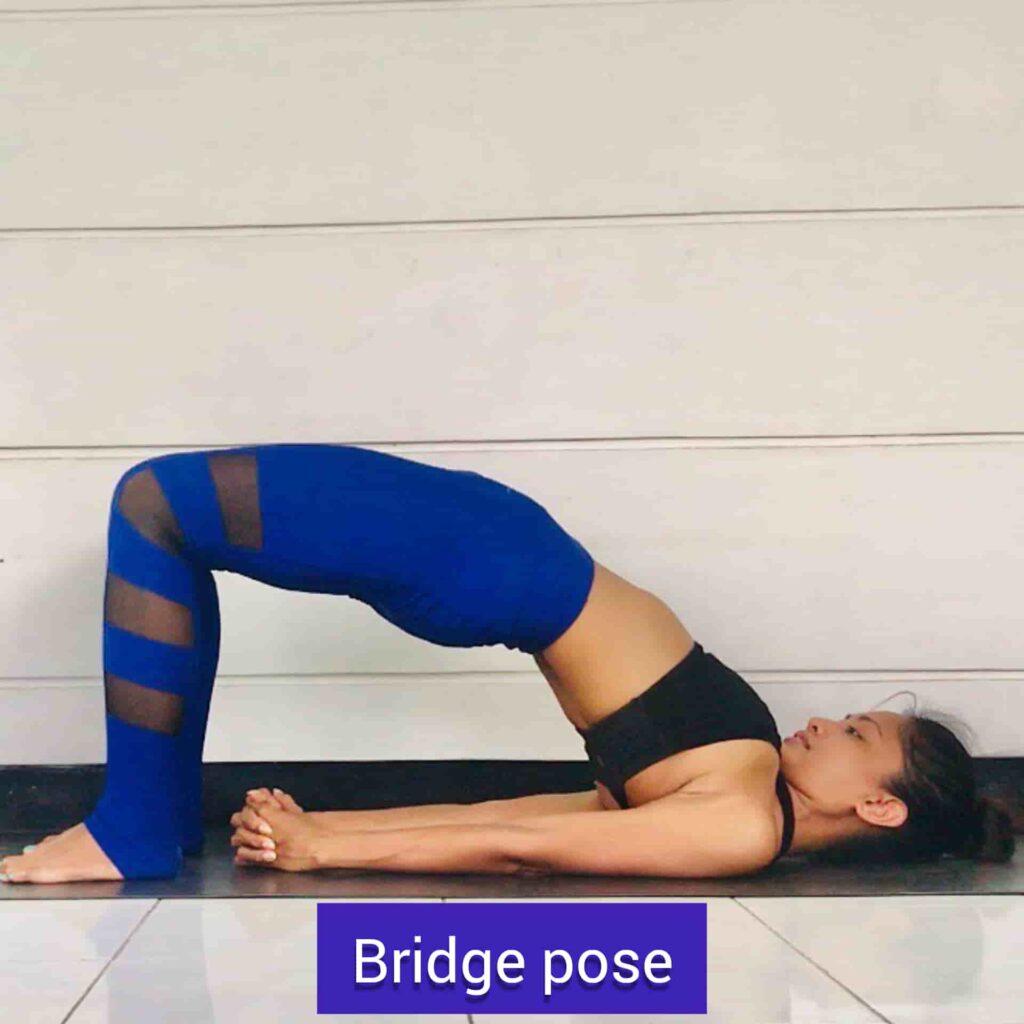
The Bridge pose opens the chest, heart and shoulders. It extends the spine, neck, thighs, and hip flexors (front hip joints). Because your heart is higher than your head in this pose, it is considered a mild reversal (less strenuous than other attacks, such as a headstand) and this yoga pose carries all the benefits of inversions: mild depression, fatigue, anxiety, headaches, insomnia and relief from stress.
Bridge pose also calms the mind and is considered curative for individuals with hypertension. Because it opens the chest, it increases lung capacity, which is therapeutic for patients with asthma.
Do not perform this posture if there is an injury to the neck or shoulder. Always work within your own limits and abilities. If you have any medical concerns, talk to your doctor before practicing yoga.
How to do:
- Bend on your knees and rest your feet on the ground. Spread your arms along the floor, palms flat.
- Press your feet and arms firmly on the floor. While exhaling, raise your hips towards the ceiling.
- Holding your buttocks off the floor, pull your tailbone towards your pubic bone. Do not squeeze your glutes or flex your buttocks.
- Roll your shoulders back and under your body. Hold your hands and extend your arms along the floor under your pelvis. Straighten your arms as much as possible, push your forearm into the mat. Reach your knuckles towards your knuckles.
- Keep your thighs and feet parallel – do not climb the outer edges of your feet or leave your knees together. Press your weight evenly on all four corners of both legs. Extend your tailbone to the back of your knees.
- Hold for one minute. To release, open your hands and place them under the palms along your body. While exhaling, slowly roll your spine along the floor, vertebrae by vertebrae. Allow your knees to fall together.
4. Reclining bound angle pose
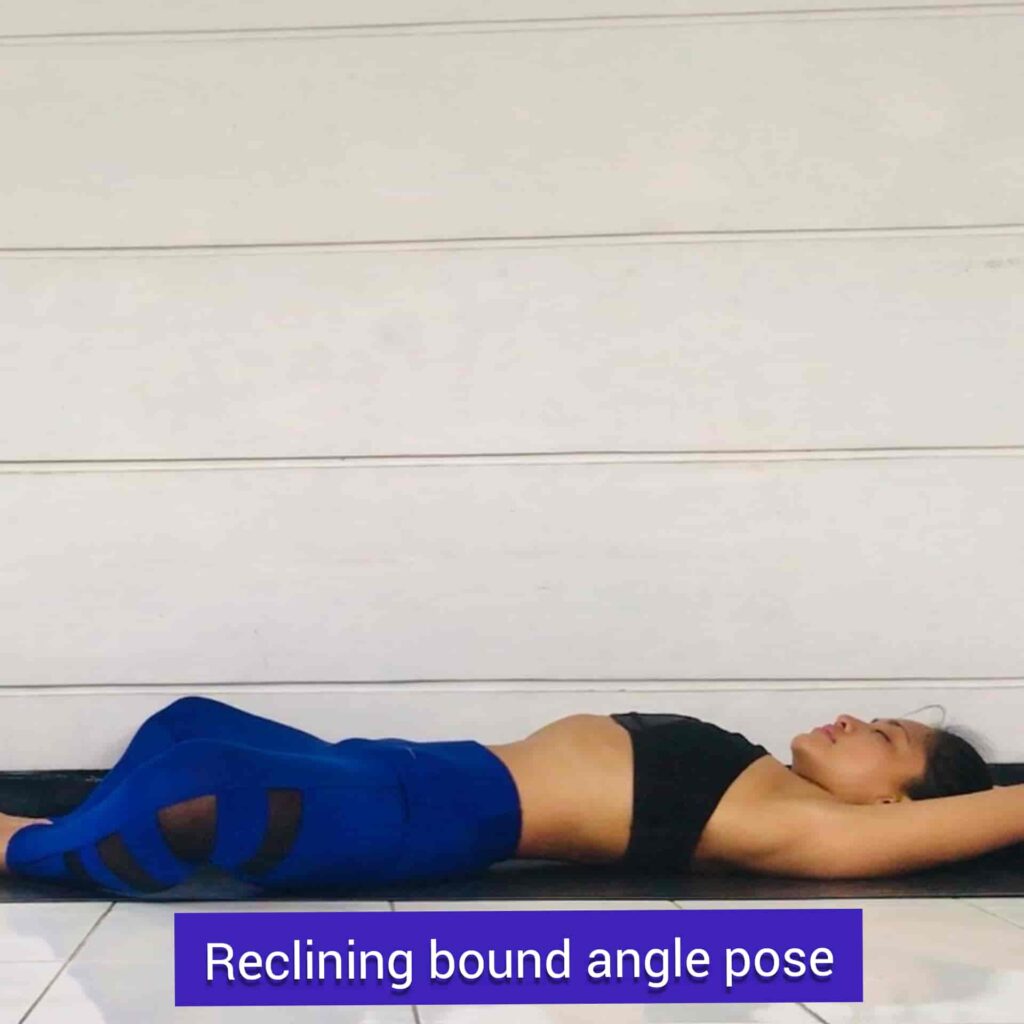
Reclining Bound Angle Pose, also known as Reclined Butterfly or Supta Baddha Konasana, is enough to ease your practice after a long day, but intense enough to begin to bring awareness to your body and your breath.
This yoga pose creates a passive, gentle stretch for the inner hips and waist, which can be left neglected in more vigorous, flowing practices. Due to the restrained nature of the yoga pose, it can also help relief symptoms of stress, insomnia, mild depression, menstruation, or menopause.
The Supta Baddha Konasana is also an excellent pose for pregnancy, as it helps to open and activate the pelvic area.
How to do:
- Comfortably lie on your back, extend your legs and your hands with your hands, facing the palms towards the ceiling.
- Bend your knees to bring the soles (bottom) of your feet together to touch. The outer (pinky feet) edges of your feet should rest on the mat. Allow the legs to be open and allow gravity to support the weight of the feet.
- Check with your body. If your hips and waist are feeling tight, you can move your legs away from your body; Alternatively, if you are feeling more open, you can bring your feet closer to your body to deepen the stretch.
- Relax your shoulders away from your ears and allow the body behind you to sink deeper into the mat. Stay in the posture anywhere from one to five minutes depending on your level of comfort.
- To come out of the pose, move the palms of the hands over the outer thighs to bend the legs slowly and bring the soles of the feet down on the mat. Then, rest your knees in your chest and slowly release the lower back from below.
5. Legs up the wall pose
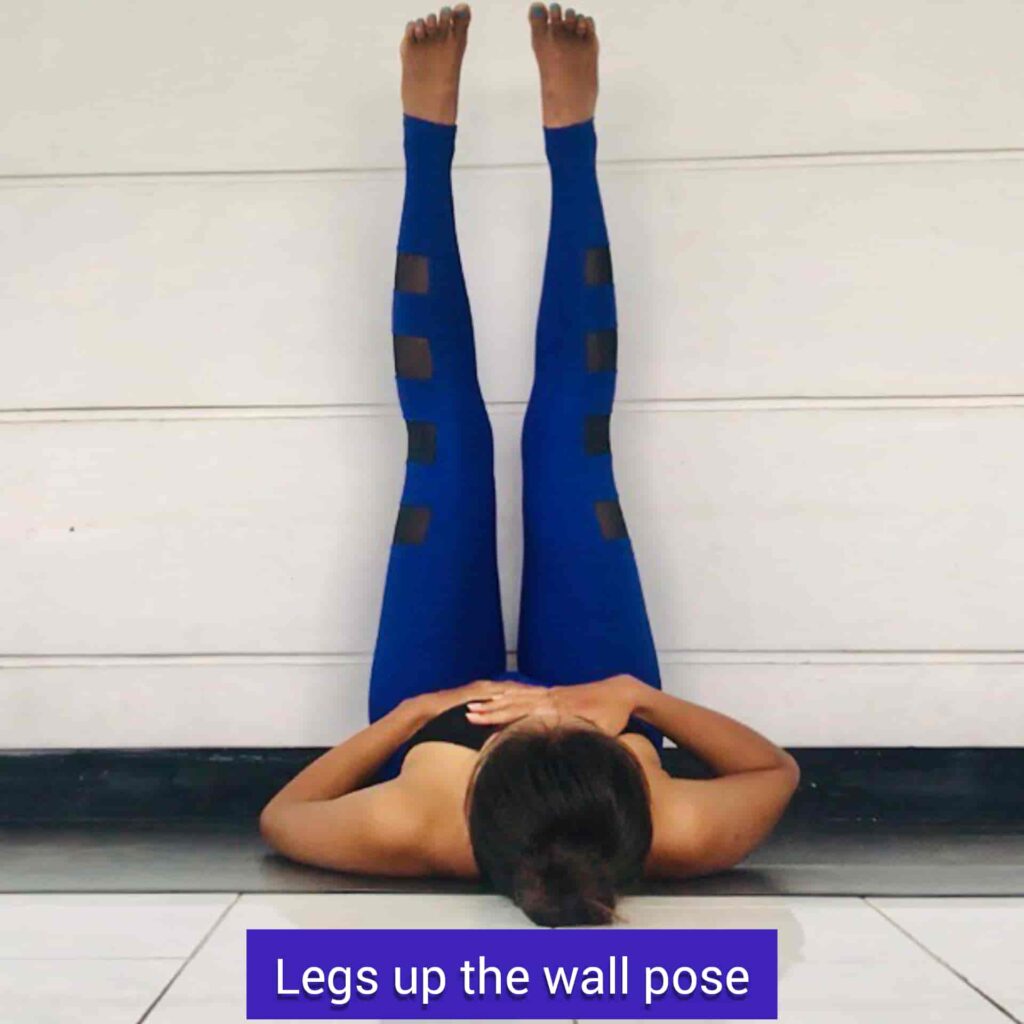
Viparita Karani or legs up the wall pose is a re-yoga posture that allows the mind and your body to relax, relief stress and tension. It is one of the most accepted totals because it does not require much flexibility or strength. But even though it is a passive pose, its benefits are very amazing.
Legs up the wall is also an excellent, calm pose for meditation in your morning or at bedtime.
How to do:
- Lie on the floor near a wall and take deep, steady breaths. Exhale and swing your feet against the wall so that your heel and sitting bones will support against it.
- If you have any discomfort in your lower back, adjust your body slightly back against the wall so that your sitting bones do not touch it.
- Rest your head on the mat or floor, keeping your spine straight, and bend your knees slightly so that your kneecaps are not locked.
6. Rabbit Pose
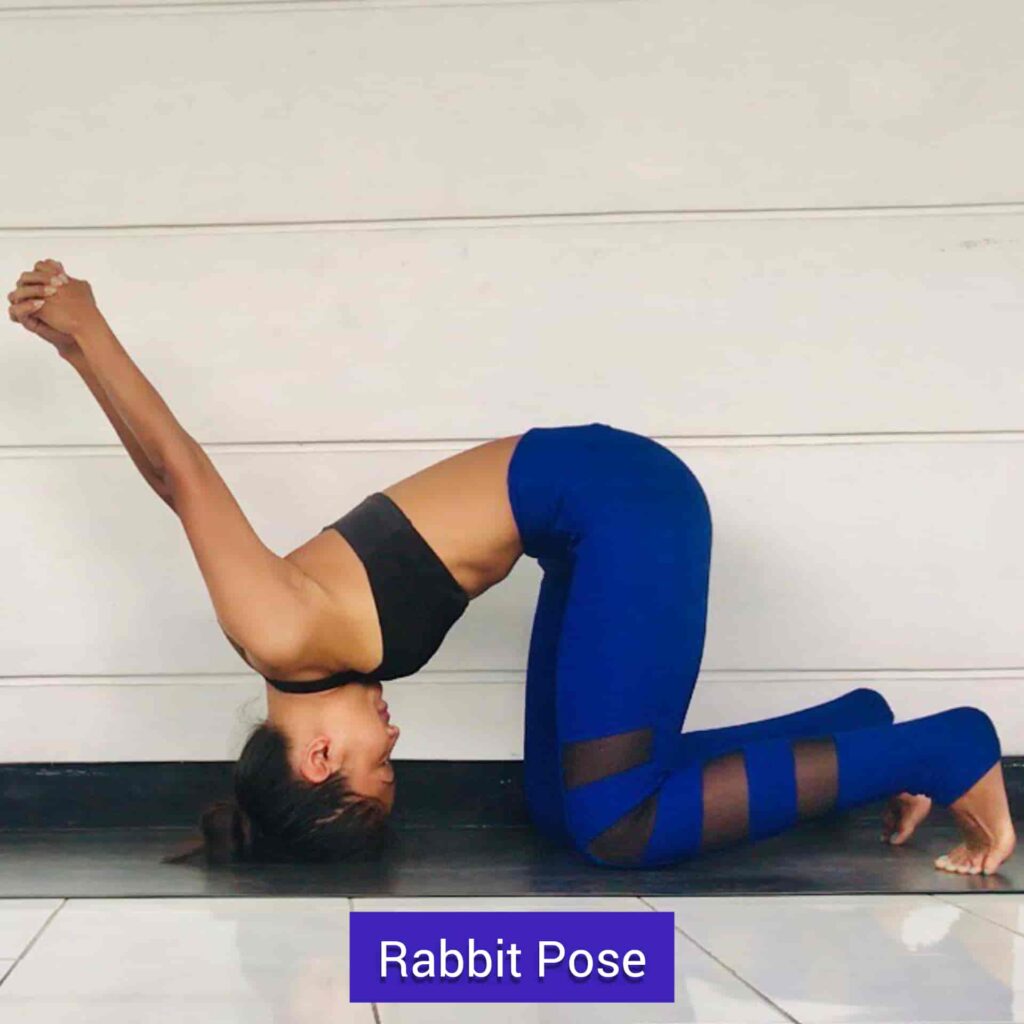
The Rabbit pose also known as Sasangasana, feeds the nervous system with fresh blood and oxygen. It rejuvenates the thyroid and parathyroid glands that balance and control your body’s metabolism and calcium. It aids digestion and reduces cold and sinus symptoms.
The rabbit tightens the abdomen, creates space in the middle as well as stimulates the intervertebral discs of the entire spine, ensuring proper alignment. Emotionally, this yoga poses helps with stress relief, and insomnia as well. By opening the back of the heart chakra, the rabbit pose helps you let go of the tendency to take responsibility for other people’s problems.
If a recent or chronic injury has occurred on the knees, neck, spine, or shoulders.
How to do:
- With the child pose, hold the heel with your hands and pull the forehead towards the knees and take it from the top of the head to the floor.
- Hold the heels tightly, and raise the hips towards the ceiling. Roll on the crown of the head and press the forehead as close to the knees as possible.
- Breathe and hold for 4-8 breaths.
- To release: Exhale slowly and take the hips off the heels and slide the forehead from the floor to the hair posture.
- Move your fingers behind you and spread them behind your head.
7. Head to knee pose
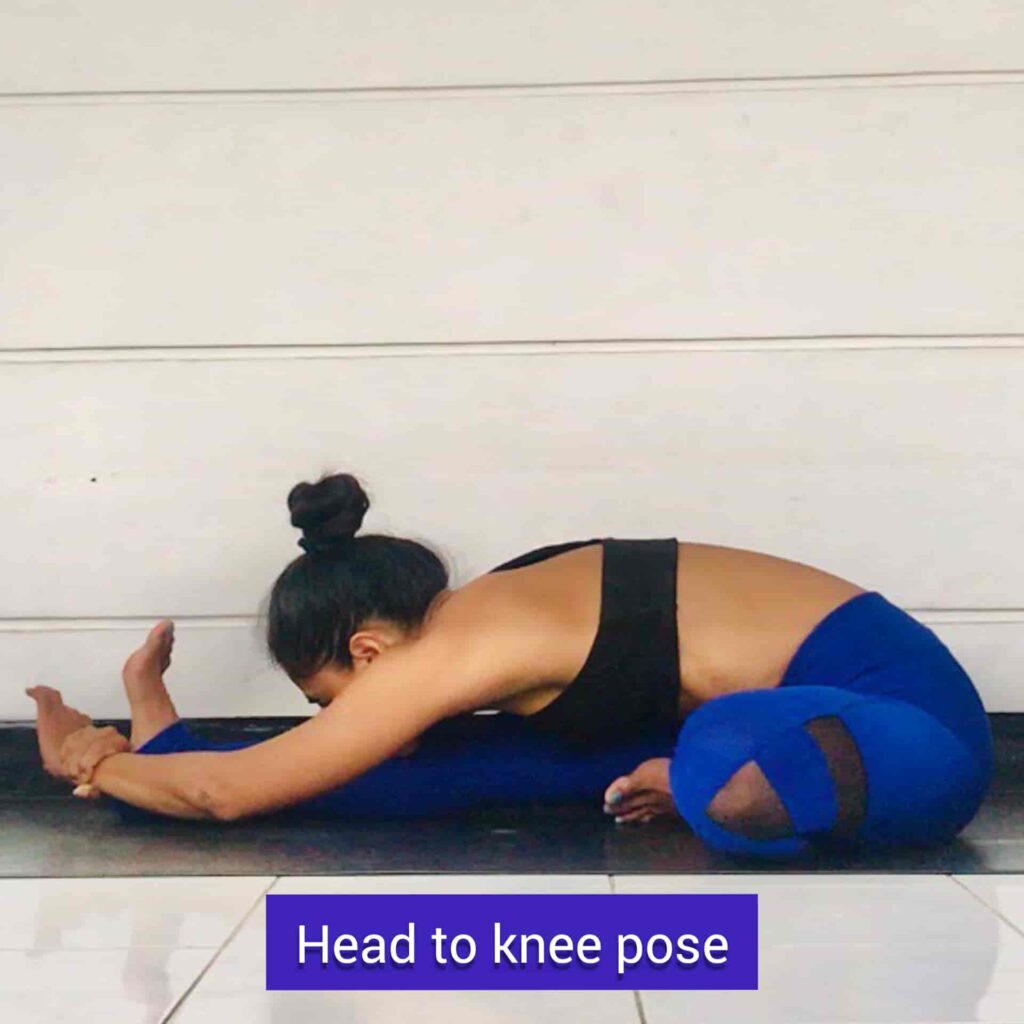
Head to knee pose also known as Janu Sirsasana, Head-to-knee forward bend, Head-on-knee pose, or Head of the knee pose, extends the muscles of the hamstrings, hips, and waist. Runners and those who engage in sports that need to run will often benefit from this good stretch for tight hamstrings.
It is also a restorative yoga posture that is said to help stress relief and calm your mind. If you have menstrual cramps or menopausal symptoms, this pose is one of the recommended ones for relief.
How to do:
- Sit with your legs spread out in front of you (Staff Pose or Dandasana).
- Bend your right knee and place the right foot against the left inner thigh, so that the knee is relaxed.
- When you exhale, bend the left leg, press the top of the thigh, lengthen the spine and raise your hands on either side of your head.
- Slightly rotate your upper body so that you are facing the left leg and then exhale to the hips.
- Keep spine long, chest open and shoulders relaxed.
- Keep your left foot, or hold your ankle or leg, and put your hands down.
- Hold for 5 to 10 breaths.
- Breathing, as you come out of the pose.
- If you find it difficult to bend the pelvis, sit on a folded blanket or cushion. Work on maintaining the length of your spine, sitting upright instead of turning forwards.
- When turning forwards, try to use a strap around the ball of your foot to keep your spine long. Just don’t force it.
- Bend your knee as much as bend from the hips.
8. Child’s resting pose
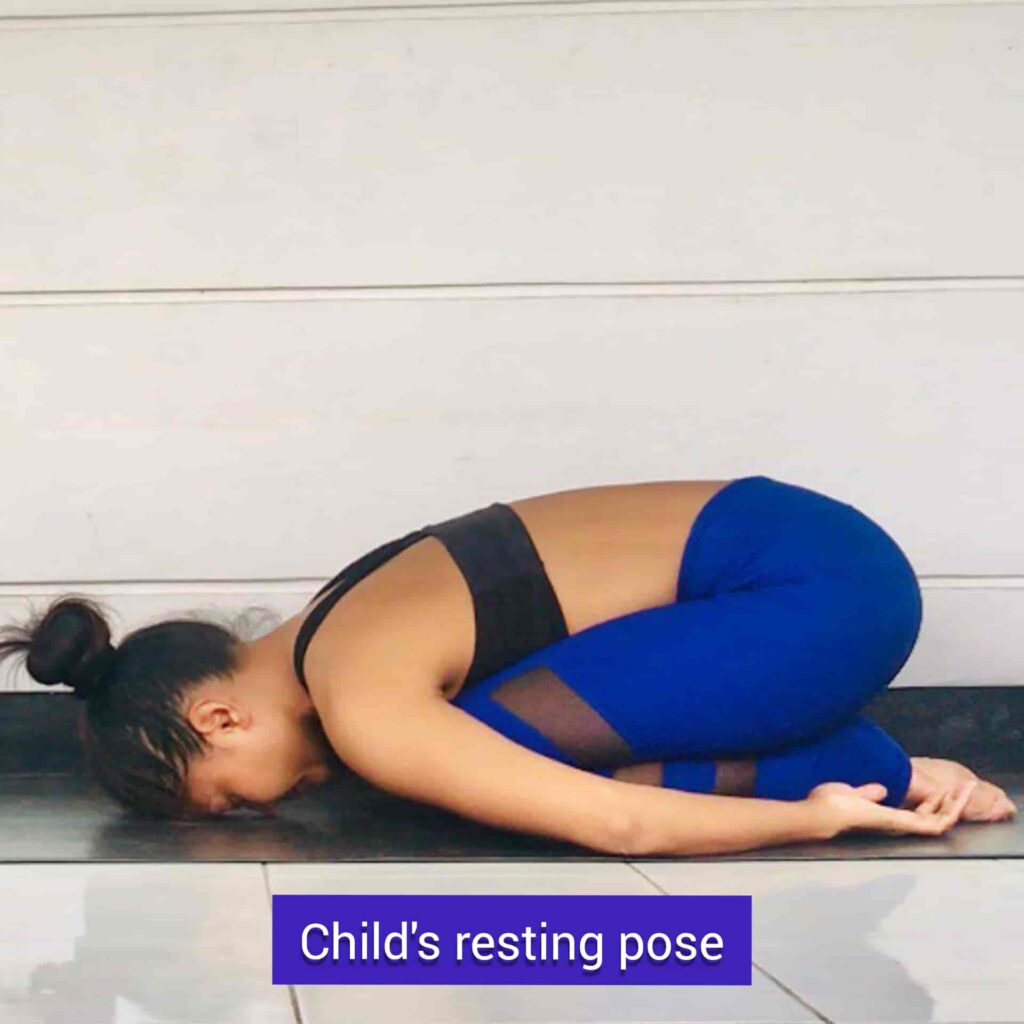
This yoga pose helps to stretch the hips, thighs and ankles while relief stress and fatigue. It slowly relaxes the muscles at the front of the body while slowly and gently pulling the muscles of the back torso.
Keeping your head ( i.e. your eye third eye ‘or the space between your eyebrows) down on the mat has an immediate calming and soothing effect on the brain. The inner fold of the body, with the eyes looking towards you, signals your brain that you are safe, and it is okay to relax.
If you are finding yourself in a place where you have many thoughts wandering in your mind, this pose is amazing.
If you want to have a better relationship with resting in your life, I highly recommend Child’s resting pose and other relaxing rugs on mats.
Do not practice Child’s resting pose if you have a current or recent knee injury. Women who become pregnant should only practice a wide-legged variety of poses – not press the abdomen above the thighs.
How to do:
- Start on your hands and knees. Keep your breath in the center, and start slowing your thoughts. Turn your awareness inward.
- Keep your knees wide while touching your big toe. Rest your buttocks on your heel.
- Those with very tight hips can hold their knees and thighs together.
- Sit up straight and lengthen spine through the crown of your head.
- When exhaling, lean forward, wrapping your torso between your thighs. Your heart and chest should rest between or above your thighs. Allow your forehead to come to the floor.
- Keep arms long and extended, palms facing down. To keep your buttocks in contact with your heel, press back slightly with your hands. Long from your hips to your armpits, and then extend even further through your fingers.
- For deep relaxation, raise your palms up and return your arms to rest with your palms. Relax your elbows completely.
- Widen your upper back. Soften and relax your lower back. Allow all the tension in your shoulders, arms and neck to go away.
- Close your eyes and keep the gaze drawn towards you.
- Breathe slowly, for a minute or more.
- To release the pose, use your hands to straighten your torso and sit on your heel.
- “Yoga and Wellness.” National Center for Complementary and Integrative Health. Available from: https://www.nccih.nih.gov/research/yoga-and-wellness.[↩]


