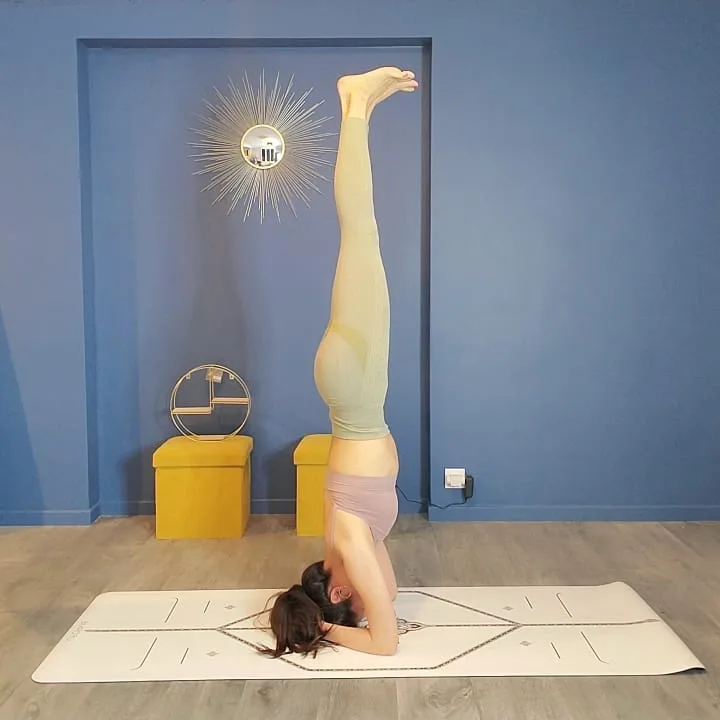
The Headstand, also known as Sirsasana, is a highly advanced pose that activates your glands, increasing strength in your spine, arms, legs, and lungs.
The Headstand (Sirsasana) is a challenging hatha yoga posture where the body is upside down and balanced on the head and forearm. In this asana your head is below your heart, that is, as opposed to the normal posture of the body or a standing posture such as Mountain Pose.
Regular performance can help in creating good posture and can aid in digestion. Experts believe that a Headstand (Sirsasana) can provide relief to individuals who experience sinus problems, asthma, and sleepiness.
We spend most of our waking hours either sitting or standing, keeping the head above the heart. The Headstand (Sirsasana) reverses and balances this habitual condition, potentially affecting various physiological processes. For example, there is an increase in blood returning to your heart (venous return), which can your improve cardiac output (at least temporarily).
In addition, baroreceptors in the aorta and carotid arteries are stimulated, resulting in increased parasympathetic outflow from the central nervous system. This, in turn, may temporarily reduce heart rate and blood pressure.
Additionally, cerebral spinal fluid bathing the brain is likely to be affected, causing changes in flow to different regions and possibly improving transport of nutrients to the brain.
The Headstand (Sirsasana) may also have musculoskeletal benefits, including stronger paraspinous muscles and improved alignment of your vertebral column.
Meaning + Origin
Sirsasana is derived from the Sanskrit name that comes from two words — Sirsa + asana:
- “Sirsa” = “head”
- “asana” = “pose or posture”
It is believed to stand on the crown of the head while the legs are raised against gravity, hence the name.
In the ancient texts, Headstand (Sirsasana) has been called the king of all the asanas and its reasons are not difficult to ascertain. When we are born, usually the head and then the limbs come out. The skull surrounds the brain, which controls the nervous system and organs of the senses. The brain is the place of intelligence, discrimination, wisdom, intelligence and power. This is the seat of Brahman, the soul. One cannot prosper without a proper king or constitutional head to guide a country; Similarly, a human body cannot be prosperous without a healthy brain.
The Bhagavad-Gita states: ‘Harmony (sattva), motility (rajas), inertia (tamas) are such qualities, matter-born; They bind fast, 0 great armed (Arjuna), indestructible resident in the body. ‘ (Fourteenth discourse, verse 5.)
All these qualities originate from the brain, and sometimes one quality prevails and sometimes another. The head is the center of sattvik qualities that control discrimination; The trunk Rajasic qualities governing sentiments and deeds; And the area under the diaphragm of tamasic qualities that regulates sensual pleasures such as the enjoyment of food and drink, and the thrill and pleasure of sex.
Information
| Also known as: | Sirsasana, Supported Headstand, Salamba Sirsasana, Headstand, Sirshasana, Shirshasana |
| Sanskrit name: | शीर्षासन |
| IAST: | Śīrṣāsana |
| Pronunciation: | shear-SHAHS-anna |
| Level: | Advanced |
| Total time: | Up to 3 minutes |
| Drishti: | Tip of nose |
| Chakra: | Sahasrara Chakra, Ajna Chakra, Vishuddha Chakra |
| Focus: | Whole Body |
| Indications: | Asthma, sinus problems, insomnia |
| Counterpose: | Balasana (Child’s Pose) |
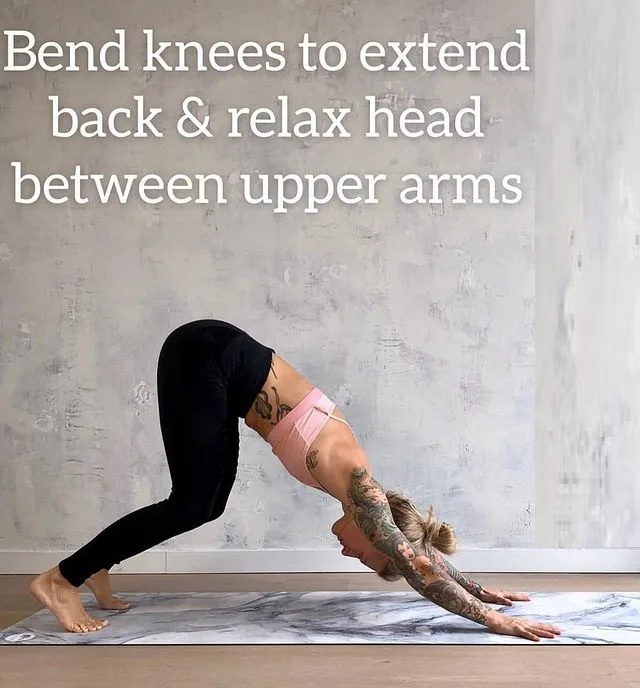
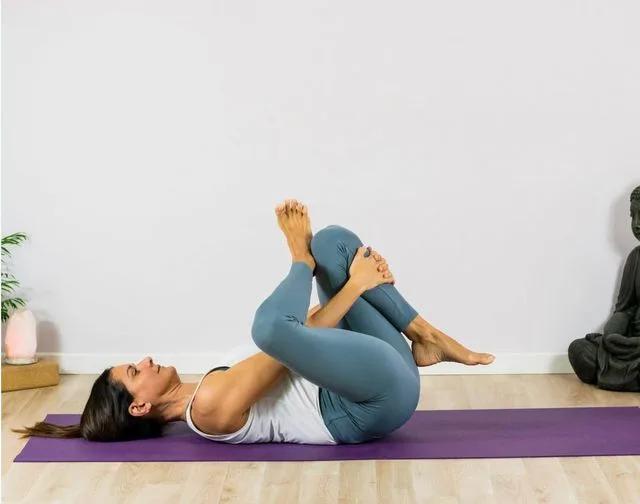
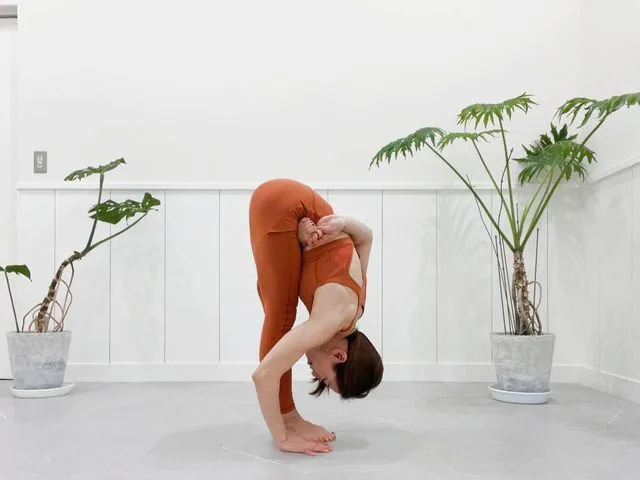
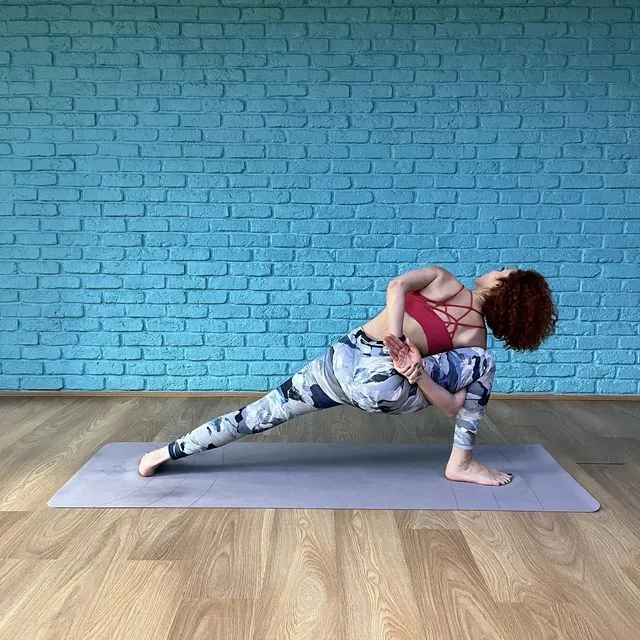
| Preparatory poses: | Standing Cow Face Pose, Downward-Facing Dog Pose, Torso Stretch Pose, Shoulderstand Pose, Standing Forward Bend Pose, Intense Leg Stretch Pose |
| Follow-up poses: | Downward Dog Pose, Child’s Pose, Hero Pose, Corpse Pose |
| Contraindications: | Pregnancy (during the first trimester), High or low blood pressure, Glaucoma, Neck or back injury, Heart conditions, Headache, Menstruation |
Benefits of Headstand (Sirsasana)
The restorative benefits to the nervous system from head circumference make it the most valuable practice in yoga. Yogis often refer to it as the king of all asanas because it increases the capacity of the brain, that is, for a body as effective as a king for its empire.
Apart from balance, power and alignment, enjoyment is an essential element for performing a Headstand while providing a soothing effect. The physical and mental benefits of Headstand (Sirsasana) are as follow:
- Physical Benefits:
- Strengthens the arms, legs, and abdomen
- Strengthens the spinal muscles
- Reduces varicose veins
- Improves digestion
- Stimulates the prostate and pituitary glands
- Improves circulation
- Mental Benefits:
- Relieves mild stress
- Relieves mild anxiety
- Calms the mind
Step by step Headstand (Sirsasana)
- Begin on the knees with the forearms on the floor. Tightly interlace the fingers, placing special emphasis on your index and middle fingers. Form a cup shape with the hands. Firmly press your pinky sides of the hands on the floor and anchor the forearms down. Keep the wrists perpendicular to the floor.
- Walk the knees a few inches behind the hips and lengthen the sides of the body from the waistline up through the shoulders. Exhale, melt the heart toward the floor and engage the shoulder blades on the back. Place the crown of the head on the floor. The back of the head touches the hands at your heel of the hands.
- Straighten the legs and walk the feet in toward the head. Position the hips directly over the shoulders while keeping the shoulder blades engaged on the back. Keep the elbows the same width as the shoulders.
- Bend the knees and use your strength of the abdominal core to gently lift or hop the feet off the floor.
- Hug the legs together; lift the knees directly over the shoulders and lengthen the tailbone up toward the ceiling. Distribute your weight between the head and the forearms. Actively extend the head into the floor to avoid compressing the neck. Keep the shoulder blades engaged on the back.
- Extend the legs straight up over the torso. Hug the thighs to the midline and straighten the legs. Flex the feet, spread the toes, and draw the little-toe sides of the feet toward the floor. Extend from the upper inner thighs through the inner edges of the ankles. Press the forearms down while drawing the shoulder blades onto the back and up, toward the feet. Extend from the palate down through the crown of the head.
Beginners tip
- Beginners use the wall for support in the beginning. Keep your forearms and head in the same position on the floor.
- Draw your knees towards your chest and then bring your feet above your forearms and shoulders to the wall.
- Align your pelvis and shoulders. Stay in this position for a few breaths and then come down to the Balasana.
- Repeat this process.
- When you’re ready, straighten your knees and extend into the final pose. If you have neck pain or numbness in your arms or hands, come out of inversion and stop.
- Remember that you must condition your paraspinous muscles over time. Work with the seating and medial Headstand until you have developed the strength to move up to full Sirsasana.
- Don’t stand up immediately after Sirsasana or any other inversions, as this may cause dizziness.
- Always use medial or intermediary postures such as Balasana or Uttanasana to re-adjust the cardiovascular system before standing upright.
Anatomy Engaging Techniques
When you are in Headstand (Sirsasana), it is important to align the direction of the force of gravity with the structural axis of your vertebral column, such that body weight is taken into your shoulders and distributed evenly throughout your intervertebral discs and vertebral bodies. The Anatomy Engaging Techniques below provides guidance on how to strengthen and train “muscle memory” in your paraspinous muscle, throughout the posture.
Step-1
- Align your shoulders and spine. Initially, engage your upper third of the trapezius and press down through your shoulders. As you progress in the asana, relax this muscle and draw your shoulders away from your ears.
- Contract your anterior portion of the deltoids as if raising your arms in front of you. Then engage your triceps and try to straighten your elbows; It presses your forearms into the mat.
- Pronate your forearms to squeeze the mound into your skull at the base of your index finger. You will balance this in step-2 by co-activating your Forearm Superinator to keep your wrist in a neutral position.
Step-2
- Use your biceps and brachialis muscles to counter the action of your triceps described in Step-1.
- In this posture, the action of your triceps predominates, in which your biceps and brachialis muscles play a stable role.
- By flexing your elbows, your shoulders also come in line with your cervical spine and maintains your center of gravity over your head. This is necessary because pressing too hard on the forearms (by engaging your triceps) can cause your body’s weight to shift above your elbow. Shifting the load on your elbows can potentially cause problems because there is a tendency to counter it by engaging the extensor muscles of your neck to hold the body up.
- Engage your biceps and your supinator muscles to counterbalance the action of your forearm pronators (Step-1) by pressing your little fingers sides of the palms into your skull. In this way, your wrist remain in neutral position.
Step-3
- Rotate your upper arm bones (your humeri) externally by engaging your infraspinatus and teres minor muscles of your rotator cuff. This stabilizes the head of your humerus in your socket.
- Contract your lower third of the trapezius so that your shoulders are away from the ears, freeing your cervical spine.
Step-4
- Combine the actions of your gluteus maximus and adductor magnus to extend your hips in the posture. The indication for this is to gently squeeze your buttocks while drawing your knees together.
- Visualize your gluteus minimus stabilizing your femur’s head in the socket (this is its action when your femur is in neutral, as in the Headstand or Sirsasana).
- Use your erector spinae and quadratus lumborum to arch your back slightly. You will compete and stabilize this action in Step-5 by engaging your rectus abdominis and psoas muscles.
Step-5
- Activating your gluteus maximus too much can lead to a “swayback” posture.
- Engage your psoas and pectinus muscles at the front of your pelvis to bring your thighs back to a neutral position.
- Strengthen your abdomen by gently contracting your rectus abdominis. It counters overarching in the region of your lumbar spine.
Step-6
- Activate your quadriceps to straighten your knees.
- When you stretch your hips by contracting your gluteus maximus, there is a tendency to externally rotate your thighs and your kneecaps to face outward.
- Engage your tensor fascia lata and gluteus medius to bring your thighs back to the neutral position. The cue for this is to imagine pressing your outer edges of the feet against an immovable object. It activates your abductor component of these muscles, which are also the internal rotators of your hips.
- Your legs do not pull apart; However, the outward rotation become neutralized as your thighs turn inward and your kneecaps are brought to face forward. You can train this action by tying a belt comfortably around your thighs and trying to press your legs outward.
Step-7
- Elevate your ankles by engaging your peronei at the edges of your lower legs. Then balance this action by contracting your tibialis posterior to create an inversion force at your ankles, stabilizing them.
- Finally, engage your tibialis anterior and toe extensors to draw your top of the feet towards your shins and open your soles upward. Opening of the soles of the feet stimulates small chakras in this area.
Contraindications
- When you are in the pose, it is important to align the direction of the force of gravity with the structural axis of the vertebral column, such that bodyweight is taken into the shoulders and distributed evenly across the intervertebral discs and vertebral bodies.
- Avoid trying Headstand (Sirsasana) in case of back or neck injury.
- If you are suffering from blood pressure, then do not practice it.
- Heart patients should avoid this yoga pose.
- Individual suffering from osteoporosis should avoid this yoga pose.
- Individuals with glaucoma or other eye problems should abandon this practice.
- Women should avoid this yoga pose during pregnancy and menstruation.


