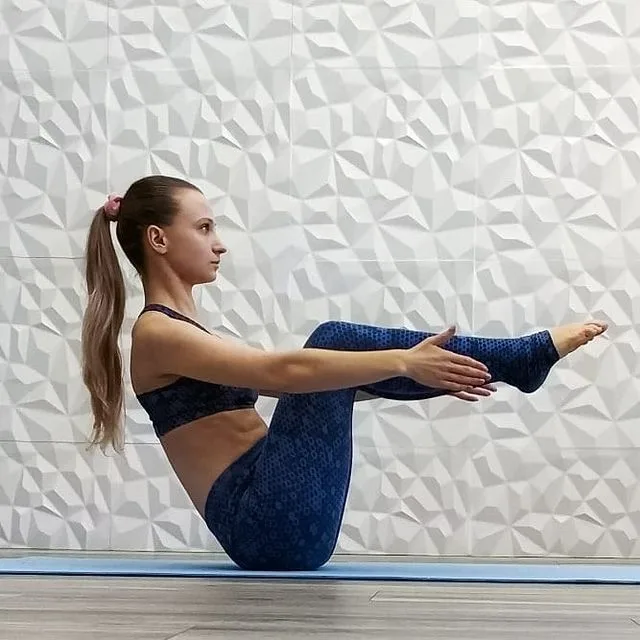
Upward Facing Bow Pose, also known as Urdva Dhanurasana or Wheel Pose, builds strength in the spine, hips, legs, abdomen, wrists, and arms while expanding your lungs and chest.
The pose can stimulate your pituitary and thyroid glands while increasing your energy. It is used therapeutically to treat infertility, asthma and back problems.
Meaning
The Urdva Dhanurasana is derived from the Sanskrit name which is made up of three words — Urdva + dhanu + asana:
- “Urdva” = “upward”
- “dhanu = “bow”
- “asana” = “pose or posture”
In Hatha yoga, this yoga pose is called Chakrasana (Wheel Pose), while in Ashtanga Vinyasa it is called Upward Facing Bow Pose (Urdva Dhanurasana).
Like many other yoga asanas, the reason for naming it Upward Facing Bow Pose (Urdva Dhanurasana) is also the body structure you create while performing this yoga asana.
When you do the Upward facing bow pose, your body looks like an upward facing bow, the floor like the string of the bow and the body like the body of the bow. That’s why we call it the Upward Facing Bow Pose or Urdva Dhanurasana.
The same thing (body posture) is the reason behind naming Chakrasana or Wheel Pose. When you do this yoga asana, your body also feels like a chakra (wheel), hence we also call it Wheel pose (Chakrasana).
Upward-Facing Bow Pose is a part of the concluding sequence of Ashtanga Vinyasa Yoga sequences. It is also performed in acrobatics and gymnastics and is known as the back bridge in these practices.
Information
| Know as: | Upward bow pose, Wheel pose, Upward facing bow pose, Urdhva Dhanurasana, Chakrasana |
| Sanskrit name: | उर्ध्व धनुरासन |
| IAST: | Ūrdhva Dhanurāsana |
| Pronunciation: | OORD-vah don-your- AHS-anah |
| Level: | Intermediate |
| Type: | Backbend, inversion, chest opener |
| Total time: | 30 sseconds or 10 seconds 3 repetitions |
| Drishti: | Forward |
| Chakra: | Sahasrara Chakra, Ajna Chakra, Vishuddha Chakra, Anahata Chakra, Manipura Chakra |
| Focus: | Whole body |
| Indications: | Back problems, asthma, infertility; stimulate pituitary and thyroid |
| Counterposes: | Standing Forward Bend Pose, Apanasana, Ardha matsyendrasana, Janu sirsasana, Supta padangusthasana |
| Preparatory poses: | Bridge pose, Supta virasana, Urdhva mukha svanasana |
| Follow-up poses: | Eka pada urdhva dhanurasana, Corpse Pose, Reclining Bound Angle Pose, Natarajasana |
| Contraindications: | Low or High blood pressure, Back injury, Diarrhea, Carpal tunnel syndrome, Heart problems, Headache |
Benefits of Upward Facing Bow Pose (Urdva Dhanurasana)
The Upward Facing Bow Pose (Urdva Dhanurasana) is considered as a pose that falls under the category of back bends and is a deep backbend among all other poses. So even though the benefits are more or less the same when practicing other back bends, maximum body beauty comes from this pose and also brings a lot of confidence. Some of the main physical and mental benefits are categorized below:
- Physical Benefits:
- Strengthens the legs, buttocks, back, chest, shoulders, and wrists
- Stretches the wrists, forearms, shoulders, and spine
- Keeps the spine strong and supple
- Opens the chest
- Stimulates the lymphatic, digestive, and reproductive systems
- Increases lung capacity
- Increases stamina
- Promotes proper pituitary and thyroid function
- Helps relieve infertility, osteoporosis, backache, and asthma
- Mental Benefits:
- Relieves mild depression and anxiety
- Reduces stress
- Energizes the mind
Steps to Upward Facing Bow Pose (Urdva Dhanurasana)
As the Upward Bow Pose is an intermediate level yoga pose, you need to warm up your body before doing this asana, so do Surya Namaskar 3-4 times to prepare the body for this asana.
Instructions
- Lie supine (belly up) on the ground. Bend your knees and bend them close to your body so that your feet are near your hips. Bend your elbows and spread your palms next to your head, keeping your forearms straight off the ground. Your fingers should be on your shoulders.
- Press the insides of your feet into the ground, exhale and push your tailbone into your hips as you tense up and lift your hips off the ground.
- Make sure that your thighs and the insides of your feet remain parallel to each other. At this point, take a breath or two.
- Press your hands into the ground and your shoulder blades on your back to lift it over the top of your head. Take a few more breaths keeping your arms parallel to each other. Keeping your hands and feet pressed into the ground, press your shoulder blades and tailbone to your back, exhale, lift your head off the ground and straighten your arms.
- Rotate the tops of your thighs slightly inward and tense the outer part of your thighs. Dilute your hip points and extend your tailbone past your knees as you lift your pubis toward your abdomen.
- Keeping your weight under your index finger, swing your upper arms out to the sides. Extend your shoulder blades and let your head hang down. Stay in this position for 10 seconds and repeat up to 10 times. Repeat this process three times to get its full effect.
Step-by-step Anatomy Engaging Techniques
Step-1
- Temporarily activate your hamstrings to extend your hips. The cue for this action is to attempt to drag your soles of the feet toward your pelvis. Your feet are glued to the floor, so the force of the contraction is transmuted to lifting your hips. Then engage your gluteus maximus, medius, and minimus by squeezing your buttocks to extend your femurs and retrovert your pelvis.
- A beneficial effect of contracting your gluteus maximus is the downward tilt of your pelvis, which protects against hyperextension of your lumbar spine. A side effect of contracting your gluteus maximus is external rotation of your femurs. This causes your legs to splay apart.
- In Upward Facing Bow Pose (Urdva Dhanurasana) maintain the beneficial effect of engaging your gluteus maximus while counteracting your undesirable effect of externally rotating and splaying the femurs apart.
- In the Step-6 explains how to do this. Contract your adductor magnus to draw your knees together. This muscle also synergizes your gluteals in extending your hips.
Step-2
- Engage your quadriceps to straighten your knees. This indirectly extends your hips because your feet are glued to the floor. They cannot “kick out” in front, so your quadriceps act like a hydraulic lift to raise your pelvis.
- Notice your rectus femoris portion of your quadriceps muscle crosses your hip and knee joints, moving both when it contracts; thus it is polyarticular. (The other parts of your quadriceps only cross your knee and are monoarticular).
- Your rectus femoris tilts your pelvis forward, anteverting it. This rotational effect on your pelvis helps to extend your spine, and the retroversion helps to protect against your hyperextension.
Step-3
- Pronate your forearms to press your hands into the floor, spreading the weight from your mounds of the index fingers across the rest of your palms.
- Contract your triceps to straighten your elbows. Note that the long head of your triceps attaches to your scapula. Firmly engaging this muscle aids to rotate your scapula away from your humerus and prevents impingement on your acromion process. This gives more room to flex your arms above the head.
- Activate your infraspinatus and teres minor muscles to externally rotate your shoulders, creating a helical action down your arms and through your elbows. A cue for this is to imagine rotating your hands outward while they are fixed on the floor, as if you were washing a window.
- Engage your anterior deltoids to flex your shoulders further, drawing your trunk deeper into the pose from your arms.
- To gain awareness of this muscle before going into the pose, raise your one arm in front of you and feel the front of your shoulder with your other hand. This is your anterior deltoid contracting. To activate this muscle while in the pose, attempt to “scrub” your hands toward your feet. Experience how this deepens your pose.
Step-4
- Draw your shoulder blades toward the midline by engaging your rhomboids. Note that your scapulae rotate outward when your arms are above the head.
- Use your lower third of the trapezius to depress your scapulae and draw your shoulders away from the neck.
- Your rhomboids and trapezius muscles combine to exert a tethering affect on your shoulder blades, stabilizing them.
Step-5
- Plantar flex your ankles and press the weight into your soles of the feet, activating your gastrocnemius and soleus muscles.
- Begin by pressing your heels into the floor, and then evert your ankles to distribute the weight evenly into your balls of the feet. This engages your peroneus longus and brevis muscles on the sides of your lower legs.
- These actions secure your feet on the floor and are the first steps in addressing the splaying of your thighs caused by your gluteus maximus.
Step-6
- Contract your tensor fascia lata and gluteus medius muscles to internally rotate your hips, counteracting the external rotation forces of your hip extensors — your gluteus maximus and adductor magnus.
- A cue for this is to maintain your feet well fixed on the floor, and then attempt to “scrub” them apart (abduction). Because your feet won’t move, your thighs will roll inward (internal rotation is one action of your tensor fascia lata and your gluteus medius).
- Then contract your adductor group to draw your knees toward the midline. You can gain awareness of your adductors in the preparatory of the pose by placing a block between your knees and squeezing it.
Step-7
- Urdva Dhanurasana stretches your hip flexors, including your psoas, pectineus, adductors longus and brevis, sartorius, and rectus femoris. Your abdominals also stretch in this pose.
- Gently contract them to engage your abdominal “air bag” effect, which helps to protect your lumbar spine. This eccentric contraction creates a facilitated stretch of your abdominals, so that they lengthen on relaxation as a result of stimulating your Golgi tendon organ.
Modifying Upward Facing Bow Pose (Urdva Dhanurasana)
As with most yoga postures, you can do this pose in a variety of ways to make the pose more accessible or to deepen the pose.
For tight shoulders
If your shoulders are tight, try placing your hands slightly wider than your shoulders before doing the push up. Sometimes this little extra space allows you to straighten your arms more.
Practice against the wall
Try the pose on the wall. Take two blocks and place them against the wall. Place each hand on a block and then push up as described above. If this is hard on your wrists, try leaning the blocks against the wall at a 45-degree angle.
Partnering
Recruit a partner. Establish yourself on the floor and then stand behind your head with your partner facing you. Then bring their feet almost below your shoulders. When you press up, hold onto their ankles instead of placing your hands on the floor.
Using yoga strap
Use a leash on your upper arms to prevent them from playing. Make a loop in the strap that is about the width of your shoulders. Slide it onto your arms just above the elbows before your press ups.
Contraindications
A wise practitioner would be well aware of the challenges they are prepared to face together and one such place or practice that requires this is the practice of Upward Facing Bow Pose (Urdva Dhanurasana).
Since the spinal cord stretch is maximum here and the body is placed on the wrists and feet, a lot of pressure will be felt on the lower and middle back. The differences mentioned below are more for beginners as those at the advanced level or intermediate level may have practiced other backbend asanas before attempting the Upward Facing Bow Pose (Urdva Dhanurasana). These contraindications are as follows:
Back injury
A back injury is something that needs to be healed with proper rest, but if the back injury is healing and other exercises of backbend posture do not harm the back, then the s difficult to practice. The reason for any kind of jerk on the back while releasing from the pose may not be justified.
Heart problems
Heart disease, if a person is suffering from heart disease then surely this yoga pose should be completely avoided and should not even take the risk of attempting it.
High or low blood pressure
Pressure, if the person has a history of high blood pressure or low blood pressure, then this yoga posture should be practiced with proper guidance after several rounds of various other backbends and months of practice.
Undergone cataract surgery
Pressure in the eyes, a person who has undergone cataract surgery or has a history of pressure in the eyes, then this yoga asana is not complete.
Cervical injury
Cervical injuries where the neck is supported by a collar, or where there is any other type of injury to the neck, this yoga pose should definitely be avoided. But where one is suffering from weak or stiff neck and needs to be opened then it can be done with proper guidance.
Hernia
Hernia In case of hernia, the body is weak and cannot stretch during the pose and hence this exercise can be done with guidance after complete recovery and after consulting a doctor.
Lack of flexibility
Lack of flexibility, of course, even if one is fit and has no disease, but lacks flexibility or confidence, a yoga teacher/instructor must realize this and not apply stretches or poses without working on flexibility and confidence should do.


