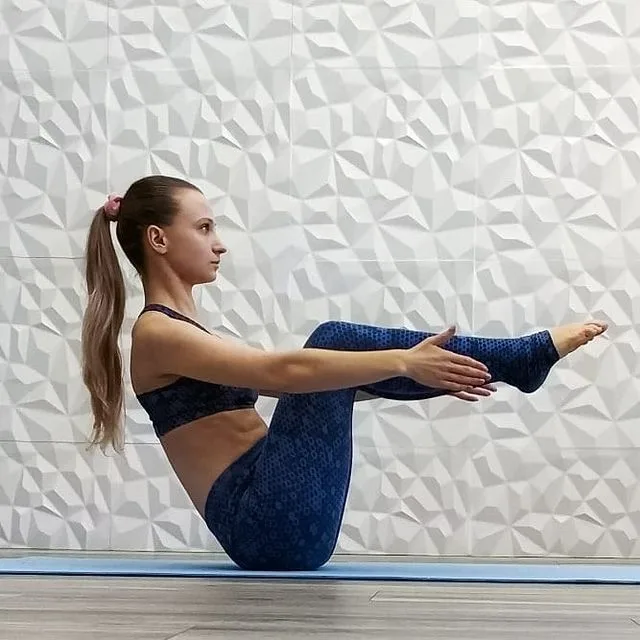
Ujjayi Pranayama (also known as Victorious Breath or Ocean Breath) is a nasal breather that uses a constriction at the back of the throat to control, slow, and enhance the inhales and exhales.
Information
| Known as: | Ujjayi Breath, Ujjayi Pranayama, Ocean Breath, Victorious Breath, Conquering Breath, Cobra Breathing, Snake Breathing, Whispering Breathing, Snoring Breathing |
| Sanskrit name: | उज्जायी प्राणायाम |
| Type: | Pranayama, Breathing |
| Indications: | Concentration, sleep disturbances, anxiety, depression, chemotherapy, pulmonary functions, thyroid |
Meaning
Ujjayi derived from the Sanskrit name that made from two words — Ud + ji:
- “Ud + ji: Ujji” = “to be victorious”
- “Ujjayi” = “one who is victorious”
Ujjayi Breath means Victorious Breath, in Ujjayi the lungs are fully expanded, the chest pouring out like a mighty conqueror. All the steps (except Kumbhaka) of this pranayama can be done at any time.
However, if the heart feels heavy, full, or aching, or the diaphragm is tight, and if you are agitated or the heartbeat is abnormal, try laying 2 wooden planks on the floor, (each about 1 foot square and 1.5 inches thick) on top of each other.
Rest the back on the planks, the buttocks under them and the arms stretched down.
You can also lie down with the bolster on, placing weights on the legs for relaxation and comfort. Two pillows can be used instead of planks. If the legs cannot be stretched due to a disease or infirmity, bend the knees and rest the lower legs on a bolster.
When the hack is thus relaxed, the pelvic muscles begin to breathe. These reliefs any tension and soften the diaphragm. The lungs and respiratory muscles function smoothly and breathing becomes deeper.
The practice of Ujjayi Pranayama (Ocean Breath) provides amazing relieve to patients with enlarged ventricles and congenital heart defects.
Moreover, it calms the apprehensions that surround heart patients, who are afraid to at least move, lest they aggravate their condition.
Benefits of Ujjayi Pranayama (Ocean Breath)
Ujjayi is the first step to deep meditation. It is useful in increasing body heat, ensuring better oxygenation of the blood, regulating blood pressure and clearing toxins from the body. It is recommended for people suffering from insomnia as well as menstrual cramps.
As per the National Center on Health, Physical Activity and Disability, Ujjayi Pranayama (Ocean Breath) can:
- Improve the concentration
- Improve sleep disturbances, anxiety, depression 1, and mental quality
- People with cancer who are receiving chemotherapy 2
- Very effective on the pulmonary functions
- Benefiting people with thyroid conditions 3
- Release tension throughout the body
- Regulate body heating and cooling, warm the core from the inside
Ujjayi Pranayama (Ocean Breath) practice guide
It’s a bit tricky without anyone showing up, so let’s take it slowly. To do this, you need to slightly tighten the throat so that the sound of inhalation and exhalation can be heard. A good way to start is to drop the chin slightly. By doing this, there is a slight blockage in the air passage just above the collarbone. It should feel a little tight.
Another way to produce this effect is to place the thumb in the hollow of the throat, just above the collarbone. If you start to suffocate, you’re pushing too hard, so back off a bit. Now take a breath. If you’re doing this correctly, the breath will produce a slight wheezing sound, as if you have mucus in the throat.
You can also try saying “aah” while inhaling. Most of us have a habit of making sounds only when we exhale, but not when we exhale. Making sounds while breathing will let you know what is going on in the throat, especially with the glottis.
The glottis is the part of the throat that we compress to make the H, K, G (as in “Grover”, not “George”) and Ng sounds. You want to constrict the throat enough, so you make a consistent H sound when you inhale and exhale, but with the lips closed.
You’re not attempting a growl, nor a Darth Vader type of sound. If the tightening of the throat causes itching, coughing, or breathing is heard by someone across the room, you have tightened it too much. If you’re doing this correctly, only you (and someone sitting next to you) should be able to hear the “ocean sound” (as yogis call it) produced by breathing.
Practice and find the right amount of tension that allows you to produce this sound without any discomfort and to maintain it comfortably for several minutes. Once you’ve got the right amount of pressure, you’re ready to start.
Keep the posture straight, keeping the jaw parallel to the floor, so that you are looking straight ahead (although you can also close your eyes). Now tighten the glottis, so that you produce an “ocean sound”. During Ujjayi, you only inhale and exhale, but never hold your breath. Care must also be taken to ensure that the volume of the “ocean sound” is consistent, and that the inhale and the length of the breath are the same. One inhalation and one exhalation count as a single cycle.
Mastering in Ujjayi Pranayama (Ocean Breath)
- All steps of all pranayamas begin with exhalation (rechaka) and end with inhalation (puraka). First, exhale whatever tidal air is left in the lungs, then start pranayama. Do not end it by exhaling, as this puts pressure on the heart, but at the end of each step of pranayama take a normal breath, do not use force.
- The passageways for inhalation and exhalation of breath differ in the sinus areas. In breath out, the breath touches the inner surface of the sinus passages below. On breath out, it touches the outer surface at the top.
- All inhalations are done with a sibilant sound ‘ssss’ and all exhalations with aspirated ‘hhhh’. While sitting in the initial position for pranayama.
- Although Savasana (Corpse Pose, or Mrtasana) is suggested at the end of each pranayama, if you want to do more than one step or different pranayama consecutively, it should be done at the end of the practice itself.
Step-1
The first stage trains in the art of being aware of the sensations in the lungs; This leads to breathing. This practice makes one attentive, activates the nerves, reduces any stiffness in the lungs and prepares them to take deep breaths.
- Lay a blanket folded lengthwise on the floor. On top of this, over the head and exactly along my edge, lay another blanket folded 3 or 4 times so that it fits over the back of your head and torso.
- Lie on your back on a folded blanket, keeping your body in a straight line. Do not cave in your rib-cage. Lie down quietly for a 60 to 120 seconds with your eyes closed. Cover your eyes with a soft cloth to relax the facial muscles quickly.
- Breathe normally, consciously observe and feel the flow of your breath.
- As you inhale, make sure that both lungs fill equally. Feel your chest expand up and out. Synchronize your two movements.
- Exhale calmly, emptying your lungs equally on both sides. If your lungs move unevenly, then fix it.
- Continue in this way, keeping your eyes closed for 10 minutes.
Step-2
Step-2 trains you to lengthen the duration of each inhale and learn the art of exhalation. In this step, it calms your nerves and calms your brain. Its slow, steady and deep exhalation is ideal for patients with cardiac disorders and high blood pressure.
- Lie down, as on Step-1 instructions (1 and 2), close your eyes without straining your eyes, keep them passive and receptive, and direct the gaze inward.
- Keep your inner ear alert and receptive.
- At first, exhale slowly until your lungs are empty, but without straining your abdominal organs.
- Breathe normally through your nose, this is inhalation.
- Breathe out slowly, deeply and steadily until your lungs feel empty, this is an exhalation.
- Continue for 10 minutes and then relax, the emphasis here being on slow, deep and steady exhalations.
Step-3
This step trains the individual to lengthen the duration of each breath and to learn the art of inhalation. This step is good for people suffering from low blood pressure, asthma, and depression. It strengthens your nervous system and instills confidence.
- Lie down as instructed in Step-1 (1 and 2). Then follow the instructions given in Step-2 (2 to 4).
- Relax your diaphragm and expand it sideways as you breathe without inflating your belly. To prevent this, don’t let your diaphragm roll over or float over your floating ribs.
- Take slow, deep, steady and slow breaths through your nose. Make sure that both the lungs fill equally.
- Listen to the sound, and maintain its rhythm throughout, fill your lungs completely until you can hear the sound of breathing.
- Taking a deep breath raises the pupils of your eyes. Consciously pull them down and look into your lungs.
- At the beginning of the exhalation, stabilize your diaphragm, then exhale slowly but not deeply. Here, the exhalation will be slightly longer than normal.
- Continue like this for 10 minutes, then rest.
- Here the emphasis is on slow, deep and steady breathing. Listen to the sound again and maintain its rhythm throughout. For better rhythmic deep breathing, it is recommended to use two planks for jacks.
Step-4
This initial step trains each one to increase the length of the inhalation and exhalation. It helps to master the art of deep inhaling and deep exhaling. It gives energy, calms the nerves and tones them. Step-1 to Step-4 is the preparation for Ujjayi Pranayama (Ocean Breath), which is done while lying down.
- Lie down as described in 1 and 2 of Step-1. Then follow the instructions in 2 to 4 of Step-2.
- Now breathe in, following the instructions given in 2 to 5 of Step-3.
- Grab the diaphragm and release it slowly, exhaling slowly, deeply and steadily until your lungs are empty.
- This completes one cycle. Repeat such cycles for 10 to 15 minutes, then rest.
Step-5
Here the breathing is similar to Step-1 but is done sitting. It trains one in the art of observation and even leads to breathing.
- Sit in Lotus Position (Padmasana), Accomplished Pose (Siddhasana), Auspicious Pose (Swastikasana) or Hero Pose (Virasana), or any convenient and comfortable position.
- Sit quietly for a while, keeping your back and spine still, but the muscles of your spine soft and mobile for adjusting your torso. The firmness of your spine should be equally balanced with the mobility of your back muscles, which expand and contract with the in and out flow of the breath. The absorption of the breath should synchronize with the mobility of your back muscle, the slower their movement, the better the absorption of the breath.
- Lower the head towards your torso and lift your inner chest frame towards the descending chin. Place your chin on the notch just above your breastbone. This is the Jalandhara bandha (chin-lock). If you can’t do it perfectly, keep your head down as much as you can without tension and continue the practice.
- Keep your arms down and the back of your wrist resting on your knees, or join the index finger of each hand with the tip of your thumb and keep the other fingers outstretched (Jnana mudra).
- Do not strain your eyeballs, but keep them passive and receptive. Close your eyes and direct the gaze inward.
- Keep the inner ear alert and receptive.
- Exhale as calmly as possible, without putting pressure on your abdominal organs first. Pay attention to the points on your torso, which denote movements of the skin for inhaling, exhaling, and retention.
- Follow the instructions in 3 to 6 of Step-1, observing the flow of your breath. Do this for 10 minutes and then rest in Corpse Pose for a few minutes.
Step-6
Here, the breathing is similar to Step-2, but is done while seated. It trains each person to lengthen the duration of each inhalation and learn the art of exhalation.
- Sit in any comfortable position following the techniques in 1 to 7 of Step-5. Release whatever breath is in your lungs.
- Breathe normally through your nose.
- Breathe out slowly, deeply and steadily until your lungs are empty.
- Join the pose as you exhale and listen carefully to the sound of your breath. Maintain its rhythm and smoothness throughout.
- This completes one cycle. Repeat such cycles for 10 minutes, inhale, then relax into Corpse Pose.
- The emphasis here is on slow, deep and steady exhalations.
Step-7
Here, the breathing is similar to Step-2, but is performed sitting. It trains lengthening the duration of each breath and to learn the art of inhalation. Step-5 to Step-7 is the preparation for Ujjayi Pranayama (Ocean Breath) practice, which is done in a sitting position.
- Sit in any comfortable position and exhale, following the instructions in 1 to 7 of Step-5.
- Take slow, deep breaths through your nose, following the instructions in 3 to 7 of Step-3.
- Exhale slowly, but not deeply, making the breath a little longer than usual.
- This completes one cycle. Repeat such cycles for 10 minutes, inhale, and then relax into Corpse Pose.
Step-8
Now start Ujjayi Pranayama (Ocean Breath) properly, with deep inhale and deep exhale. This pranayama ventilates the lungs, calms, and tones the nervous system. As a result of deep respiration, the blood supplies life-giving energy to the tiniest parts of the tissues. It reduces phlegm, relieves chest pain, and makes the voice melodious.
- Sit in any comfortable position following the techniques in 1 to 7 of Step-5 and release whatever breath is in your lungs.
- Take slow, deep, steady breaths through your nose.
- Hear the sibilant sound of breath. Control, adjust and synchronize your flow, tone, and rhythm. The flow is controlled by the resonance of the sound and the flow by the tone. This is the key to success in Pranayama.
- Fill your lungs from bottom to top, straight up to your collar-bones. Try to consciously take the breath to the farthest parts of your lungs.
- Be constantly aware of the flow of the breath.
- As you breathe, the body, lungs, brain, and consciousness should be receptive rather than active. The breath is received as a divine gift and should not be pulled by force.
- Do not inflate the stomach while inhaling. Place the diaphragm under the entire rib cage. See it in all types of pranayama. If the diaphragm is lifted over the floating ribs, the stomach swells instead of your chest.
- The movements described in 4, 6, and 7 above are performed by stretching the entire abdominal region from the pubis to the breastbone, down the spine, and then toward the head. It automatically massages the internal organs.
- In deep breathing, your internal intercostal muscles rise up. Just before the exhalation, there is another lift in these muscles, preparing the one before the exhalation.
- Now the process of deep exhalation begins, in which your torso and diaphragm play an active role.
- Maintain the lift of your diaphragm as well as your intercostal muscles, and begin to exhale. Let your breath out slowly, deeply and steadily.
- After a few seconds, the grip of the torso gradually loosens on its own until your lungs are passively emptied. Maintain constant awareness during the outflow of breath.
- This completes one cycle. Repeat for 10 to 15 minutes, keeping your eyes closed and your limbs relaxed. Inhale and then lie down and relax in Corpse Pose.
- Inhale with warmth, gaiety, and joy as if you are receiving life force as a gift from the God. Exhale with a feeling of gratitude, silently expressing the humility in the form of submission to the Lord.
- With each inhalation and exhalation, there is a partial pause when your muscles of the torso adjust themselves. Learn to be aware of it.
Step-9
This is a phase for beginners, introducing breath retention when the lungs are full. This is a deliberate internal retention (Sahita antara kumbhaka).
Internal retention can also be done while lying down with pillows under your head to simulate Jalandhara Bandha.
The practice of Antara Kumbhaka develops harmony between your breath and lungs, and between your nerves and mind. If performed correctly, it produces a dynamic state in which your body feels full of energy. It enhances working capacity, removes despair and creates hope. Through the creation of energy, it activates your nervous system and develops stamina. It is ideal for those who suffer from low blood pressure, lethargy, laziness, and doubts.
Note: However, Antara Kumbhaka is not recommended for people suffering from hypertension, high blood pressure and cardiac disorders.
- Sit in any comfortable position and exhale, following the instructions in 1 to 7 of Step-5.
- Breathe in and hold the breath. Keep your trunk firm and alert.
- Do not lift the bridge of your nose or eyes or head during retention.
- Feel your breath leaking out into the most distant pores of the skin of the torso and become aware of the process.
- After a few moments, this awareness begins to lose its grip, the moment this happens, exhale normally. This is one cycle, so practice 10 to 15 of these.
- If any fatigue is felt during this exercise, these chakras can be alternated with normal breathing.
- When this exercise becomes easy, intensify it until you can hold your breath comfortably for 10 to 15 seconds at a time. To increase the length of your retention, lift your diaphragm toward your lungs, hold it firmly and draw your abdomen in and up toward your spine. Then hold the breath without raising the bridge of your nose.
- If tightness is felt in your lungs, or tension is felt in and around the temples or head, it is a sign that you are exceeding your potential; If so, reduce the period of internal retention. Your transition from internal retention to exhalation should be smooth.
- Exhale slowly, without losing control of your torso, diaphragm, and lungs. After completing the exercise, take a few deep breaths and then relax in Corpse Pose.
Step-10
This is a step for beginners, introducing breath retention when the lungs are empty. This is called intentional external retention (Sahita Bahya Kumbhaka).
Bahya Kumbhaka is especially good for people who are under high stress or suffering from high blood pressure, as it relieves nervous tension. It brings about a passive state, a sense of detachment, as if one were an empty vessel floating on water. However, it is not recommended for people suffering from depression, malancholia, and low blood pressure.
- Sit in any comfortable position following the techniques described in 1 to 7 of Step-5 and exhale whatever is in your lungs.
- Breathe normally and release slowly and slowly, emptying your lungs as much as possible without strain.
- Be passive and hold your breath for as long as you can, then breathe normally. This is one circle, repeat 10 to 12 of them, or continue for 10 minutes.
- Tightness in your abdomen, pressure on the temples or gasping for air may indicate that you have reached your potential in Bahya Kumbhaka (External Retention); In this case, your length of retention is reduced. The transition to inhalation should be smooth. If any fatigue is felt during this exercise, the chakras of this step can be alternated with normal breathing.
- Take a few deep breaths and lie down in Corpse Pose.
- External retention can also be done while lying down with pillows under your head.
Step-11
This is internal retention (antara kumbhaka) for advanced yogi. This state is good for people suffering from lethargy, nausea and physical fatigue. It warms the body, removes phlegm and instills vigor and confidence. This leads to better concentration. Wrong practice leads to irritation, palpitations, anger, and exhaustion.
- Sit in any comfortable position and exhale, following the instructions described in 1 to 7 of Step-5.
- Keeping your torso alert, take a strong, deep breath without force, jerk, or stiffness.
- Hold your breath for 10 to 15 seconds.
- Within moments, the body loses its grip. Raise your side ribs to maintain this grip. Now contract your lower trunk from your pubis, perineum, and anus and lift it along your spine towards your chest. This is the basic bond.
- This lift of your torso creates tension in your head. Lower your head from the base of the back of your neck. It gives a better Jalandhara Bandha and relieves tension in your head.
- Feel your breath leaking out to the farthest pores of the skin of your torso, creating awareness everywhere.
- Keep your eyes, ears, and tongue inactive and your mind calm.
- If the retention period is too long, your throat feels stretched and your facial muscles and temples become tense. It means you are losing the grip. So, recharge the energy of your torso as described in 4 above.
- If there is still a feeling of tension in your head and trunk and your face turns red, it means that you are not maintaining your correct grip or have exceeded the capacity. This can cause injury to your nervous system. In this case, do not continue retention.
- Breathe normally or deeply without losing grip on your torso, diaphragm, and lungs.
- This is a cycle of retention. Practice 10 to 12 such chakras, maintaining the same awareness as in the first chakra. Since the capacity for retention varies with individuals, it is not possible to refer to your duration of breath retention. It is advisable to do internal retention after an interval of 3 or 4 breaths.
- After completing the exercise, inhale and lie down in Corpse Pose.
- In this step, the emphasis is on holding the breath instead of inhaling and exhaling.
Step-12
This is external retention (Bahya Kumbhaka) for the advanced yogi. This step cleans your abdominal organs and prevents their further prolapse.
- Sit in any comfortable position and exhale, following the instruction in 1 to 7 of Step-5.
- Breathe normally, and exhale continuously and vigorously. Empty your lungs as far as possible without force, jerk, or stiffness.
- When your exhalation is complete, do not inhale, but stop and pull your entire abdominal region up towards your spine and towards your chest. This is the Uddiyana Bandha.
- Keep this hold for as long as possible. When the tension is felt, relax your stomach, bring it to the normal position and then inhale.
- This is one circle, repeat 8 to 10 such cycles, then inhale and lie down in the Corpse Pose.
- As the practice improves, increase your duration of retention after exhalation. The duration varies with each person. See the own potential to increase it.
- Never inhale during uddiyana bandha, as this can cause you to gasp and put pressure on your heart.
- It is advisable to do external retention initially after an interval of 3 or 4 deep breaths.
Step-13
This advanced step combines both internal (antara) and external (external) retention (kumbhaka) with 2 or 3 inhale and exhale.
- Here, exhale first. Take a deep breath. After taking a full breath, hold your breath (antara kumbhaka) for 10 seconds.
- Take a deep breath. After a complete exhalation, hold your breath (Bahya Kumbhaka) with Uddiyana Bandha for 5 seconds and take a deep breath. This completes one cycle.
- Exhale, and take 2 or 3 deep breaths in and out. Then repeat the cycles of Kumbhaka, then 2 or 3 deep in and out breaths.
- Do 5 to 6 cycles, ending with the inhalation. Then lie down in the Corpse Pose.
Precautions and contraindications
Those who are highly introverted and have very low blood pressure should practice Ujjayi Pranayama (Ocean Breath) for a short time only under the careful guidance of a guru or yoga practitioner, as Ujjayi Pranayama (Ocean Breath) can further reduce introversion and blood pressure.
- THE JOURNAL OF ALTERNATIVE AND COMPLEMENTARY MEDICINE. Volume 23, Number 3, 2017, pp. 201–207. Mary Ann Liebert, Inc. DOI: 10.1089/acm.2016.0140; Treatment of Major Depressive Disorder with Iyengar Yoga and Coherent Breathing: A Randomized Controlled Dosing Study[↩]
- PMID: 22525009, PMCID: PMC3353818, DOI: 10.1089/acm.2011.0555. Yoga breathing for cancer chemotherapy-associated symptoms and quality of life: results of a pilot randomized controlled trial; Anand Dhruva, Christine Miaskowski, Donald Abrams, Michael Acree, Bruce Cooper, Steffanie Goodman, Frederick M Hecht[↩]
- https://pubmed.ncbi.nlm.nih.gov/21046920[↩]


