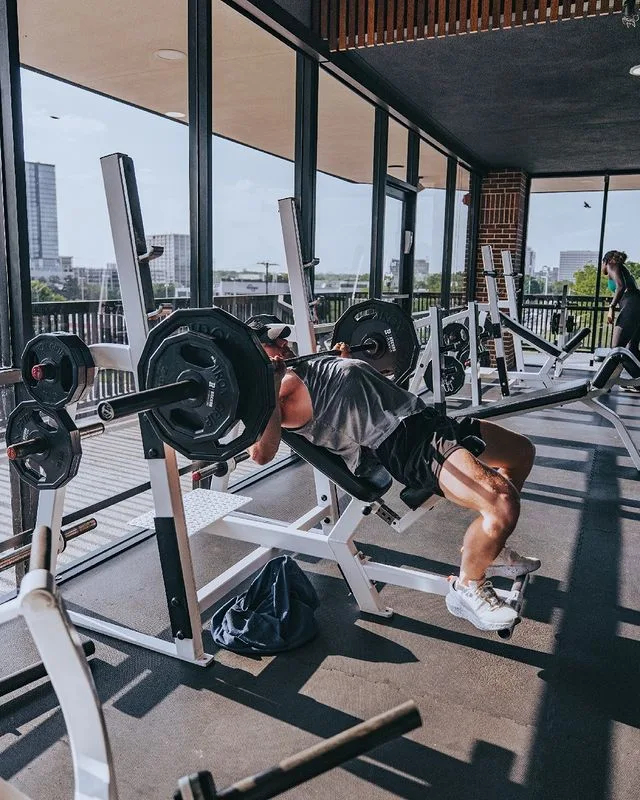
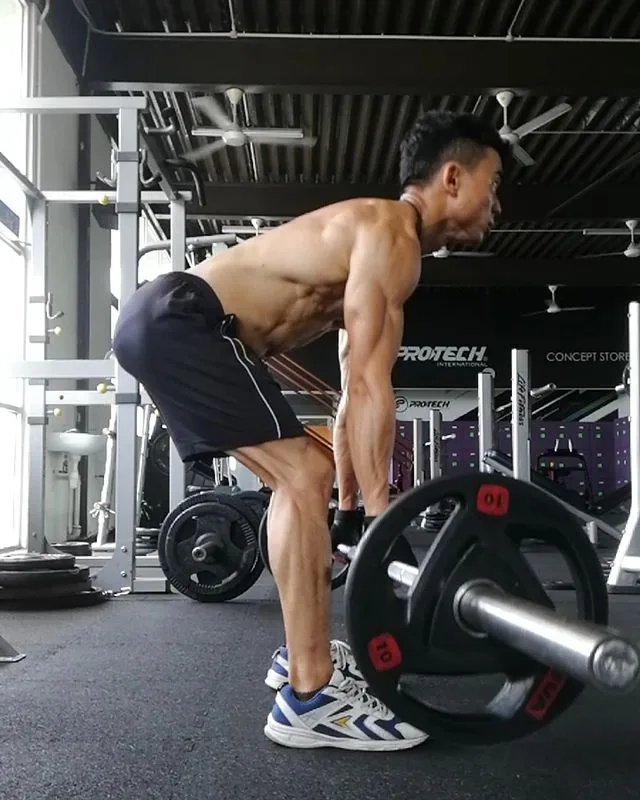
The incline barbell press is a compound move that primarily targets your upper pecs and secondary to your triceps, shoulders, and even your back.
Do you need to do chest exercises specifically for your upper chest? Or do all chest exercises stimulate all available muscle fibers? And more than that, is there such a thing as an “upper chest”?
Well, I’ll keep it short and sweet. Continue reading This article contains a step-by-step form and technique guide for the incline bench press (incline chest press) using a barbell. The best exercises for this are incline presses using barbells, dumbbells, or a smith machine.
Step-by-step incline bench press using barbell
The incline bench press, also known as incline chest press, is a variant of the bench press and is an exercise used to build chest muscles.
Upper Chest: Although it’s a great exercise, the flat barbell press doesn’t do a great job of filling out the upper chest. Incline presses are intended to focus more work on the upper pecs. The main benefit of doing the incline press is to develop the upper portion of the pectoral muscles. The pectoralis major muscle consists of a clavicular and a sternocostal head (upper and lower pec).
Incline barbell bench press setup and movement
You may have to experiment with the angle on the bench. When the bench is set at an incline (15 to 30 degrees), you activate your shoulders more, as is the equivalent of the shoulder press. Plus, because of the angle of the bench, this exercise puts less stress on your rotator cuff, a common area of injury when using a flat bench.
To target the upper chest, you’ll need a bench that’s vertically inclined or inclined 30 to 45 degrees. Most bodybuilders find that angles above 45 degrees transfer most of the stress to the front shoulders, while angles less than 30 degrees target the lower chest more. In addition to chest, you can use an incline bench to work biceps and triceps.
Most of the steps will be the same if you use dumbbells or a special bar. However, there may be some minor technique adjustments, mainly in how you get hold of a specific implementation.
1. Setup
Here’s how you set up the incline barbell bench press with proper form:
Step-1: Set up bench 30-45 degree angle
- Set your bench at an angle of about 30-45 degree.
- Lie on the bench and “screw” the shoulder blades in toward each other and down toward your groin.
- Create an arch in your lower back large enough to fit your fist between it and the bench.
- The chest should be lifted as if you are going to show it to someone, and you will want to keep it “up” like this for the entire lift.
Step-2: Grip should be wider than shoulder width
- Your grip should be a few inches wider than shoulder width, about 22 to 28-inch, depending on your build.
- If you go too narrow, you’ll be relying too heavily on the triceps, incidentally, the close-grip bench press is a great triceps exercise.
- If you go too wide, you’ll decrease the range of motion and the overall effectiveness of the exercise.
Step-3: A “thumbless” or “suicide” grip
- Do not use a “thumbless” or “suicide” grip, as it is aptly called, in which the thumbs are next to the index fingers as opposed to wrapped around the bar.
- While people give various reasons for preferring the thumbless grip, its disadvantage is clear: When you’re going heavy, it’s surprisingly easy for the barbell to slip out of the hands and fall onto the chest, or worse, the neck.
Step-4: Keep the bar in the palm of the hand
Keep the bar in the palm of your hand, not your fingers, as this causes wrist pain.
Step-5: Grip the bar hard
Grip the bar hard, try to squash it like spaghetti, as this will give you a slight boost in strength.
Step-6: Create a stable lower body base
- Create a stable lower body base by placing the feet directly under the knees, which should be facing out, tightening the quads and activating the glutes.
- The upper part of the leg should be parallel to the floor.
- The bottom part should be vertical, making a 90-degree angle.
- This allows you to push through the heels as you climb, creating the “leg drive” you’ve probably heard of, the powerlifting style of bench press, with the heels, well, if you like it.
Step-7: Maintain throughout the lift
Once you’ve done all of the above, position yourself in the position you want to maintain throughout the lift.
2. Movement
Step-1: Lock the elbows and open the bar
- Unlock the bar by locking the elbows to take the bar off the hooks, and move the bar into position with your elbows.
- Don’t try to bring the weight directly from the hook to the chest, and don’t drop the chest and slouch the shoulder blades.
- As you release the rack, as this will cause you to push the bar off the shoulders.
Step-2: Keep the arms at an angle of about 45 degrees
- Research has shown that keeping your hands at about a 45-degree angle relative to your torso and using a medium grip is the best way to protect your shoulders when bench pressing. 1
- However, 45-degrees on the nose isn’t necessarily right for everyone—you’ll want to find a position between 30 and 60-degrees that’s most comfortable for you.
Step-3: Bottom-Middle-Top Position
The steepest position above is about 20-degrees and is commonly seen in powerlifting. The middle position is about 45-degrees and is what I find most comfortable. The top position is 90-degrees, which keeps the shoulders in a compromised position.
Step 4: Control while lowering the bar
The proper bench press movement is a controlled lowering of the bar should pass by the chin and touch just below the collarbones to allow for a vertical bar path, followed by an explosive drive upward. The bar should go up and down in a straight line, not toward your face.
Step-5: Reducing the range of motion
Reducing the range of motion only reduces the effectiveness of the exercise, and with improper technique, the shoulders are only at risk of injury. By using the full range of motion with proper form, you’ll maximize muscle growth while preventing injury.
Step-6: Raise the bar one place for each rep
Don’t look at the bar while moving, as this will likely cause you to change its descent and ascent angles. Instead, pick a spot on the ceiling to look up during the exercise and watch the bar move up and down in relation to it. The goal is to get it in the same spot for each rep.
Step-7: Keep the elbows “tucked”
- Keep your elbows “tucked” into the starting position the entire time, paying special attention during ascent.
- This is when people usually instigate them to take advantage.
- Increasing the angle relative to your torso makes it easier to lift the weight, but puts undue stress on the shoulders.
Bottom line
The “upper chest” debate is one of many “controversial” topics in the world of weightlifting.
There is a muscle that we call the “upper chest”. This is known as the clavicular pectoralis, and here’s what it looks like:
Despite what people may tell you, this muscle is not part of the pectoralis major, the large chest muscle. While part of the pectoralis major shares nerves with the clavicular pectoralis, the angle of the muscle fibers is very different. Thus, some movements may stress the pectoralis major, and others may stress the clavicular pectoralis.
Note that I say emphasize, not separate. This is because all movements that emphasize one of the two incorporate the other to some degree. Nevertheless, proper development of the chest requires a great deal of emphasis on the clavicular pectoralis for two simple reasons:
- It’s a small, stubborn muscle that takes its time to grow.
- The movements that are best for developing it are also good for developing the pectoralis major.
The best way to make sure your upper chest doesn’t lag behind your pec major in size is to do a lot of incline pressing. Hence, incorporating the incline bench press into the program, which places more emphasis on the clavicular pectoralis than flat or incline pressing, is recommended. 2
While doing this exercise, the angle of incline in the bench should be 30 to 45 degrees. Some people prefer 30 degrees, but some prefer an incline closer to 45. I recommend that you try different settings between 30 and 45 degrees and see which one you like best. 3
- Green, Carly M. CSCS; Comfort, Paul MSc, CSCS. The Affect of Grip Width on Bench Press Performance and Risk of Injury. Strength and Conditioning Journal: October 2007 – Volume 29 – Issue 5 – p 10-14. doi: 10.1519/00126548-200710000-00001.[↩]
- Barnett, Chris; Kippers, Vaughan; Turner, Peter. Effects of Variations of the Bench Press Exercise on the EMG Activity of Five Shoulder Muscles. Journal of Strength and Conditioning Research: November 1995 – Volume 9 – Issue 4 – p 222-227[↩]
- Source: Bigger Leaner Stronger: The Simple Science of Building the Ultimate Male Body. By Michael Matthews. Available here: https://amzn.to/3S7dyYD[↩]


